Toolkit – Bubble Pipe + Particle + Pose
Table of Contents
Description
In this video tutorial series we take a more comprehensive look creating a simple bubble-pipe Accessory item live, and in real-time, using IMVU Studio Toolkit.
Video I: initially the pipe starts out as a Cube that’s shaped using Extrude, Loop Cut and general vertex, edge and face editing. Once this initial step is done the pipe is copied using Duplicate and assigned a Subdivision Surface Modifier so a high-resolution version can be shaped for Normal Map generation. Next, the low-resolution version is assigned a material, image, UV UV Unwrapped and Mapped before both are used to Bake a Normal Map of the pipe, itself then saved to the material.
Video II: once the mesh is done is can be set up for IMVU using the Attachment Tool. Initially this is a test to ensure the item works correctly and there aren’t any issues that need to be addressed. The next step is to modify the Attachment.RIG, adding an extra ‘target’ bone for the particle effect in Studio. Here, a Particle is added and set up to affect a ‘popping’ bubble, a Diffuse and Opacity map setting the bubbles appearance, while the particles settings define its behaviour.
Video III: to add a custom avatar pose to an accessory item the setup differs as accessory and pose items use different underlying substructures. To make an accessory with pose the mesh has to be set up as a clothing item using the Clothing Tool, weighted to the appropriate bone of the avatar, before a pose can be created using the Animation Tool.
Video IV: once the accessory is assembled in Studio the particle effect can the reintroduced. However, in the absence of a ‘target’ bone available to actual Attachment items, the spawn point has to be set manually using the Position coordinates of the particle. To aid this process the Particle widget is turned on and used as a guide to reposition the effects origin, changing the X, Y and Z values – default values for ‘forward’ alignments, negative (-) for ‘backwards’.
Duration: total c. 3 hr 40 mins (03:40:00).
Info: 1080p.
Suitability: Beginner+.
Source: KatsBits – Bubblepipe + Particles (c. 3 MB, *.blend, *.jpg, *.png).
Product ID: Bubble Pipe (PID 63022435).
Design note: when using Generated images in Blender, be sure to save them locally before importing a project (via FBX) into Studio as this can cause that process to hang – this may also mean replacing images set up in Blender with ‘updated’, Studio compatible, versions. Similarly, whilst images may be the correct format, aspect ratio or dimensions, i.e. 512 x 512 height/width, their size be too big – Studio limits images to 1 MB – so a different format may need to be selected, or their being passed through an image editor for more options.
The objects UV map can be exported and used as a template for making/painting the diffuse image. In UV Editing workspace select Export UV Layout from the UV menu to export the active objects UVs – UV » Export UV Layout [1] (UV selection not necessary but may aid identifying what is being included).
Saving the pipes UV map as an image [1] as a template for diffuse texture painting.When setting up an accessory as a body-part item that’s to include an accompanying pose, some trail and error back-and-forth may be needed to correctly position the mesh relative to the avatar and the pose being made [2]. It should be relatively straightforward to adjust the body-part in Clothing Tool project file and then re-append the corrected/updated version into the Animation Tool project – whilst it is possible to build the accessory mesh in the Animation Tool, it uses the same avatar skeleton, it’s best to use the Clothing Tool to ensure any mesh objects are set up correctly with respect to being properly attached to the avatar skeleton.
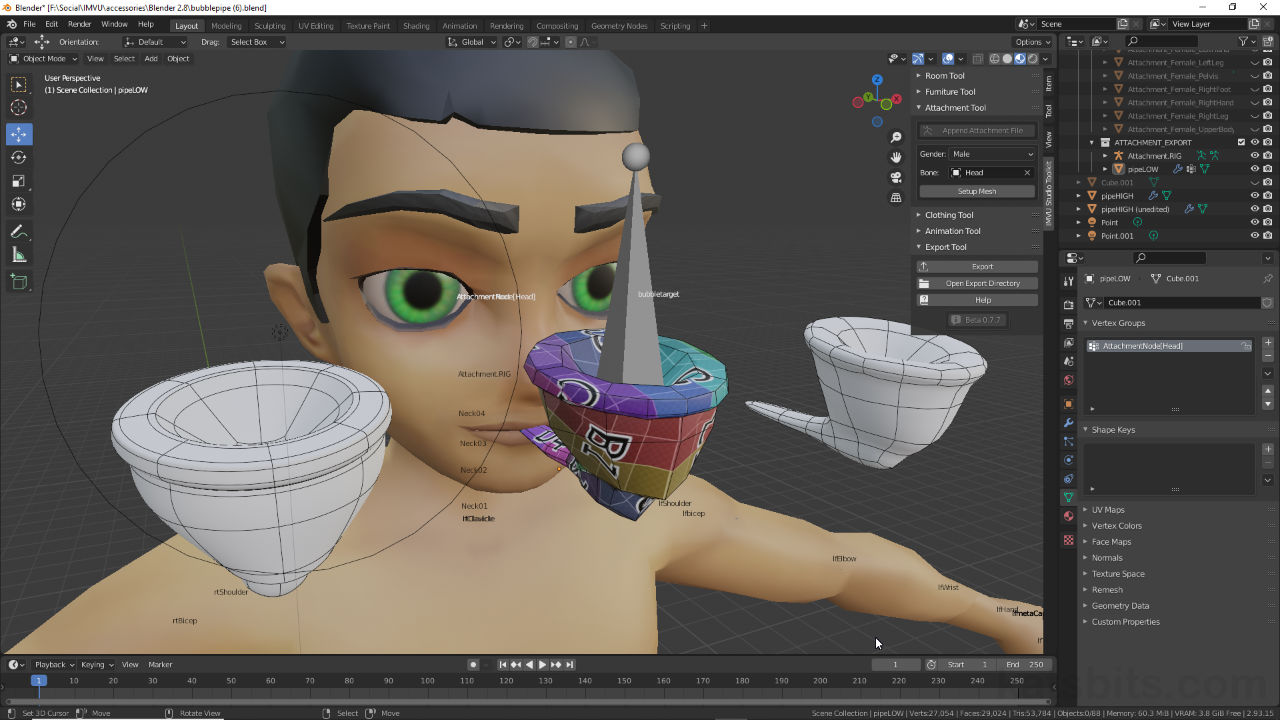
Pipe mesh incorrectly positioned relative to the accessory items set up [2]. This can be corrected by adjusting and then re-appending the mesh from the Clothing Tool project, into the same Animation Tool project.


Timestamps
Times are approximate;
Video 1 – Meshing
– 00:00 – Start & Tool Overview
– 07:00 – Meshing (low res)
– 22:00 – Subdivision Surface (high-res)
– 40:00 – Materials & UV Unwrapping
– 57:00 – Normal Map Baking
Video 2 – Particles
– 00:00 – Start & Recap
– 05:00 – Attachment Setup & Export
– 14:00 – Studio Setup (first)
– 30:00 – Armature Particle Setup
– 40:00 – Studio Particle Setup
Video III – Pose
– 00:00 – Start & Recap
– 07:30 – Clothing Setup
– 11:00 – Positioning & Weight Painting
– 25:00 – Pose Preparation
– 32:00 – Append & Pose
– 48:00 – Studio Assembly
Video IV – Particles
– 00:00 – Start and Recap
– 09:00 – Particle Setup
– 14:30 – Particle Position
– 23:00 – Bubble Material
– 27:00 – Summary
