Toolkit – Custom Couples Poses
Table of Contents
Description
IMVU Toolkit for Blender isn’t specifically set up to create couples poses – two poses that form a ‘pose unit’ and not interactive animations between avatars – so they have to be done by fixing one pose that can then be duplicated and used as a reference object for another (or others).
Pose Duplication
Step I: seat nodes, room or furniture mesh(es) are be brought into a new Animation Tool project using Append and set up as a moveable group using Parent so everything can be centred on the avatar rig that’s then posed in-situ. This is exported as first pose (Pose 1).
Step II: the first pose is fixed in place by duplicating the relevant sections of the avatars body and joining them together into a single mesh. The pose is then fixed in place by collapsing the modifier stack and the room mesh and remaining nodes are re-parented to re-focus on the partner node of the couples pose allowing the group to be repositioned and re-used as a reference for the second pose.
Step III: once the second pose done, both exported as FBX files using the Toolkit, they can be imported into IMVU Studio and assembled, the Trigger for each corresponding to the custom seat label used for the nodes, i.e. stance.Starfish01, stance.Starfish02 etc.
Design note: both rooms and furniture seat nodes must be set up to accommodate custom poses and use the custom labelling convention [1] e.g. Seat[n].[CustomLabel] or Seat01.Starfish01, Seat02.Starfist02 and so on, instead of the standard Seat01.Sitting or Seat01.Standing etc.
Ensure seat nodes, for both rooms and furniture, use the correct labelling to accommodate custom poses [1] else they won’t work in Studio/IMVU.Apply
It’s important to ensure the duplicate avatar has the pose fixed in place using Apply to prevent it articulating as additional poses are created. Once joined together, make sure the mesh is selected and from Modifier Properties click the ‘more options’ down-arrow [2] and select Apply from the list. This fixes the pose and essentially detaches it from the avatar rig so it can be moved independantly (but no longer posed).
Fixing a pose in place using Apply [2].Pose Mode
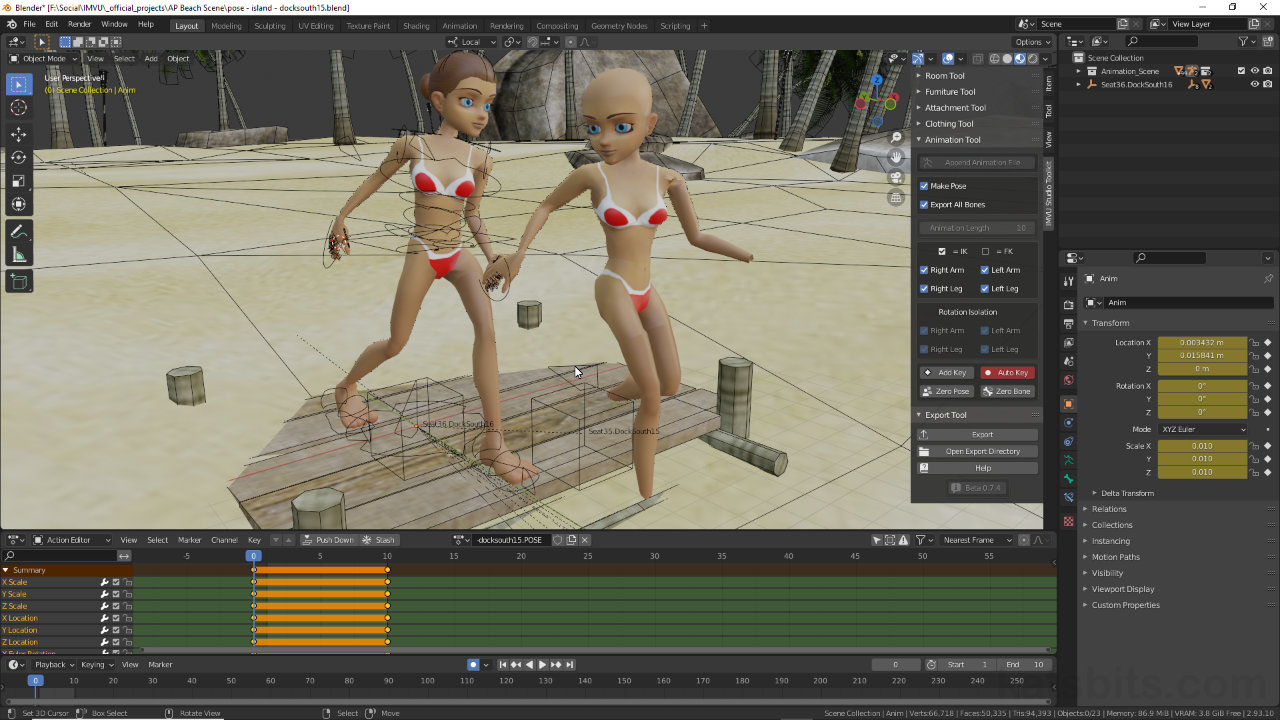
The animation tool requires the animation rig, the wireframe objects and shapes, to be in Pose Mode. When initially selecting the rig if it highlights orange this indicates its in Object Mode not Pose Mode. To switch, ensure the rig is selected, then from the Interaction Mode selector, click Pose Mode. The rig will changes its appearance, different parts changing colour, indicating they can be selected, moved and posed for sequence creation.
Make sure to be in Pose Mode when using the Animation Tool.


Timestamps
Times are approximate;
– 00:00 : Nodes, Append & Position
– 04:30 : Pose (1st) Copy & Avatar
– 08:30 : Pose (2nd) Set-up & Export
– 12:30 : Studio Assembly
