Particle Basics in IMVU Studio
Table of Contents
Description
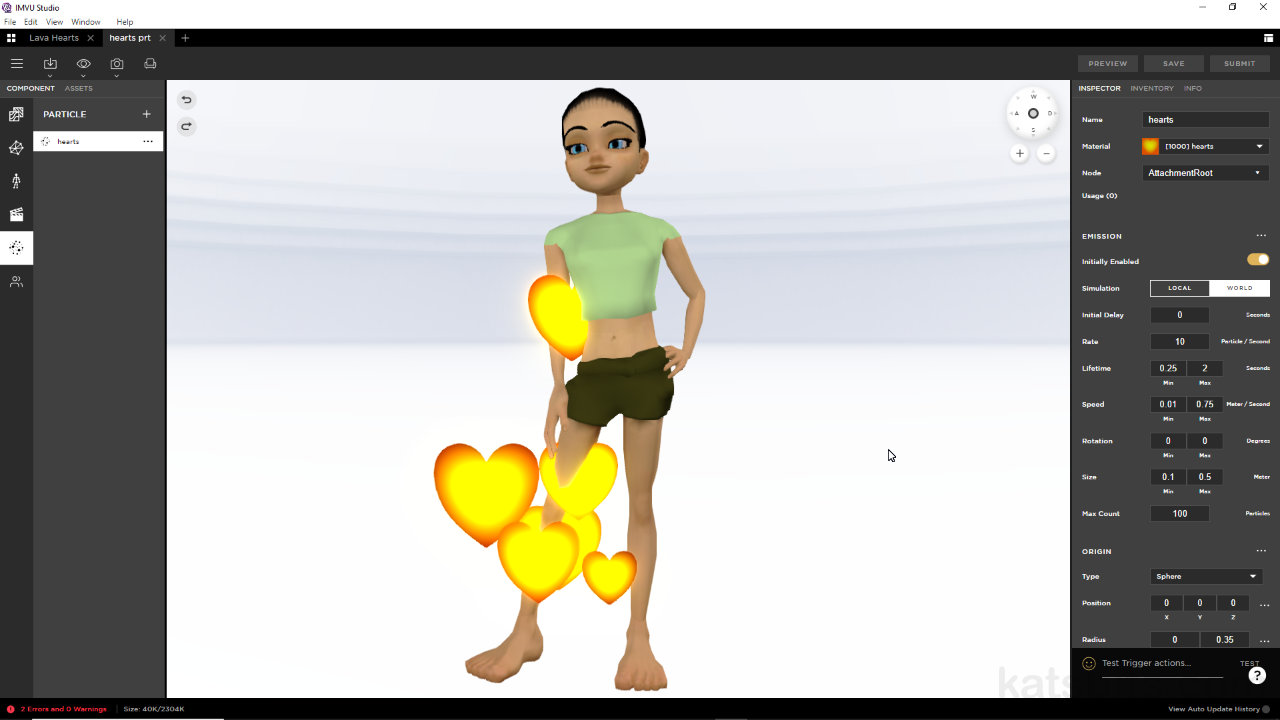
Particle effects for IMVU can now be created in IMVU Studio directly using the particle editor. No 3D, or DeBug text hacking, required. To create a basic effect, derive an item, typically an Empty Accessory, and in Component properties add a new Particle instance. This generates a host of options that can be edited to control the behaviour and appearance of the effect. Once set the particles material can be edited to add a Diffuse and optionally, an Opacity to define the shape of each particle, and enabling other options, e.g. enabling Emission, to make the effect glow. This can then be saved and uploaded without needing to do any further editing.
Duration: total c. 25 mins (00:25:00).
Info: 1080p.
Suitability: Beginner+.
Source: KatsBits – Particle Heart (c. 100 KB, *.png).
Product ID: Lava Hearts (PID 62624204).
Design note: by default the individual particles are imageless flat, opaque, square plains or surfaces so an Opacity map is typically necessary to define particle ‘shape’. For variable transparency (Composite Blend) tones of grey can be used [1], each registering as a different degree of transparency/opacity (black & white being fully transparent or opaque, grey values in-between), or a greyscale image for variable transparency to define the effect. For a hard shape or outline [2] (Alpha Test) the image used should consists of just black and white – black is 100% transparent, white is 100 opaque.
Particle transparency can be achieved using and ‘alpha mask’ or an opacity map; a greyscale image [1] for variable transparency, or a black and white image [2] to create a masked shape only.The basic properties of a particle effect are;
– Emission : defines the appearance of individual particles.
– Origin : controls where & how particles spawn or emit.
– Direction : defines the direction or axes of movement.
– Gravity : determines behaviour relative to the world.With these in mind, an effect travelling upwards, the particles core settings are Direction [3] and Gravity [4], as these define the needed upward aspect based on the X, Y or Z coordinates set, e.g. Direction: Z = 1, Gravity: Y = 1 – this behaviour, and settings therein, is relative to the Node (bone) set as the origin in Skeleton properties and the ‘local’ (the bones own) orientation this then utilises relative to other (avatar or item) bones.
The direction of travels for particles is determined by the X, Y and Z axes of Direction [3] and Gravity [4].How individual particles then behave is determined setting Emission properties;
– Rate defines how many.
– Lifetime, how long each lasts.
– Speed, how fast they travel.
– Size, how big they can be.Each setting having an ‘start/end’ or ‘min/max’ allows for the creation of randomised variation amongst individual particles after being spawned, for example Rate, Lifetime and Speed largely work together and may need to be adjusted to ensure the system has time to spawn new particles or particle groups to prevent emission ‘gaps’ occurring (particles seemingly clumping together).
The particles Emission [5] properties define the behaviour of the individual instances, how many appear, how fast the move, how long they last etc.Particles are generally ON by default so automatically play as soon as the underlying item loads into a room or is worn. They cannot be turned OFF unless the item is removed. To trigger a particle effect so it plays for a duration, or plays until its stopped, an Action is used that references the effect instance. In this way the particle can be triggered to play for a set number of frames (30 frames = 1 second), or infinitely until time runs out (duration ends) or they are triggered to an ‘off’ state.
To do this set up an Action, create an Ensemble then access the Config pop-up [7]. Here, set the Emission [8] type for the particle that’s being triggered; On Timed/Off Timed to define a duration the effect plays, or On Forever/Off Forever to active on/off infinitely.
Triggering a particle needs an Action and accompanying Ensemble [6] that references the effect whose behaviour can then be set using the Emission property.
Video overview setting up a triggered particle effect.


Timestamps
Times are approximate;
– 00:00 : Start, Images.
– 01:30 : Particle Basics
– 03:00 : Direction, Gravity & Origin
– 06:00 : Emission (Pt I)
– 09:30 : Particle Material
– 13:00 : Emission (Pt II)
– 16:30 : Bone Origin
– 20:00 : Product Save & Info
#############
