Toolkit – Accessory + Particles
Table of Contents
Description
In this exercise we take a look at making a simple Accessory item, a bubble straw, that’s set-up to utilise the IMVU Studio’s Particle System. Creating a new Attachment Tool project, a simple ‘straw’ mesh is first made and positioned at the avatars mouth. Next, the mesh is ‘rigged’ using the Toolkit and the resulting Attachment.RIG modified to include a new ‘origin’ bone for the particle. Once set up, the project is exported to FBX and imported into IMVU Studio for assembly where a custom ‘bubble’ image, created externally using Affinity Photo, is used as the particles ‘bubble’ effect.
Duration: total c. 40 mins (00:40:00).
Info: 1080p.
Suitability: Beginner+.
Source: KatsBits – Accessory + Particle Effect (c.1.0 MB, *.blend, *.fbx, *.png). Requires installation of the toolkit for Blender. Open in Blender 2.93 LTS (preferred) or above.
Product ID: Bubble Straw (PID 62533177).
Design note: additional concerns to be mindful of when making content to be used with IMVU’s particle system;
Armature as Origin
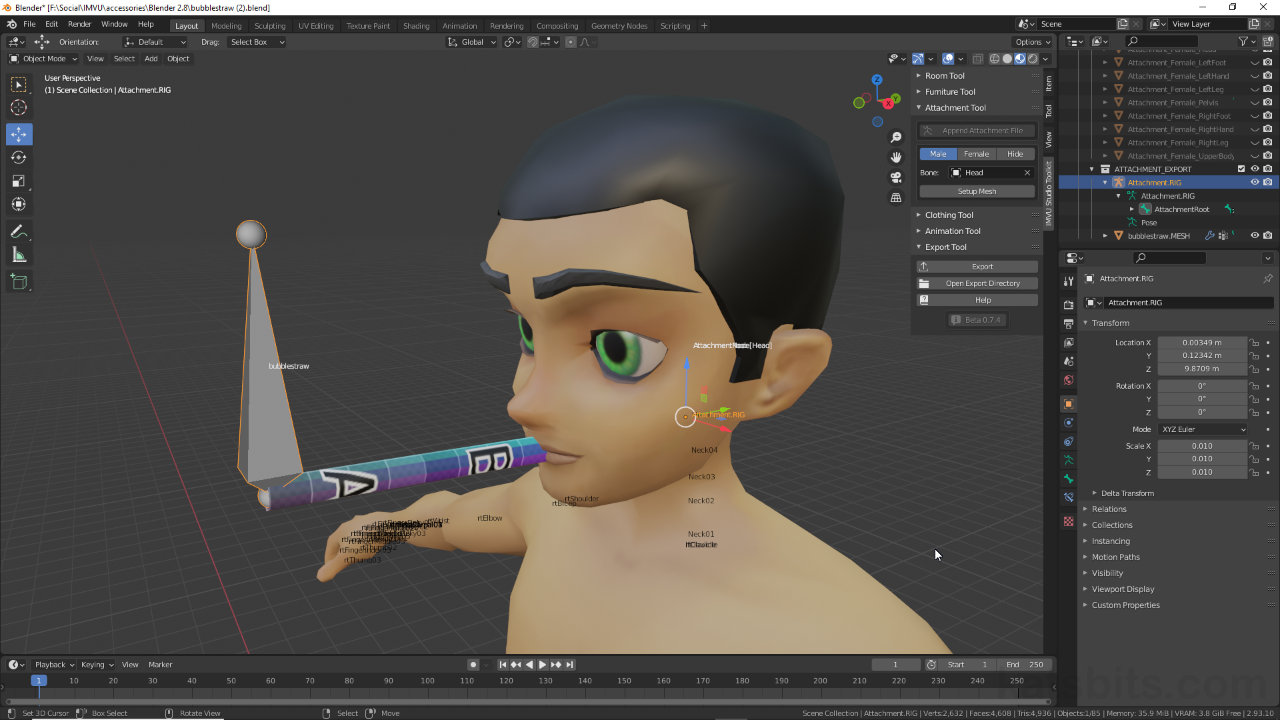
The Armature associated with an accessory mesh does not necessarily need extra bones to use particles as the effect can be manually offset from an attachments default AttachmentRoot or AttachmentNode bones in IMVU Studio (Inspector » ORIGIN » Position). However, positioning the effect exactly where it needs to be can be tricky without specific ‘origin’ bones, especially for avatar bones that are ‘rolled’ or rotated around their axes, or that don’t aligned to the world (causing the effect to be off-kilter in some way). With this in mind make sure to be editing the correct Armature in Blender, Attachment.RIG [1] and not Head [2], the object that appears after clicking Setup Mesh in the Attachment Tool.
Be sure to edit the correct Armature when adding bones to an accessory skeleton; Attachment.RIG [1] has TWO bones by default, Head [2] only ONE.Verify Skeleton
Because additional bones are being added to Attachment.RIG, after importing the Blender exported FBX into IMVU Studio, double-check the skeleton by enabling the Skeleton visual aid option [3]. Once active all available skeletal structures will be displayed as a wire [4], an RGB widget indicating the orientation of the top and bottom ‘nodes’ of each bone.
Check Attachment.RIG has imported with extra bones by enabling the Skeleton visual option [3], which display bones as interconnected yellow lines [4].Particle Basics
Basic particles are defined by four properties;
– Emission : controls the physical appearance of particles.
– Origin : controls where & how particles spawn or emit from.
– Direction : defines the direction or axes of movement.
– Gravity : defines particle behaviour relative to the world.For the purposes of the project described above, overall, Emission [5] properties generate bubbles that are similar in size while having random variance based on the Min: 0.1, Max 0.2 attribute for Size – this generally governs the relative scaling between individual particle instances. Everything else generally defines the number and speed with which particles appear.
Be default Origin [6], the place where particles spawn or appear, is essentially a three-dimensional volume or a flat two-dimensional shape. To define a point-of-origin as an alternative to a shape or volume, Radius has to be set so Start and End are both 0, e.g. Start: 0, End: 0.
Note: in addition to setting the origin Node, particle location can be further modified by manually setting the X, Y and Z Position coordinates, which uses the Node as the local origin of the offset.
Once a Particle is assigned it can be edited in Particle Inspector. Here Emission properties generally govern the particles appearance [5], with Origin [6] changing how the particles spawn.Particle Direction/Orientation
To define the general axes along which the particles travel absent any gravitational influence (see below), Direction properties need to be set. Here, the X, Y and Z attributes for Direction can be set as positive values, i.e. X: 1, or negative values to invert or reverse the direction. In practice, and depending on the origin bones orientation, with Y set to 1, i.e. Y: 1, particles will move forward of the spawn point, whereas set to -1, i.e. Y: -1, particles will travel backwards from the same point of origin.
The path along which particles travel can be further influenced by setting Gravity. Here, Position can be set to change the behaviour of the emitted particles based on other settings present
Note: both Direction and Gravity can be set to use a one, two or all three of the available X, Y or Z axes depending the effect wanted.
Particle travel alone a path based on Direction [7] that can be influence by Gravity [8]. To set a positive or forward travel use ‘positive’ values (no preface), for reverse or backwards use negative (prefaced “-“)


Timestamps
Times are approximate
– 00:00 : Start & Basic Mesh
– 06:00 : Materials & UVs
– 10:00 : Attachment Rig Setup
– 21:00 : Image Save & FBX Export
– 22:30 : Studio Import & Assembly
– 27:00 : Particle Setup
– 35:30 : Bubble Texture & Material
