Append for IMVU
Table of Contents
For IMVU creators using Blender the default scaling of the Starter Files is much larger than Blenders so it often appears as though Append has not worked.
Append
To share content between Blender projects the application provides a feature called Append. What this basically does is allow for content from one *.blend file to be brought in to another, for example a cell phone mesh from one file imported into another project based on the female or male Accessory Starter File. To do this, open a Starter File in Blender, click the File menu, then Append – File » Append. This opens the File Browser.
Important: if IMVU Toolkit for Blender is installed additional attention should be paid to scaling as the Toolkit’s template content is scaled relative to Blender for usability (exports correctly scaled). In practice tool content should be loaded as a reference before import/appending. To (re)scale after Append/Import, select the mesh then in Object Properties [i] change the X, Y and Z values of Scale [ii] to fit the project.
Rescaling meshes after Append/Import into Blender if Toolkit is being used – in Object Properties [i] change Scale [ii] to adjust relative to the Toolkit template content.

Design note: it’s generally best practice to load content into a Starter File as they are correctly scaled for IMVU and act as a proper size/scale references for custom content.

Using the IMVU Starter Files as the basis for different projects meshes from other Blender projects can be brought in using Append.
File Browser
In the File Browser find (browse to) the file from which content is to be appended. Click to select a source. A series of folders will be shown each representing a different category of data within the *.blend. Click the Object folder to access its contents, a list of all the objects contained in the source file. Select the individual component(s) (Shift + for multiple selections) and click the Append from Library button top-right to bring the selection into the open project.
Important: depending on the version of Blender used in the 2.8+/2.9+ series, Append may present the File Browser, necessary for content navigation, as an embedded area or a separate overlay window [1] that may also have undergone some reorganisation. The way files are browsed, and data appended into a project, remain the same however – to Append, open the File Browser [1] from File » Append, browse to and select the file containing the parts to be imported, double-click then again on the Object folder [2], select the part/s and click the Append button [3] to complete.
Depending on the version of Blender the File Browser may appear as an overlay windows instead of an embedded area during Append. The general process to select and bring in data remains unchanged however.

Design note: if saved with the *.blend file, browsing the Object folder, meshes, lights, cameras and other types of ‘entities’ will be available/accessible. To make selection easier it’s a good idea to name them in the source (where appropriate) to make identification less confusing. This can be done in Object Properties.
Naming objects for easier identification – select the object then access Object Properties, in the Name input field at the top of the panel, type a new name, press Enter (or click elsewhere) to confirm. Alternatively double-click the name listed in the Outliner and type a new name. Press Enter to confirm.


Use the File Browser to select the source *.blend (shown above as thumbnails) containing the items to be brought in to the open project using Append.
Object Scale/Size
IMVU’s scaling is much larger than Blenders so once an object has been brought in using Append it may appear as though nothing has happened. To check Append worked correctly, in the Outliner editor upper-right side, scroll though the entries listed to see if one is highlighted and/or corresponds to the object imported – if any entry exists the item was brought in, it’s just very small compared to the avatar helpers and needs to be scaled up to match.
Design note: because items brought in using Append are typically selected by default Frame Selected can be used as an alternative way to confirm import – immediately after appending something press Numpad ., or select View » Frame Selected, to refocus the view on the highlighted items.

To confirm the selected object/s have been brought into Blender use the Outliner to check for a corresponding entry, or press Numpad . (period) to focus on the selected items before scaling them up to suit IMVU’s references.
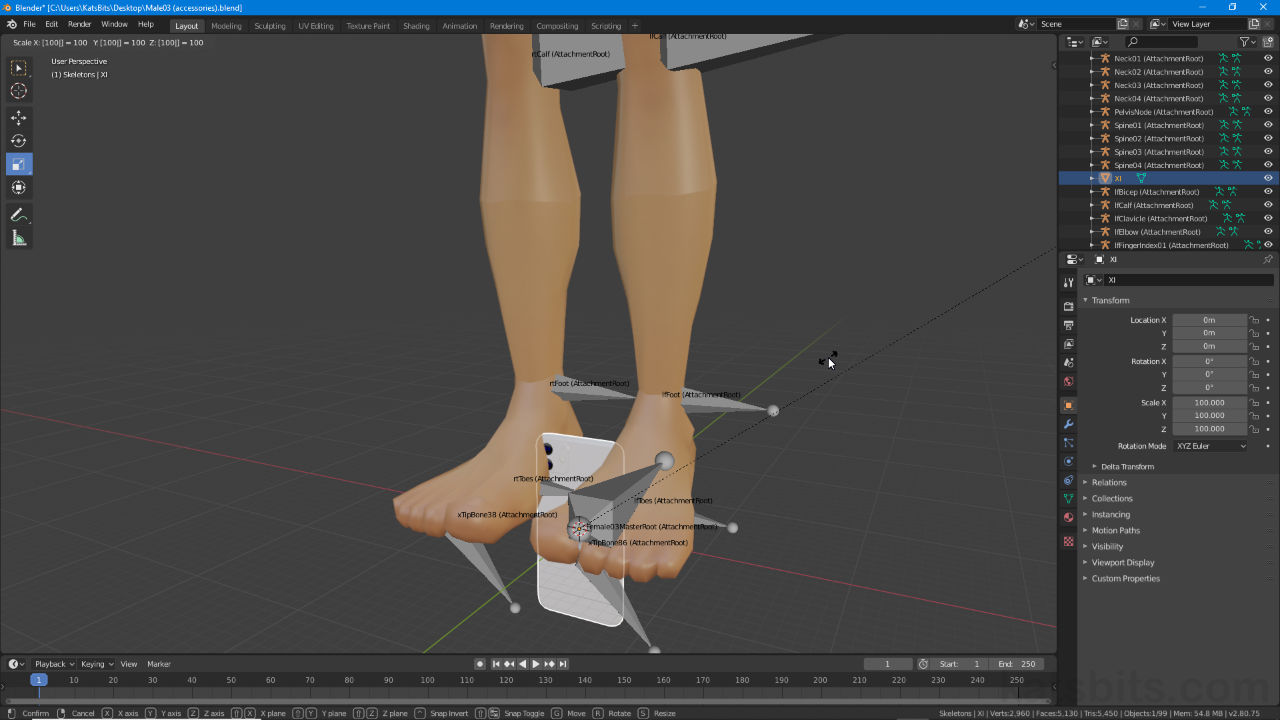
To scale the item, in Object properties under Transform, change the default X/Y/Z Scale values from 1.000 to 100.000 (Scale X: 100.000, Y: 100.000 and Z: 100.000). Alternative press the S key to activate (universal) Scale and type 100, press Enter to confirm (alternatively select the Scale widget in the Toolbar to the left then click-drag its inner area to scale uniformly). The item will then be scaled correctly to match IMVU.
Design note: although increasing object size by 100x will match IMVU’s general scale, if the items were made without use of an IMVU references a degree of adjustment up or down (larger/smaller) may be necessary to proportionately match IMVU’s models.

To confirm the selected object/s have been brought into Blender use the Outliner to check for a corresponding entry, or press Numpad . (period) to focus on the selected items before scaling them up to suit IMVU’s references.
Video
Walking through the process of importing a mesh saved in another file into a new project (the male accessory Starter File shown) using Append in Blender 2.8.
Using Append in Blender 2.8 to bring in meshes made in others files/projects.
