How to Prep Roblox Models/Meshes in Blender
Table of Contents
Description
Generally speaking it’s relatively straightforward to export content from Blender for import and use in Roblox, simply make something, centre it on the grid and export to OBJ, FBX of glTF, and let Roblox Studio do all the work on import. For best results, however, good practice should be to perform some basic prep so that, at the very least, the incoming model looks exactly the same in Roblox as it does in Blender.
Duration: total c. 25 mins (00:25:00).
Info: 1080p.
Suitability: Beginner+.
Source: n/a.
Product ID: n/a.
The details discussed in this tutorial specifically relate to the core prep work that’s necessary, and typically expected, to get a fully functional and optimised model into Roblox Studio. More advanced topics like LOD (Level Of Detail), animation, armatures etc., will be discussed separately.
Avatar Reference (optional)
Although Blender and Roblox use the same system scaling and units of measurement (metres), for accuracy a Roblox avatar can be used. This can be the Blocky source files provided by Roblox, or a custom avatar exported from Roblox Studio. In either instance, this provides a scale, size and ‘look’ reference items can be built around.
Blocky source file open in Blender ready to be used as a reference around which the accessory can be made. Alternatively this can be a Studio exported avatar when making something for a specific outfit/fit.Apply Transforms (optional)
Following on from the above, if an avatar has been used to ensure object proportion and position relative to it’s eventual placement in Roblox, while this data is saved to file on export from Blender, it is ignored and reset by Roblox Studio on import; Studio essentially resets any Origin and related Transform properties it might find. To avoid this best practice should be to apply all transform properties (Ctrl + A) to objects before export – Object » Apply » [option] (typically All Transforms or Rotation & Scale).
Be sure to apply all transforms before export from Blender so Roblox doesn’t display the mesh with an unexpected orientation.Object/Model Origin (optional)
Similar to Apply Transforms, while an objects Origin aids positioning the model whilst its being built, upon import into Roblox, Origin data is essentially ignored and virtually reset to use the objects centre-of-mass based on its Bounding Box volume. Depending on the shape and size of the model this can offset the origin awkwardly relative to its native position in Blender. To mitigate this, once the item has been modelled, recentre the origin to Center of Mass (volume) in Blender – Object » Set Origin » Origin to Center of Mass (Volume).
Important: Bounding Box volume vs. area… [more]
Blender does not use the total area or volume occupied by an object, its Bounding Box, as the basis upon which it calculates centre or mass, it’s not necessarily making a boundary determination. Instead Blender positions the centre of mass properly, based on the objects actual shape. Relative to Roblox this is more expensive and accurate way to offset the Origin. Similarly, if an object is rotated off-axis in Blender, because that’s how its to be seen or used in Roblox, this will change the dimensions of the Bounding Box used to determine where Roblox resets the Origin to, and as a result may alter the transform behaviour in Studio as the item is manipulated around the scene.
Differences in the objects orientation will affect the objects Bounding Box in Roblox, and where it subsequently calculates the Origin to be when reset.Design note: displaying Bounding Box in Blender… [more]
Side-by-side comparison of an accessory object (image-left) and its corresponding Bounding Box volume (image-right) showing how Origin to Geometry (in this instance) sets the Origin to different locations – in Roblox the objects Origin (image-left) will be ignored and effectively reset to match the Bounding Box origin.Single UV/Image
Roblox operates on the basis that the entirety of object must be mapped to a single image/texture atlas through a single material assignment. While multiple material can be used, largely to aid development, they must all unwrap to the same UV map and image. If an item is assembled to use multiple objects in Roblox Studio, each should be similarly mapped to their own distinct image.
Design note: using multiple images and power-of-two… [more]
In Blender, best practice should be to use a single material and image/texture atlas assignment per object. Where multiple materials have been assigned, use the Material List in Material Properties to remove or collapse them as best as possible to ensure safe import into Roblox Studio. When using ‘PBR’ materials that included other image map types – normal, roughness etc. – simply ensure materials are correctly set up for display in Blender, and that everything similarly maps to the same underlying texture atlas.
Image-top: for compatibility, best practice should be to map everything to the same image/texture atlas. Image-bottom: PBR materials can be used comprising a standard set up routing through to Principled BSDF.Triangulate
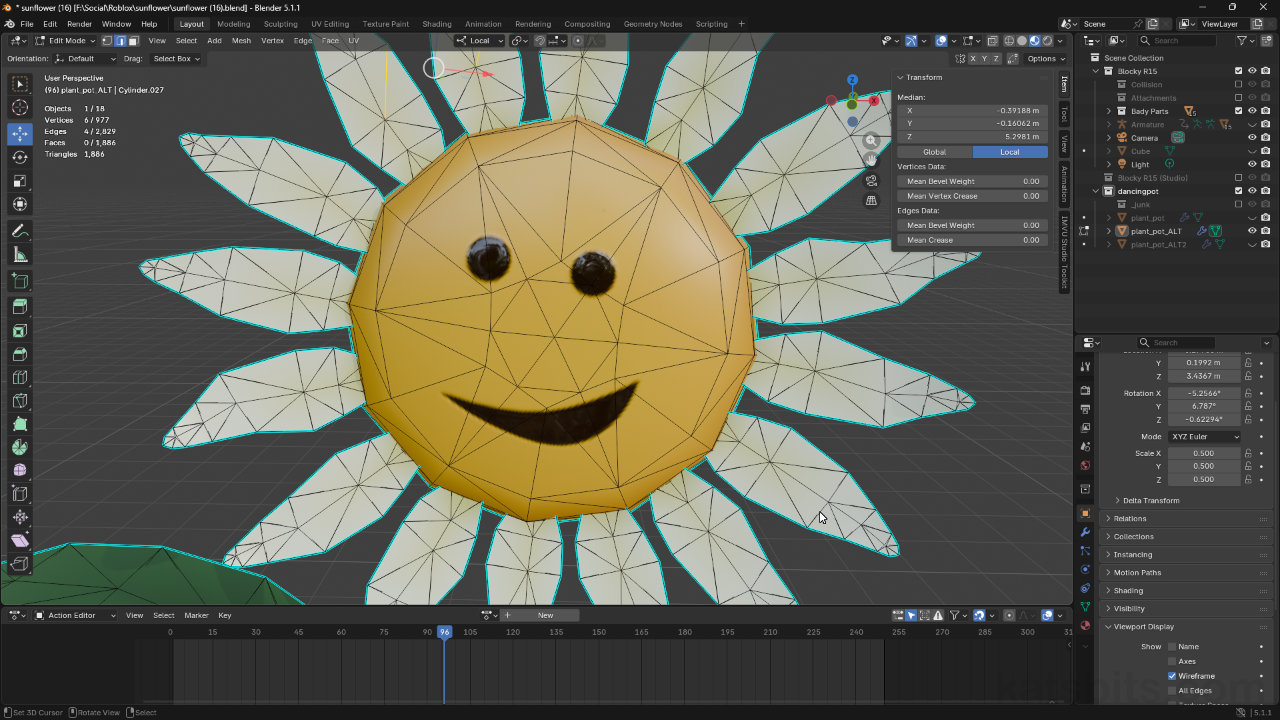
Depending on the file format used to export from Blender, Roblox may provide an option to automatically triangulate imported models. While this works without issue in a general sense, best practice should be to manually process meshes Blender so the resulting “triangle soup” maintains its orientation integrity, that surfaces don’t ‘collapse’ in on themselves due to the orientation of the original ‘quad’ they were reduced from. In Edit Mode select the entire mesh (A) and from the Face menu click Triangulate Faces (Ctrl + T) – Face » Triangulate Faces.
Important: triangulation and edge orientation… [more]
If relying on Roblox to triangulate a mesh, during import and conversion, triangles can be flipped or rotated seemingly at random based on assumptions Roblox makes about the shape and structural flow of the mesh as it cannot know what the object is, or how individual triangles are supposed to describe the shape. To avoid this, after triangulation in Blender, be sure to check surfaces that form curves to make ensure they’ve not collapsed in on themselves – surfaces will look concave. If they do, they will need flipping or rotating. Switch to Edge Select (Ctrl + 2) and select the diagonal edge shared between two collapsed triangles. From the Edge menu, click Rotate Edge CW (Clock Wise) or Rotate Edge CWW (Counter Clockwise) – Edge » Rotate Edge CW/CCW. This changes the orientation of the shared edge and whether surfaces then appear concave or convex.
Use Rotate Edge to flip shared edges between triangles to change their orientation and whether they then appear to form a shared ‘concave’ or ‘convex’ surface.
For relatively complex models, especially those with curves or round shapes, preference should be to manually triangulate the mesh to maintain surface orientation integrity.Mesh Density
Optimising meshes to reduce their complexity should be done at an earlier stage of development than at ‘prep’ because it often necessitates potentially destructive reductions to mesh structure or complexity that might be ‘final’ in appearance or form, for example, when ‘version building’ to create a high resolution mesh for baking and its corresponding low-resolution bake target (the game mesh baked to), the low resolution should be optimised for eventual use not just, in this instance, the bake process.
Design note: decimating meshes and optimisation… [more]
Meshes should be heavily optimised, which might mean making use of Sharp edges and/or strategically placed edge-loops, to get the most from a little as possible – if it doesn’t define noticeable shapes, remove it.Export Format
Models can be exported from Blender as OBJ, FBX or glTF. Which one to use depends on what’s being exported. Static objects for example, can be exported to OBJ as they only need to included mesh and material information, whereas animated, or objects that include a skeleton of some description, can be exported to FBX, or preferentially glTF. Either way, subject to the prep work described above, Roblox will import the file, setting it up as a basic game object ready for use.
For non-animated objects OBJ files can be used, else preference should be for glTF – FBX can be used but requires additional set up once in Roblox Studio.


Timestamps
Times are approximate;
– 00:00 : Avatar Reference
– 03:00 : Transforms & Origin
– 08:00 : Triangulate & Edge Rotate
– 12:00 : Smoothing & Sharp Edges
– 15:00 : Materials, Textures & UVs
– 17:00 : Export Options
– 19:00 : Vertex Colors
– 20:00 : OBJ, glFT, FBX
