Normal Map Node
Table of Contents
Blender generally has the sophistication to render materials that include normal maps without issue, especially useful for quick content preview. Occasionally however, objects display artefacts and adorations, typically where UV Seams have been used to unwrap and map a mesh. To address these discrepancies a Normal Map node can be dropped into the material tree.
Simple Material
When making content for games simple materials are often more than enough for preview purposes, that is a material with an Image Texture node plugged into the Base Color [1], Specular [2] and Normal [3] inputs of a Principled BSDF [4] node, one node instance per input. For such simple materials however, the inclusion of normal maps typically result in render inaccuracies. To address this a Normal Map node can be used as a compensatory or corrective property.
Design note: colour values stored in a normlised image, being interpreted as/representing structure, should inform the render process, how it aught to be modified, typically with respect to mesh smoothing and surface detailing, and in turn how other aspects of the material then tie together for final output.

For most purposes setting up a material with a simple node-tree is sufficient to get an idea of what the final asset will look like but may present problems if a normal map is part of said material, typically at UV Seams.
Normal Map Node
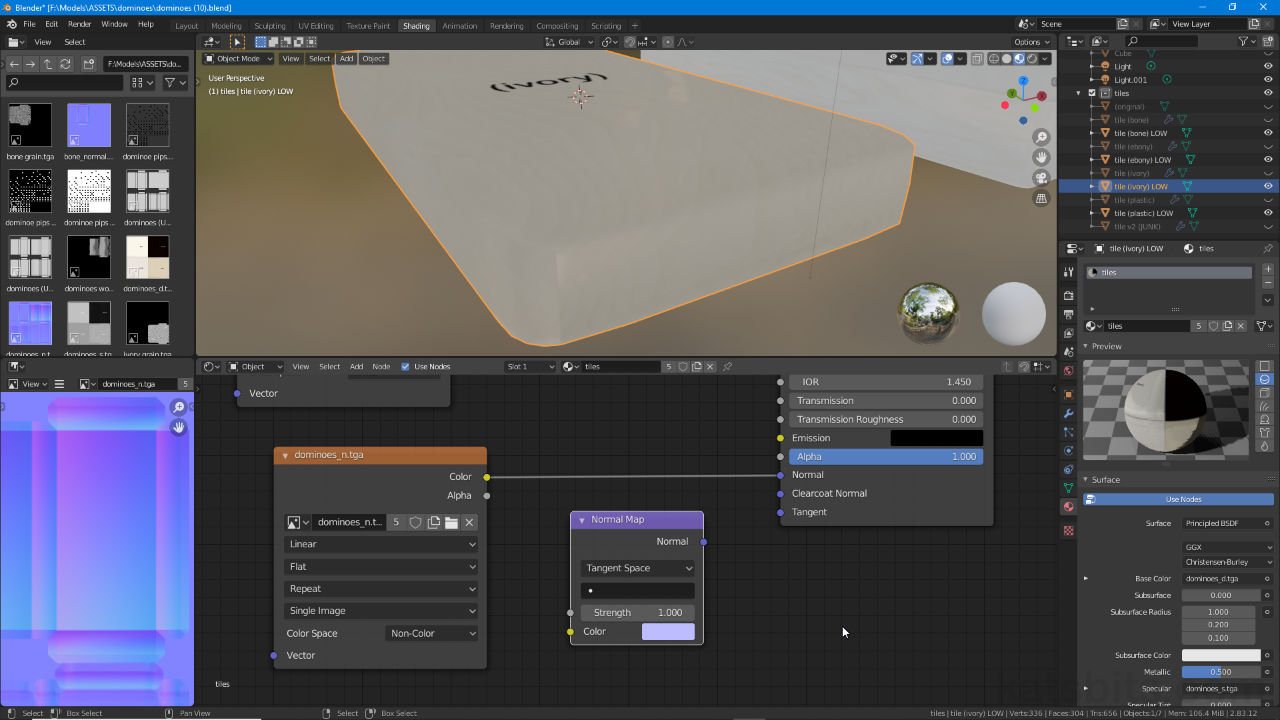
To address rendering and real-time display issues materials can be modified by dropping a Normal Map material node between the Image Texture node carrying the normal map image, e.g. normalmap.tga, and the Normal input of Principled BSDF – Image Texture » Normal Map » Principled BSDF. To to this, with the appropriate object selected and material highlighted, in Shading Workspace (or the Node Editor generally) click the Add [5] menu then Vector [6], then finally Normal Map [7] from the list of options. A node will appear.

Normal Maps are ‘vector’ properties so to add an appropriate node instance, select Vector from the Node Editors Add menu; Normal Map will be an option available in the sub-category menu.
If space is available drop the Normal Map node between the Image Texture node holding the normal map itself, and Principled BSDF, if the two were connected Blender will automatically adjust the links between the nodes. If not, drop the node into the workspace and ensure Color output from the Image Texture node [8] is linked to Color input of Normal Map – Color (Image Texture) » Color (Normal Map), and that Normal output from the Normal Map node is connected to Normal input of Principled BSDF [9] – Normal (Normal Map) » Normal (Principled BSDF). This should immediately correct any aberrations and render the included normal map properly (when Viewport Shading is set to Material Preview or Rendered for both Eevee and Cycles).
Design note: the Normal Map node itself provides a number of settings that control how normal maps are used, primarily the ‘space’ represented by the colour palette – Tangent, Object, World etc., and a Strength slider that alters how slight or severe the effect is rendered. In most cases the defaults can be used.

The Normal Map node has to be dropped between the Image Texture [8] node carrying the normal map and Principled BSDF [9], or at least linked between the two, to work correctly. Once connected the material will be rendered properly normalised.
