Learn Blender – Make a Set of Dominoes
Table of Contents
Description
In this simple exercise to learn Blender (2.92+/-) we make a domino and dominoes set. Although a simple shape, just a lozenge with a few dimples, to work efficiently the mesh needs to be laid out so the same object can be used as the basis for a full set of twenty-eight tiles. With this in mind, using basic techniques the default scene Cube is first shaped in Object Mode to create the a domino tile that is then modified in Edit Mode to lay out the pips (dots), fourteen in total to accommodate all combinations on both halves, using Loop Cut, Grid Snap and the Mirror modifier. We then take a look at and adjust some simple material properties to finish the tile before duplication and additional editing to form a complete set.
Suitability: beginners or anyone wanting a simple exercise to get more familiar with Blender (Blender 2.92 shown but any version from Blender 2.80 onwards can be used).
Duration: c. 1 hr 30 mins (01:30:00).
Info: 1080p | c. 550 MB.
Source: KatsBits – Dominoes (zip c. 600 KB – *.blend).
Important: to learn more about manipulation and selection in Blender see Blender Basics.
Design note: some additional considerations to keep in mind while working through the dominoes project;
3D Cursor Location
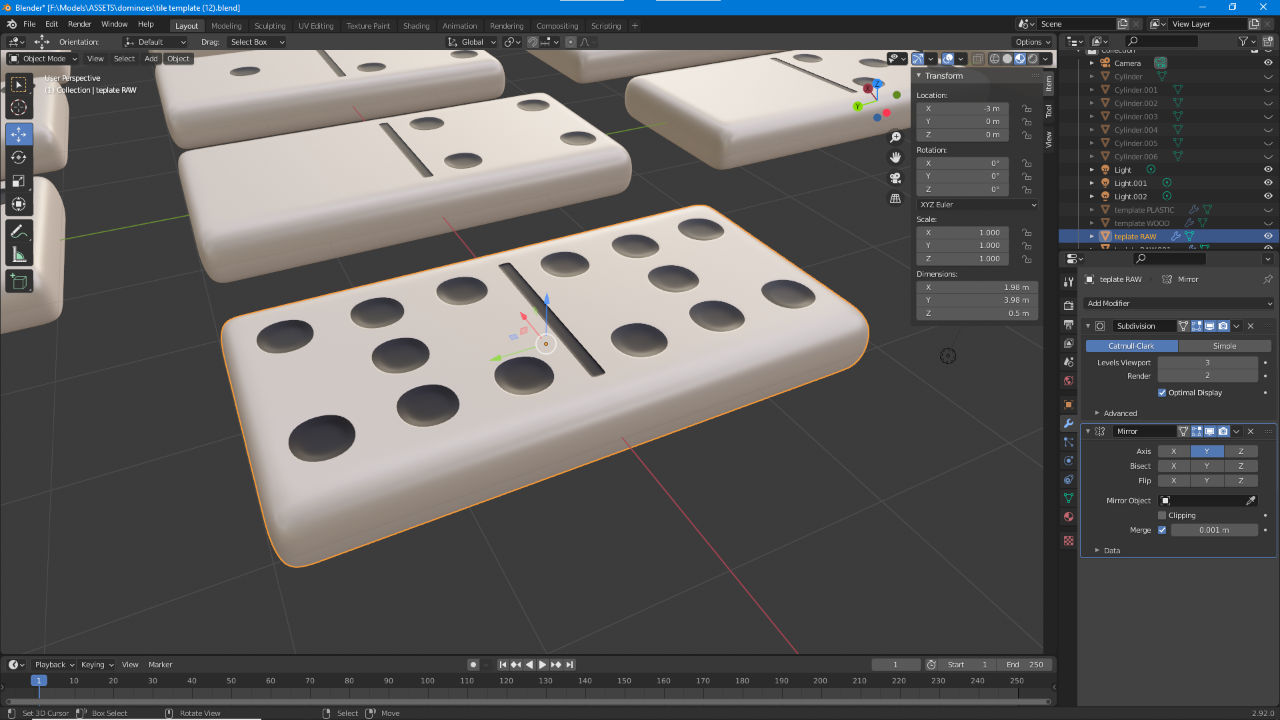
When dropping the pips proxy object into the scene it initially appears at the 3D Cursor [1] so may be off-grid depending on the cursors location. To address this the 3D Cursor can be repositioned beforehand, or the pip proxy mesh prior to being moved into position. For the former, open the Sidebar, View » Sidebar (N), and adjust the 3D Cursor coordinates in the View tab [2]. For the latter, select the object and in Object Properties adjust the X, Y and Z Location values in Transform [3] so the item sits squarely on the grid, i.e. X: 0.000 instead of X: 0.1276.
Making sure the pips proxy object initial position is correct so subsequent iterations are properly aligned to the grid – this can be done checking the 3D Cursors location before adding the Cylinder, or after by changing the meshes X, Y, and Z Location coordinates.Measurements
Edge Length (and other Measurement settings) is only available when Edit Mode is active. To activate (toggle them ‘on’), make a selection, switch to Edit Mode (Tab), and from the Viewport Overlays [4] menu activate Edge Length [5] (disable to toggle them ‘off’).
To ensure the dominoes pips are not mis-aligned and all over the place, in Viewport Overlays [4] enable Edge Length [5]. This helps ensure everything can then be properly grid-snapped and correctly positioned.Subdivision Surface
When assigning the Subdivision Surface modifier the overall shape of the tile may change but not the pips if the concave shape has not yet been established. This can only be addressed by adding more structure to relieve internal surface ‘stress’ that allows the effect to affect the mesh. To do this, place additional loop cuts (using the Loop Cut tool or press Ctrl + R) and Edge Slide (toolbar icon or double-tap G) them into position so they butt up to the outer edge defined by the pips grid. For a sharper edge/transition two loops can be placed and positioned to butt against the outer edge.
Assigning the Subdivision Surface modifier [6] may change the tiles overall shape, smoothing or rounding corners and outer edges [7], without necessarily effecting the pips [8] or internal surfaces until more structure is added that essentially relieves the stress around the pips so they can curve appropriately and form the defining circular shapes.Open/Closed Mesh
When deleting faces to ‘blank’ out unwanted pip spots, because the tile material is visible on both the outside and inside of the mesh, it can be difficult to determine exactly where gaps have formed after removal in the objects surface. To make this deletion > fill process easier Backface Culling can be used to hide the inside of the mesh so gaps stand out in contrast to Blenders default grey background. To do this, in Material Properties select the ’tile’ material instance then scroll down to Settings. Here enable (check/tick) Backface Culling [9] to nullify the inside of the mesh [10] (this assumes surfaces are facing outwards otherwise the mesh may appear inside out) – the pips colour can also be temporarily adjust to makes the distinction clearer otherwise it may be difficult to determine background grey from pips.
Enabling Backface Culling in the tiles material to make it easier to see where gaps in the mesh have formed after deleting faces. The pips colour can also be changed temporarily to make editing easier as black can be difficult to distinguish from the backgrounds dark grey.


Timestamps
Times are approximate.
Video : Make a Set of Dominoes in Blender – c. 1 hr 30 mins (1:30:00).
– 00:00 : Overview.
– 01:00 : Tile Layout.
– 27:00 : Pips layout.
– 47:00 : Subdivision Surface.
– 1:00:00 : Dominoes Set.
