Furniture Room for IMVU
Table of Contents
Videos
VIDEO I : Making a Start
VIDEO II : Framework
VIDEO III : Materials & UV Editing
VIDEO IV : Room Skeleton
VIDEO V : Materials & Textures
VIDEO VI : Adding Features
VIDEO VII : Custom Room Poses
VIDEO VIII : Final Assembly
Description & Info
In this series of videos (recorded live so may include off-topic conversation) we walk though the process of making a furniture room for IMVU and a lot of hints and tips along the way, all in real time using the Room Starter File for Blender 2.8+.
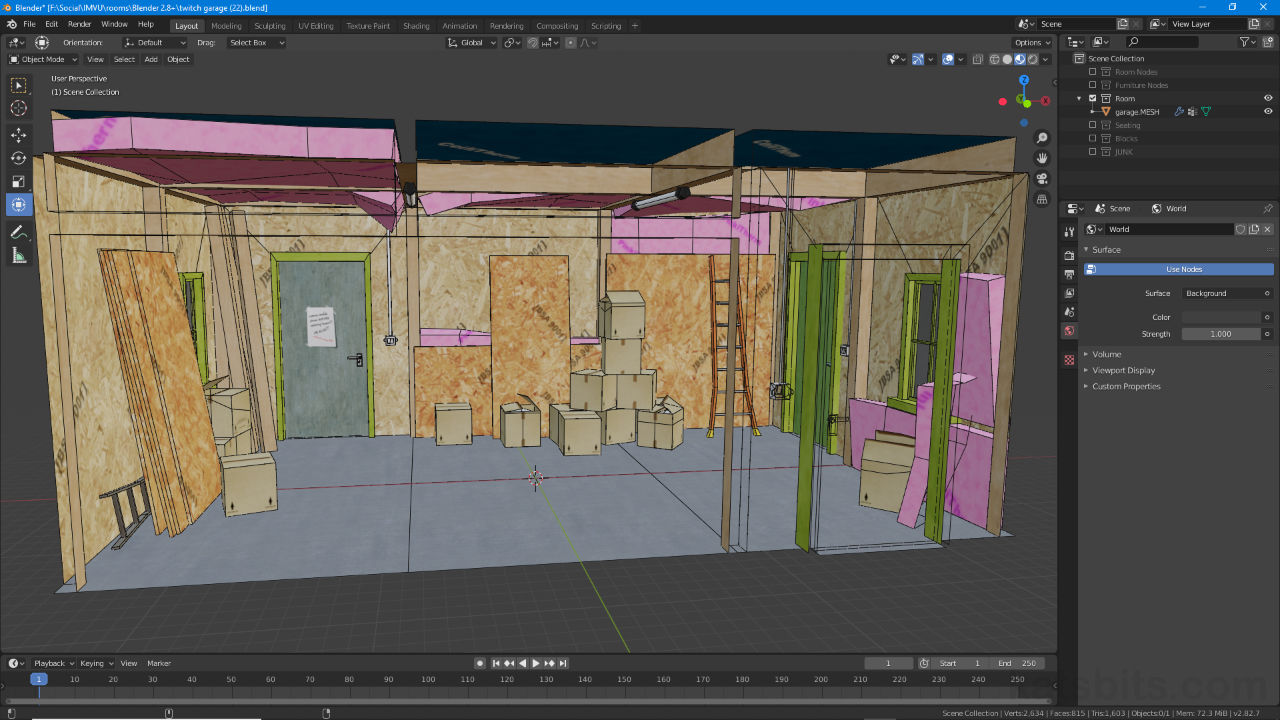
Video I : we take a first look at the Furniture Room Starter File for Blender 2.8+, what it is and what its comprised of before starting a new custom room from a Plain mesh primitive that’s shaped to form a simple garage with wall panels and framework by duplicating a small section of the room. In the second half (c. 01:11:00) a Creator question about custom avatar poses for furniture items is discussed.
Video II : we continue building up the garage focusing on the framework around windows and doors, building an initial object that’s duplicated before then using precision editing, the numerical positioning of vertices, to create the garage opening and support framing, before then moving on the ceiling using a similar technique.
Video III : we take an extensive look at UV unwrapping and mapping based largely on selection to unwrap and map different parts of the mesh. In doing so UV maps are discussed in relation texture repetition and tiling, how UV sections can be placed for effective use of space, how different elements can be mapped ‘uniquely’ vs ’tiled’, and how texture image affects UV map layout overall.
Video IV : it’s time to put the Room Skeleton together so we extensive look at the underlying structure of a room and how they essentially work, what each of the main components are and how they can be used; their position and placement as well as their respective Child » Parent relationship with other elements before FBX export and initial assembly in IMVU to test everything works as expected.
Video V : with materials in place and assigned to help distinguish parts of the mesh, we swap out the temporary textures used as placeholders with the final assets and in the process talk about the UV maps and layout. With the new images the blocks have to be reworked to fit. Once done the room is exported and assembled in IMVU Classic Editor and then IMVU Studio Beta.
Video VI : now the room basically done its still a little empty. To accommodate the addition of custom poses some ‘features of interest‘ are added, wall panels, ceiling insulation, opening some boxes, making a simple ladder and so on, all then potentially usable to pose the avatar around.
Video VII : with the ‘features of interest‘ in place additional they can be used as markers to place additional pose spots, each associated with a custom pose that takes advantage of the feature, climbing a ladder, looking behind some panels etc., those poses being done using the Alternative Pose File and Appending the mesh to build the pose around.
Video VIII : with everything in place, avatar spots for customs poses in the room, and custom poses made for those spots, both elements, room and poses, are exported to individual FBX files and importing into IMVU and assembled, Action being necessary for the Room’s poses to work.
Duration : total c. 13 hrs (13:00:00).
Info : 720p.
Project file : not available.
Product ID: 49702075
Design note: see links below for more on topics shown in the video;
– Setting up left or right mouse click.
– What is Mesh Smoothing?.
– The basics of Blender 2.8.
– Material basics, using Nodes in Blender 2.8.
– IMVU compliant material names.
Time Stamps
Times are approximate (videos above display chapter/timestamp markers in the timeline).
Video I : Meshing – c. 1 hr 50 mins (01:50:00).
– 00:00 : Stream Start.
– 06:00 : Start & Room Starter File 1st Look.
– 21:00 : Room Build Start.
– 31:00 : Add & Assign Materials.
– 45:00 : Rooms & Floor Plans.
– 52:00 : Doors & Windows.
– 01:11:00 : Pose (Furniture items).
– 01:35:00 : Actions in IMVU.
Video II : Meshing (cont.) – c. 1 hr 20 mins (01:20:00).
– 00:00 : Stream Start.
– 04:00 : Start, Recap & Overview.
– 07:00 : Framework (Doors & Windows).
– 32:00 : Precision Editing.
– 53:00 : Roof Framing.
– 01:11:00 : Ceiling.
Video III : UV Maps – c. 1 hr 50 mins (01:50:00).
– 00:00 : Stream Start.
– 05:00 : Start, Recap & Overview.
– 07:30 : Materials & Textures.
– 22:00 : UV Editing.
– 39:00 : UV Orientation.
– 55:00 : Unwrap Ceiling.
– 01:05:00 : Texture Scale & Size.
– 01:30:00 : Using (UV) Seams.
Video IV : Prep & Export – c. 1 hr 50 mins (01:50:00).
– 00:00 : Stream Start.
– 04:30 : Start, Recap & Overview.
– 08:00 : Room Skeleton (node).
– 28:00 : Furniture Nodes.
– 40:00 : Seat Nodes.
– 55:30 : Join, Smoothing & Vertex Groups.
– 01:06:00 : Export & Assembly.
Video V : Textures & UVs – c. 1 hr 20 mins (01:20:00).
– 00:00 : Stream Start.
– 03:00 : Start, Recap & Overview.
– 04:30 : Materials.
– 17:00 : UV Adjustments.
– 30:00 : Re-Unwrap Boxes.
– 46:00 : FBX Export & Assembly.
– 54:00 : IMVU Studio Beta import.
Video VI: Feature Focus – c. 1 hr 30 mins (01:30:00).
– 00:00 : Stream Start.
– 04:30 : Start, Recap & Overview.
– 13:30 : Window Detail.
– 22:30 : Door Handles Detail.
– 44:00 : Ceiling Detail.
– 55:00 : Open Box Detail.
– 01:12:30 : Ladder Detail.
Video VII : Poses – c. 1 hr 30 mins (01:30:00).
– 00:00 : Stream Start.
– 03:00 : Start, Recap & Overview.
– 07:30 : Light Detail & Feature Overview.
– 21:30 : Extra Pose Spots.
– 35:00 : 1st Custom Avatar Pose.
– 59:00 : 2nd Custom Avatar Pose.
Video VIII : Export & Assembly – c. 1 hr 50 mins (01:50:00).
– 00:00 : Stream Start.
– 03:30 : Start, Recap & Overview.
– 36:00 : Room & Pose Export/Import.
– 01:09:00 : Action Set Up.
– 01:26:00 : Opacity & Hiding Meshes.
– 01:30:00 : Ladder Detail v2.
Additional Resources
– Blender 2.8+ Starter Files for IMVU.
– Learn to make Accessories for IMVU using Blender 2.8+.
– For more on creating items for IMVU see IMVU Basics tutorials.
