Minecraft Room for Nowhere
Table of Contents
Description
In this exercise we make a simple Minecraft style scene for Nowehere metaverse using the Nowhere Toolkit for Blender (3.6 LTS shown throughout).
Design Note: the Nowhere Toolkit for Blender is active developed and currently compatible with Blender 3.6 LTS. Support for earlier versions of Blender may vary so check before use – the Add-on will typically fail to install if not compatible.
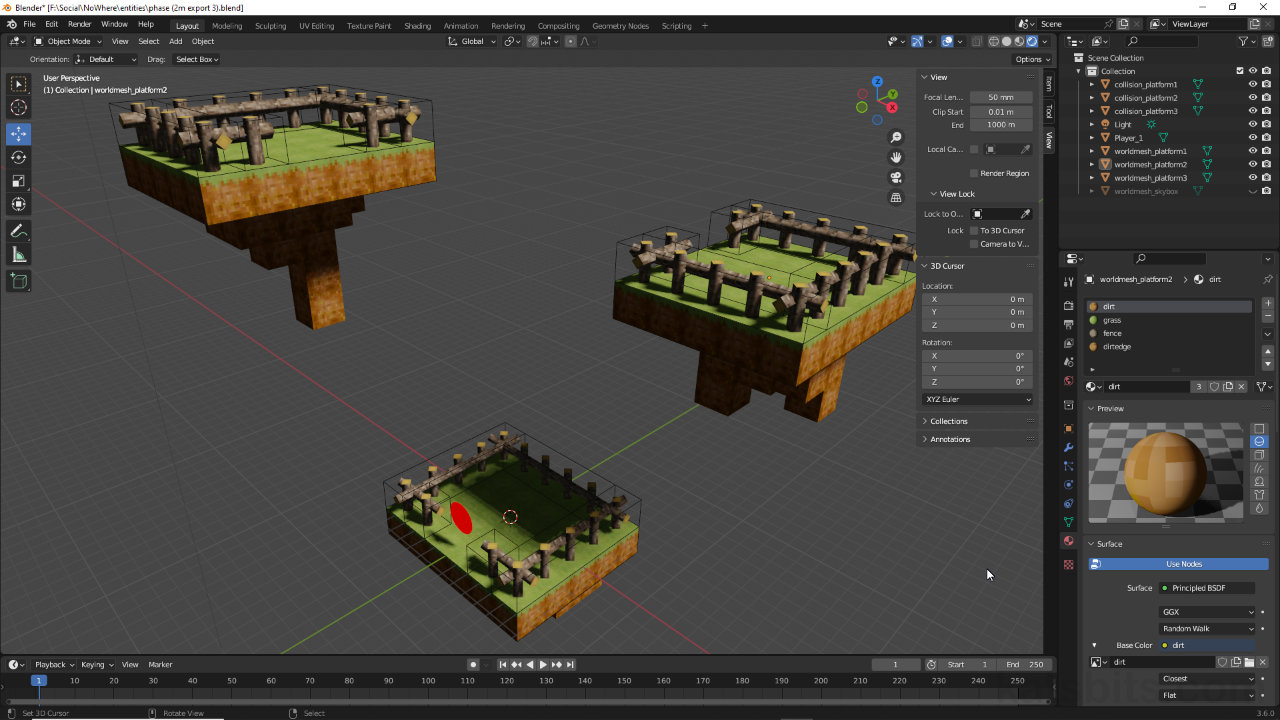
Using an image editor of choice a set of low-resolution, pixelated Minecraft style textures are first created, which can then be used in Blender to texture the default Cube object, after a Player entity has been dropped into place for Nowhere scaling. Once the initial block is made its then duplicated to create a simple square(ish) platform, that’s also then surrounded by a fence. With visible meshes done, Collision is dropped into place to give the Player something to stand on. Finally a simple skybox is made before the project is exported to *.glTF using the Toolkit and imported into the Nowhere WorldRunner for testing.
Duration: total c. 1 hr 50 min (01:50:00).
Info: 1080p.
Suitability: Beginner+.
Source: KatsBits – Nowhere Minecraft Source (c. 250 KB – *.blend, *.gltf, *.fbx, *.png), Compatible with Blender 3.6 LTS and above.
Room URL: Nowhere Live Station.
Design note: when making a Minecraft style Space for Nowhere metaverse, keep the following points in mind;
Texturing
When making Minecraft style textures not much needs to be done to the source except ensuring a square format can be produced, and it doesn’t have too much colour or tonal variation, although this can be fixed later. Depending on the image editor used, how this is done will vary, Affinity Photo [1] for example, allows for the image canvas to be squared up, Document » Resize Canvas…, before being rescaling or down-sized, Document » Resize Document…, to the required 16 x 16 pixel image. Similarly, using GIMP [2] this process can be done by resizing to adjust the general dimensions and position of the image relative to the edit, Image » Canvas Size…, then with Image » Scale Image… to resize down to 16 x 16 pixels. Either way it’s preferable to adjust the dimensions first to make it easier to select the best area to use before then down-scaling to 16 x 16.
Affinity Photo provides options to resize images from the Document menu [1]; Resize Canvas… and Resize Document…
GIMP [2] includes options to resize photos from the Image menu; Canvas Size… and Scale Image…Mesh Optimisation
For simplicities sake the initial platform is constructed from duplicates of the default Cube once it was UV unwrapped and textured. Doing this tends to generate a lot of unnecessary geometry that’s generally hidden from view but loaded in with the scene. Ideally these should be removed to make the overall Space efficient and low-footprint.
One platform cleaned up and optimised from 960 triangles down to 560. For larger complex meshes the difference between high and low resolution versions can be quite dramatic. Edges marked Sharp have also been optimised and reduced to only those expressly needed.A quick way to do this is to; if the individual Cubes have been joined together, select a platform and switch to Edit Mode and from the Mesh menu click Clean Up » Merge by Distance – Mesh » Clean Up » Merge by Distance. Make sure nothing is selected, Select » None, then from the Select menu click Select All by Trait » Interior Faces [3] – Select » Select All by Trait » Interior Faces. This selects everything inside the mesh. Shift-click to deselect any faces that might have be incidentally included and then press Delete or X and from the Delete popup click Faces from the list of options – Delete/X » Faces.
Use the Interior Faces [3] option to select unwanted faces inside the mesh (once Merge by Distance has been run), that can then be removed to better optimise the mesh with the removal of unused (non-visible) surfaces.Export Prepping
Generally speaking a scene will export from Blender and import into Nowhere’s preview tool if it has, at minimum, a Player [4] entity. The rooms appearance depends on material set up and whether an actual light entity has been used – ‘real-time’ verses ‘static’ illumination. Before export from Blender however, ensure all unused content is deleted from the project – only exportable objects, entities and items should remain. Save a *.blend then use the Nowhere Toolkit’s included Export GLTF [5] option.
Ensure the scene has at least a Player entity [4] included before export and is appropriately lit, either by adding a light source for real-time lighting, or using other techniques for static illumination. Once done use the Toolkits Export GLTF option [5].


Timestamps
All times are approximate;
– 00:00 : Start & Textures.
– 14:00 : Player Entity & Initial Block.
– 20:00 : Materials & UV Editing.
– 30:00 : Platform & Fence Posts.
– 01:09:00 : Collision.
– 01:15:00 : Lights & Lighting.
– 01:23:00 : Skybox & Sky Texture.
– 01:38:00 : glTF Export & WorldRunner Preview.
