Animated Accessory
Table of Contents
Description
Starting with Blenders default scene we make a simple low poly ‘coin’ (vcoin) that’s duplicated to create a high resolution version with some detailing that’s in turn used to generates a coin-blank texture set – normal map, shininess map and diffuse map. This is then imported into the Accessory Starter File, rigged and animated before export to FBX and assembly in IMVU Studio (recorded live, may include off-topic chat).
Design note: for more information on creating normal maps read “How not to make normal maps” here.
Download: software or tools for converting images to normal maps; GIMP, nJob.
Duration c. 3 hrs 30 mins mins (03:30:00).
Info: 1080p.
Source: KatsBits – vcoin blank (zip c. 2 MB – *.fbx, *.blend, *.png, *.psd, *.tga).
Product ID: Vcoin Head Spinner | Vcoin Overhead Spinner
Video I
To make the animated coin blank accessory the process is split into two main parts; 1) make the low/high resolution coins and Bake the basic normal map texture (low resolution has material assignment and is UV unwrapped and mapped); 2) Append into the Accessory Starter File to position, rig, and animate the low resolution version in situ. Once these steps are done the item can be exported to FBX, animation included, and assembled in IMVU Studio.
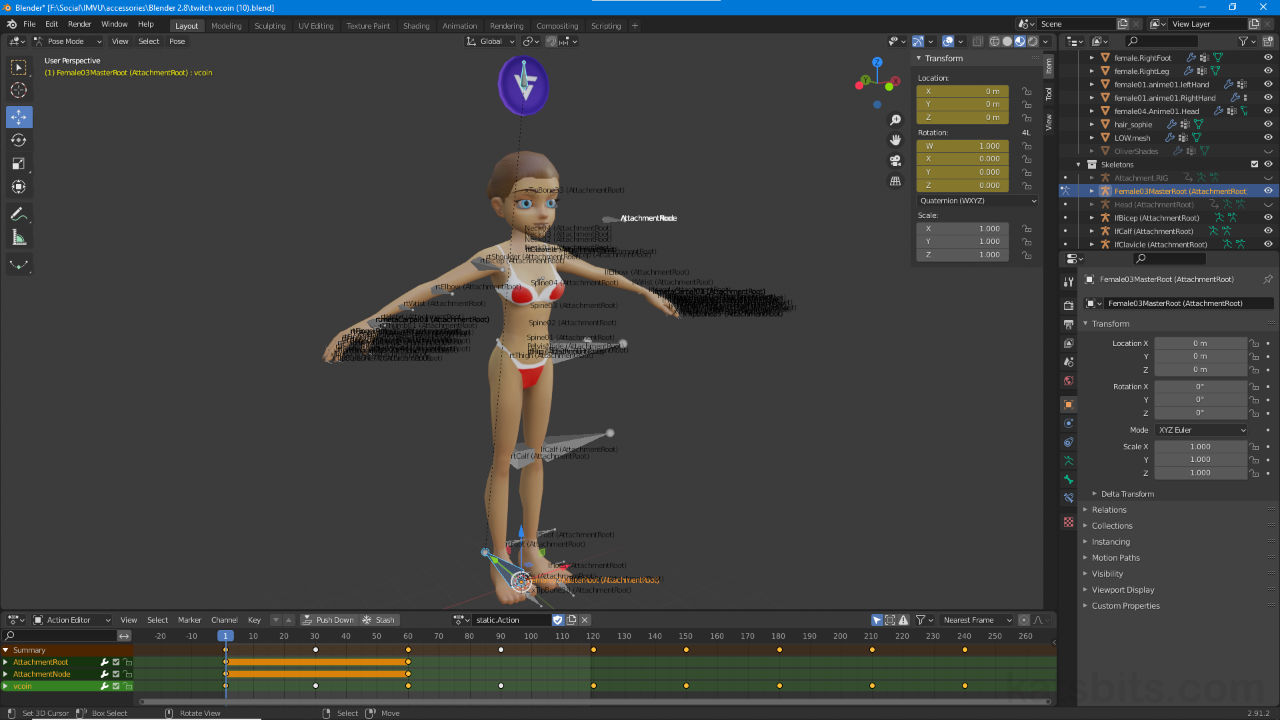
Design note: for animation the rig, the skeletal structure that controls an associated mesh, can be as simple as adding an extra bone to the default ‘accessory’ Armature object (e.g. ‘Head (AttachmentRoot)’). This bone is then animated – AttachmentRoot and AttachmentNode should not be animated as they anchor the accessory to a particular bone in the avatar skeleton.
For simple animated objects skeletons can simply be the addition of an extra bone that controls the mesh object that animates for example a single bone linked to AttachmentRoot that animates the coin.

Video II
For ordinary derivation the coin mesh needs to be modifiable so the effect provided for by the inclusion of the normal map itself can be changed. Without access to the original source file this is typically done generating an overlay normal map from a grey-scale image. Using an image editor then, a grey-scale image is created – white = height, black = depth – and ‘normalised’ using a image filter – this can be done in GIMP natively, using a Photoshop plugin, or a third-party application. This new map can then be blended with the original to proved new detailing for the coin that only requires updating the image assets as normal.
Design note: when making products for derivation their normal maps should be generic and including only the very barest of details, edges for a coin for example, to accommodate derivers the freedom to create custom detailing using image-based normal maps.
The coin blank, and its generic normal map (image left above), can be modified overlaying another normal map that includes details, edge knurling, face designs etc., made by converting a grey-scale image using a ‘normalisation’ filter or third-party application (image right, upper and lower).

Time Stamps
Times are approximate.
Video I : Meshing, Baking & Animation – c. 2 hrs 10 mins (02:10:00).
– 00:00 : Overview & Start.
– 02:00 : Meshing, Materials & UV’s
– 16:00 : High Res Coin & Baking.
– 47:00 : Append, Accessory Set-up & 1st Export.
– 01:20:00 : Rigging & Animation.
– 01:50:00 : Root Bone & Misc.
Video II : Generated Assets & Skeleton Selection – c 1 hr 30 mins (01:30:00)
– 00:00 : Overview & Start
– 04:00 : UV Export & Channel Swizzle.
– 14:00 : Import & Assembly.
– 23:00 : Derivation Assets.
– 38:00 : Normal Map from Image.
– 01:08:00 : Armature Root & Animation.
