IMVU Studio Toolkit – Static (Statue) Pose
Table of Contents
Description
In this exercise we take a look at making a simple static or statue avatar pose for IMVU using the IMVU Toolkit for Blender. Once the tool is loaded and avatar dropped into the scene, the avatar rig can be used to create a pose by selecting individual control shapes to articulate the avatar meshes. This can then be exported and assembled in IMVU Studio.
Download: KatsBits – Toolkit OhNo (1 MB, *.blend, *.fbx). Requires toolkit. Open in Blender 2.93 LTS+.
Product ID: Oh No – 59568055 (Empty Mood).
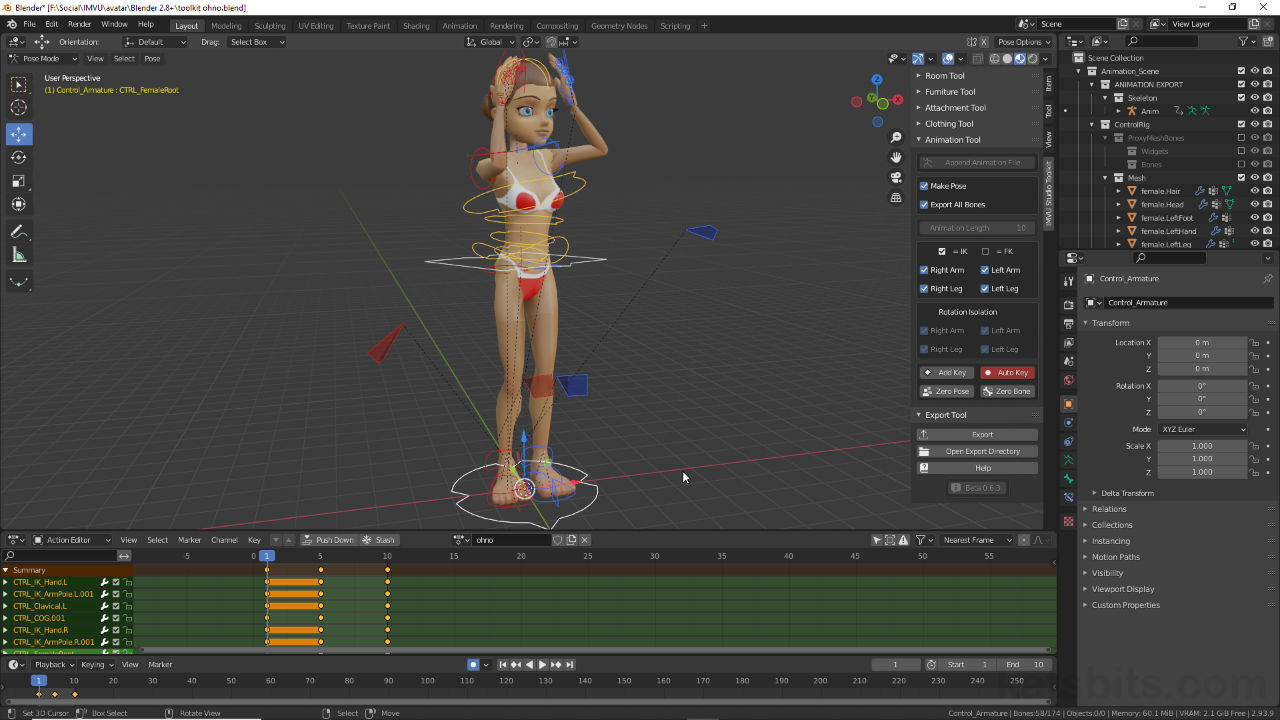
Design note: if Auto Key is not enabled before posing the avatar click the Add Key button [1] to mark the selected control element, and bones it controls, to the Action Editor timeline. This needs to be done each time a controller is moved or manipulated. To clear or reset a control click the Zero Bone button [2] (Zero Pose resets the entire avatar).
To mark a pose in the form of keyframes to the timeline click the Add Key button [1]. To reset a controller click Zero Bone [2].Static Poses
Prior to export, if a pose is to be ‘static’ and not move (not animated), ensure Make Pose is enabled [3]. If the pose is to completely override the defaults enable Export All Bones [4] – if this option is not set only data associated with bones specifically marked to the timeline will be exported, useful for animations that augment the defaults rather than fully replacing them.
The export options for poses differ depending on the end result; to completely override the avatars default animations ensure Make Pose [3] and Export All Bones [4] are enabled.Reset Skeleton
After import if the pose distorts or behaves unexpectedly it’s likely the project has defaulted to using the skeleton brought in with the file. This typically happens with projects derived from the base female (80) and base male (191) avatars. To fix, on the left side of the Studio under Component click the Skeleton icon [5]. Select the listed entry [6] – there should be a single entry for avatar poses (the name may differ from shown below). To the right side of the editor in the Inspector, click the Asset drop-down and set Female04_Anime01_SkeletonMASTER.xsf [7] from the list (the full name may not be visible). Click Preview to assign and correct the problem.
Deriving from the base avatars can cause poses to distort. If this happens it’s likely the wrong avatar skeleton is being used. To fix this the skeleton being used [5] needs to be reset in Skeleton [6] options where Female04_Anime_SkeletonMASTER [7] will be available.Pose Mode
The animation tool requires the animation rig, the wireframe objects and shapes, to be in Pose Mode. When initially selecting the rig if it highlights orange this indicates its in Object Mode not Pose Mode. To switch, ensure the rig is selected, then from the Interaction Mode selector, click Pose Mode. The rig will changes its appearance, different parts changing colour, indicating they can be selected, moved and posed for sequence creation.
Make sure to be in Pose Mode when using the Animation Tool.


Timestamps
Times are approximate;
– n/a
