Collections not Layers
Table of Contents
Summary
TL:DR summary on Collections;
(1) Collections replace Layers.
(2) Pressing M opens Move to Collections quick access menu.
(3) Outliner area acts as Collections manager.
(4) Inclusion/removal from Collections can be done in 3D View and/or Outliner.
What are Collections
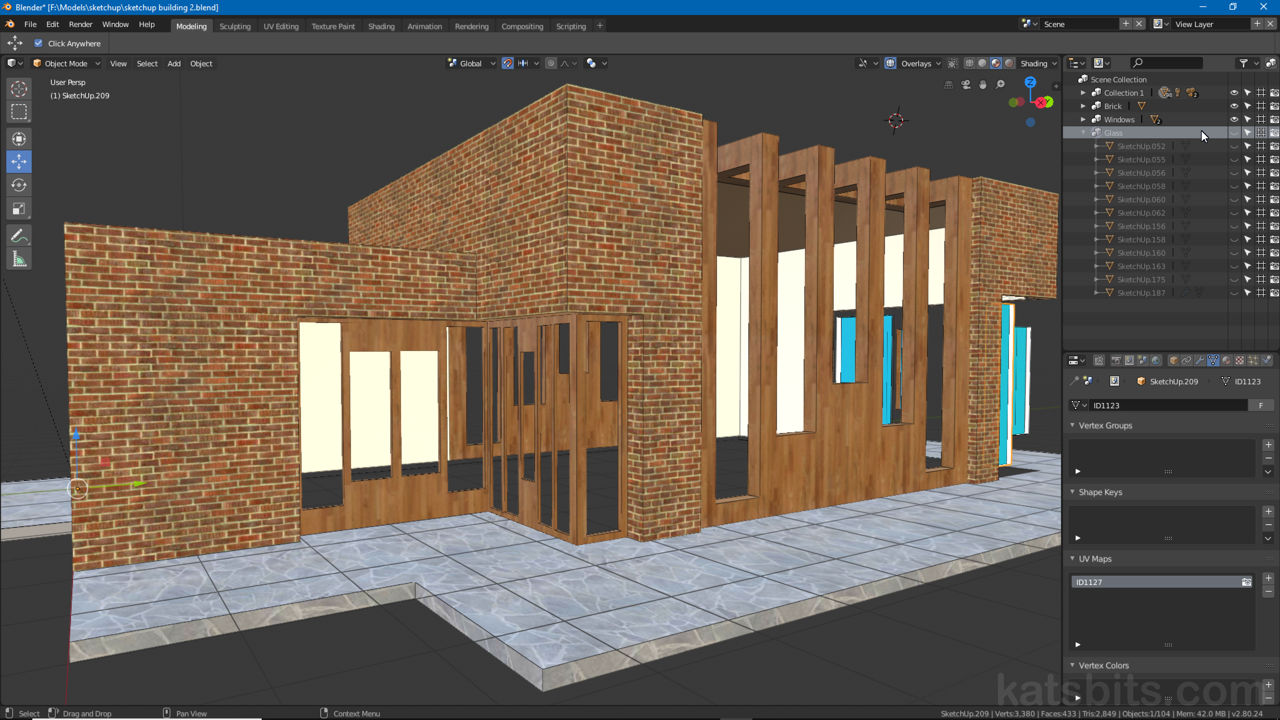
For Blender and newer versions scene and project organisation has been improved with the introduction of Collections as a replacement for Layers. This change removes the Layers button array from the 3D View Header (which itself has undergone overall changes) making use of the Outliner editor, the upper-right area of the interface, as an object manager, a tool similar in function to those found in Photoshop, GIMP, Photo-Paint etc. so scene and project data generally, can be better organised and managed using familiar manipulation metaphors.
Design note: aside from the addition of Collections, the Outliners Display Mode options have been condensed and reorganised into (currently) six main categories instead of the twelve or so previously available – this may mean hunting around for specific items to find out where they’ve been moved.

Collections and the Outliner editor replace using Layers and Layers button array (3D View Header) whilst still using similar metaphors of use (pressing a shortcut to access and assign).
Using Collections
With Layers being obsolete pressing M no longer displays the Move to Layer pop-up. Instead Move to Collection appears, a different overlay highlighting the Collections available for use (as a text-based list), alongside an additional option, + New Collection, to add more entries if needed.
Design note: Scene Collection and Collection 1 are shown by default.
To move something into or out from a Collection, make sure the object(s) or item(s) is selected in the 3D View, press M for the quick access menu then left-click Scene Collection, Collection 1 (defaults) or other option as available. Alternatively click + New Collection to add a new entry, which appears in the Outliner, that can then be selected for object management on pressing M again.
Design note: clicking + New Collection is an ‘action’, Blender will do something, which then necessitates M being pressed again to access the new entry – it won’t be created (step 1) and appear in Move to Collection (step 2) as a single action (step 1 + step 2).

Layers have been replaced with Collections so pressing M opens Move to Collection instead of Move to Layer.
Object Management
Although Collections are generally managed from the Outliner, the objects they might contain can be changed a number of ways; 1) the Move to Collection quick access menu, 2) an Object menu option, 3) from within the Outliner. To use options 1 and 2 objects should be selected in the 3D View so Blender can identify associated Collection instances, for example moving a ‘wall’ object from one Collection into another requires the mesh to be selected before it can be shuffled between Collections. Using option 3 objects can be selected and rearranged directly in the Outliner simply by clicking an entry to highlight and dragging it into another Collection.

Simple object management can be had using the quick access and Object menu options when working in the 3D View, or by using the Outliner to select and rearrange data directly dragging it from one Collection to another.
The shortcut formerly for Layers, M, now accesses Collections where objects can be moved quickly between instances – simply select the object, press M and click the Collection from the Move to Collection pop-up.
Collection Management
Managing Collections themselves is done in the Outliner editor. To create a new Collection right-click anywhere near an existing collection or blank area of the workspace. In the Collection pop-up that appears select New. A numbered instance will appear (Collection [n]). To rename double (left) click the listing and type a new label (Enter to confirm or click elsewhere on-screen).
To remove a Collection (Shift+) left-click select one or more instances and press Delete or right-click over the instance to be removed and select Delete from the Collection pop-up menu. To rearrange Collections, left-click select individual or multiple instances to highlight then left-click-drag into another Collection or position in the Outliner stack. Release left-click to confirm. Doing this essentially makes the moved Collection(s) a ‘child’ of the instance into which it is placed.
Design note: when creating a new Collection the mouse needs to be clear of a Collections contents otherwise Blender assumes the action relates to the entry otherwise highlighted by the mouse cursor/click. Deleting a Collection removes the Collection instance and whatever it contained so move object that need to be kept prior to deletion. Beyond being moved between Collections, the objects they might contain cannot (currently) be rearranged, they are automatically listed/ordered alpha-numerically.

Collections are blocks of data that can be edited and manipulated in the Outliner, new instances created, deleted, managed or moved to change their order or position in the stack, or in to or out from other Collections.
Managing Collections is best done in the Outliner where they can be selected and dragged to re-order, in the stack or within other Collections, or have their labels (names) changed.
