Toolkit – Clothing
Table of Contents
Description
In this exercise we take a look at using IMVU Toolkit for Blender to make a simple sports vest. To start, an avatar is dropped into place using the Clothing Tool, a Cube primitive is then added – Add » Mesh » Cube (Ctrl + A) – scaled to size, and mirrored using the Mirror Modifier – Modifier Properties > Add Modifier > Mirror – before being divided using loop cuts (Ctrl + R) to further shape the mesh to fit the avatar. As the shirt is modelled, structural detail is added, but no more than is needed for the task at hand. Once the basic shape is settled on, extra detailing, cloth folds, can be added and separate materials assigned, front and back. The mesh is finally UV Unwrapped and images mapped ready for the next step, prepping for IMVU. Here, because the item is asymmetrical and relatively low resolution, to prep, the avatar is copied and weights duplicated over to the mesh using the Data Transfer modifier. Once done, an Armature modifier is applied to link the vest with avatar skeleton, before export using the FBX tool, and final assembly in IMVU Studio.
Duration: total c. 1 hr (01:00:00).
Info: 1080p.
Suitability: Beginner+.
Source: KatsBits – Toolkit Clothing (c. 6 MB, *.blend, *.fbx, *.png).
Product ID: n/a.
Design note: manually creating clothing using the IMVU Toolkit for Blender, or making clothing generally, has a number of important design caveats;
Avatar Selection
When starting a clothing project the Clothing Tool defaults to using the Male 1.5 avatar. To set a different base use the Gender selector in the tool [1]; click the drop-down menu and select from Female/Male (defaults) Female 1.5/Male 1.5 and Hide (none) – can be used to hide the base avatar and/or hide the base to accommodate a custom avatar base mesh).
Important: ordinarily when prepping clothing for IMVU using the Clothing Tool, the mesh is automatically linked and weighted clicking the Bind to Armature [i] button, the results of which will vary greatly depending on the design and complexity of the item. Some significant adjustment to weighting may then be necessary.
Prepping clothing typically means clicking the Bind to Armature [i] button to automatically weight and parent selected meshes to the avatar Armature object.
Setting the base avatar using the Gender [1] option in the Clothing Tool.Start Low Poly
The workflow shown above is just one way to make clothing and will differ depending on the clothing’s design or purpose. Irrespective of this, because clothing can be formed from quite complex shapes, meshes should always be shaped gradually, divisions and/or structure being added incrementally by manually placing Loop Cut‘s as and when needed instead of using more broadly applicable Subdivision; starting with too much structure too early, is more likely to cause issues than solve – details can be added at later stages using different techniques if necessary.
Using Subdivision (right)does not inherently grant any particular advantage over lower resolution meshes (left), and may in fact cause more issues with ‘waste’ than strategically placing loop cuts to manually divide the mesh in a more controlled fashion.Weight Paint
The accuracy of weight value distribution is determined by mesh structure and density; when duplicating data across to another mesh the Data Transfer modifier essentially looks for the nearest vertex corresponding to the source, so there may be gaps or over-representation in some places. These issues can generally be fixed manually editing weight values in Weight Paint mode (switch the main 3D Viewport to Weight Paint mode or click the Paint Weights button in the toolbar).
Important: generally speaking weights appear the same on a mesh with Subdivision regardless as to the modifier being applied or not but they, Subdivision, may affect the distribution of wright values depending on the mesh density as a result.
Weight values should transfer without issue regardless of Subdivision being applied to the mesh.
A lower resolution mesh will more accurately match the lower resolution of the avatar itself.
Higher resolutions may weight with slight differences compared to lower resolution but should still articulate and deform without issue.Layerable vs Non-Layerable
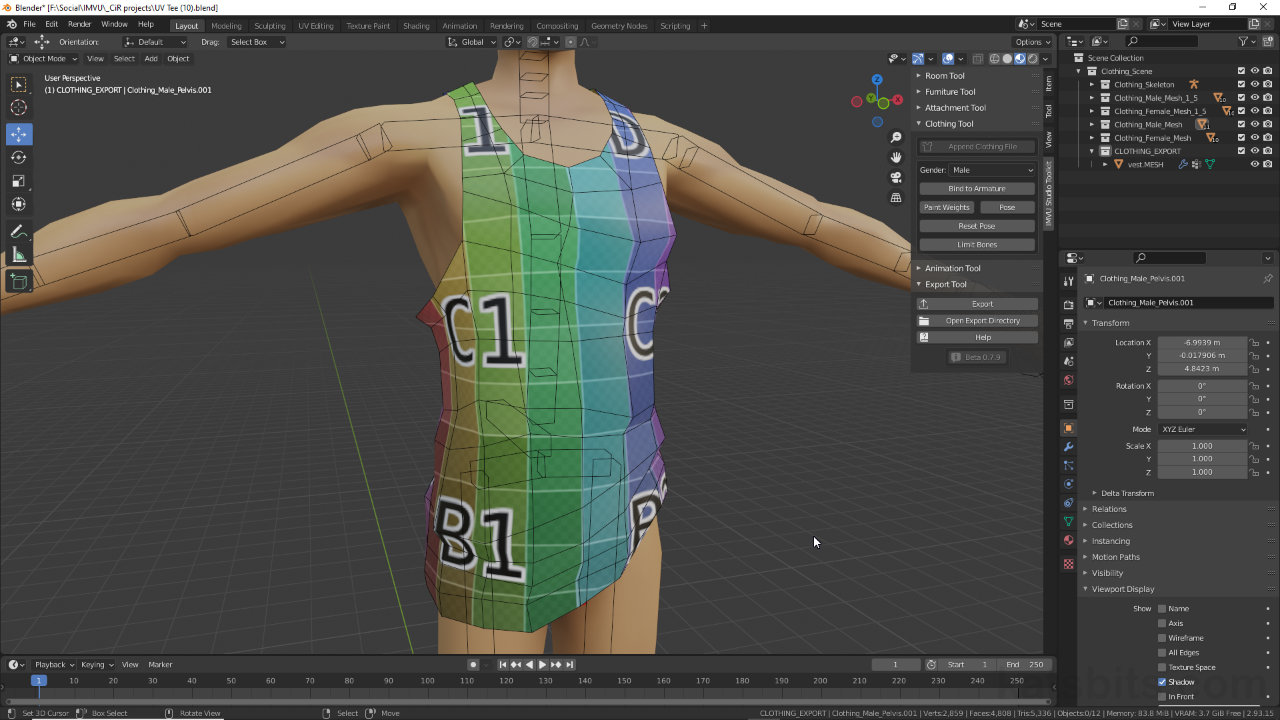
Depending on the clothing’s design sections of the avatar may need to be included with the export. To do that select the respective body part or parts and then the mesh before clicking the Export button in the Toolkit – before exporting ensure the clothing mesh has been moved into the CLOTHING_EXPORT [2] collection in the Outliner else it will be excluded from the FBX (this is irrespective of it being bound to the avatar skeleton).
Meshes are not automatically placed in the correct Collection [2] for export so ensure this is done to they’re included in the resulting FBX file.


Timestamps
Times are approximate;
– 00:00 : Overview & Blocking out
– 07:30 : Neck, Arms & Body
– 34:00 : Folds
– 55:00 : UVs & Materials
– 01:00:00 : Weight Painting, UV Maps & Images
– 01:05:00 : Export & Studio Assembly
