Paint Minecraft Skins in Blender
Table of Contents
Description
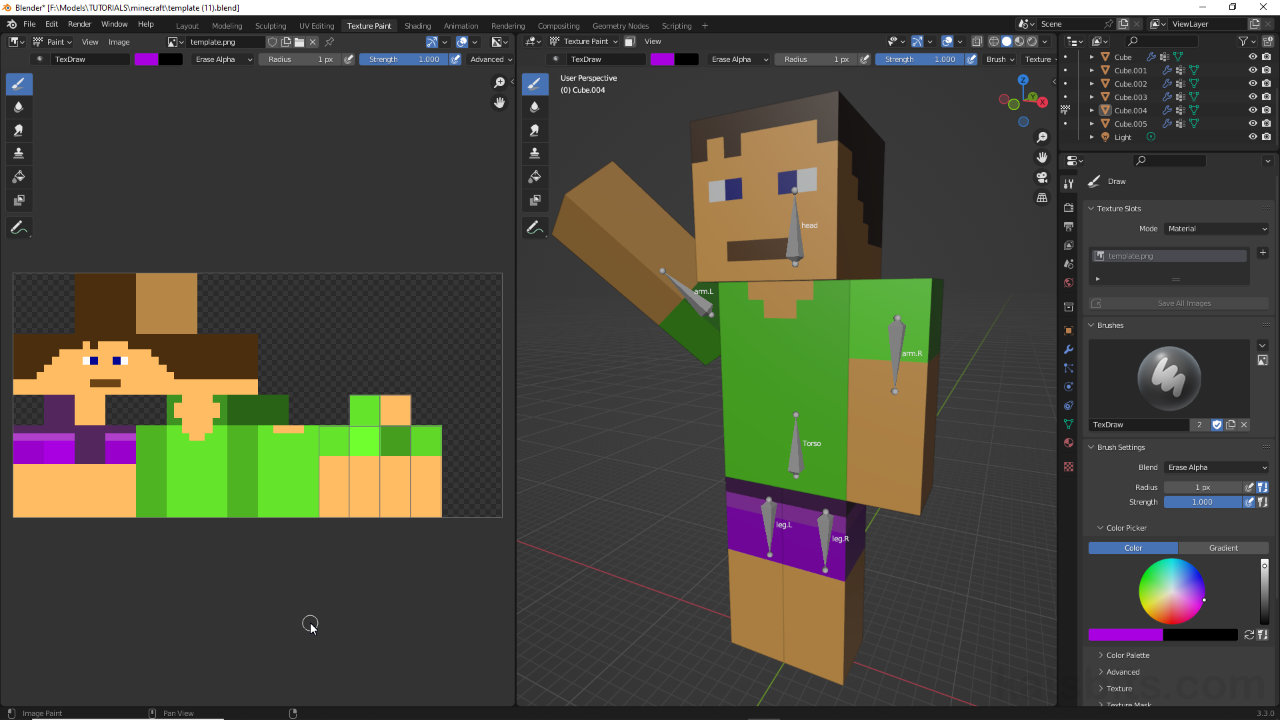
Following on from the first part of “Making a Classic ‘Steve’ Minecraft Character in Blender” we take a look at using that rigged and textured character to paint a custom Minecraft player skin with the Texture Paint tools. For this the template image mapped to the model is all that’s needed but it does need to be properly UV Unwrapped and mapped to the character.
Download: Katsbits – Minecraft Skin (c. 200KB | *.blend, *.png, *.psd).
Design note:while it is possible to paint Minecraft player skins in Blender, the tools and brushes available in Texture Paint workspace are not as comprehensive as might be available in a dedicated photo or image editor.
Texture Interpolation
For each material being painted, ensure Texture Interpolation is set to Closet [1] (default is Linear) as this replicates the pixelated appearance of Minecraft image assets, making it easier to discern what’s happening as the skin is painted – this can be accessed in Material Properties clicking the Base Color heading/label.
To make skin painting easier, in Material Properties set the Texture Interpolation mode to Closest [1]. This makes image appear ‘clean’ (pixelated) matching Minecraft’s graphic style.Texture Paint
Because the Texture Paint editor can be used independently of whatever is selected or shown in the 3D Viewport, allowing for any image to be painted at any point in time, ensure the correct image is displayed in Texture Paint’s workspace. To do this click the Browse image to be linked [2] button and select the image to be painted from the list, e.g. template.png.
Make sure to set the correct image [2] to be painted as the Texture Paint editor can be used independently of whatever is selected in the 3D Viewport or Material Proeprties.Anti-Alaising
When painting, although Anti-Aliasing and Falloff may be disabled/set, Blender will still attempt to blur or alias strokes depending on a given pixels proximity. In other words, painting a pixel dead-centre will paint a relatively uniform, clean colour, whereas painting to one side may result in bleed, which in-turn means aliasing has to be used depending on the strength of that overflow. Either way Anti-Aliasing [3] should be disabled – Advanced » Anti-Aliasing, and Falloff [4] set to Constant – Falloff » Constant.
Because Minecraft images are so small ordinary brush settings can be difficult to use. To address this Anti-Aliasing [3] can be disabled, and Falloff [4] can be set to Constant.Texture Paint Tools
Texture Paint tools are also accessible from the editors Sidebar [5]. To access, click View » Sidebar, or press N.
Texture Paint and general brush options are also accessible in the editors Sidebar [5] (largely replicating what’s typically displayed in the Active Tool panel to the right of the 3D Viewport).Erase Alpha/Delete
Generally speaking Minecraft skins include a mask that essentially nulls the unused areas of the image. If colour bleeds out across, or is painted to, this area it effectively edits, in part or whole, the mask. To fix this the overflow isn’t erased so much as the mask is repainted (similar to a clip-mask in a 2D image editor) [6] using Erase Alpha [7] as the drawing or Blending Mode.
Use Erase Alpha [7] to repaint or fix issues with overpainting. This can also be used to paint alpha [6] to the image.The painted skin applied to the player character in Minecraft.
Timestamps
Times are approximate;
– 00:00 : Overview
– 03:00 : Paint Tools
– 05:30 : Painting
– 22:30 : Save Image


