IMVU Studio Toolkit – Attachments (Accessories)
Table of Contents
Description
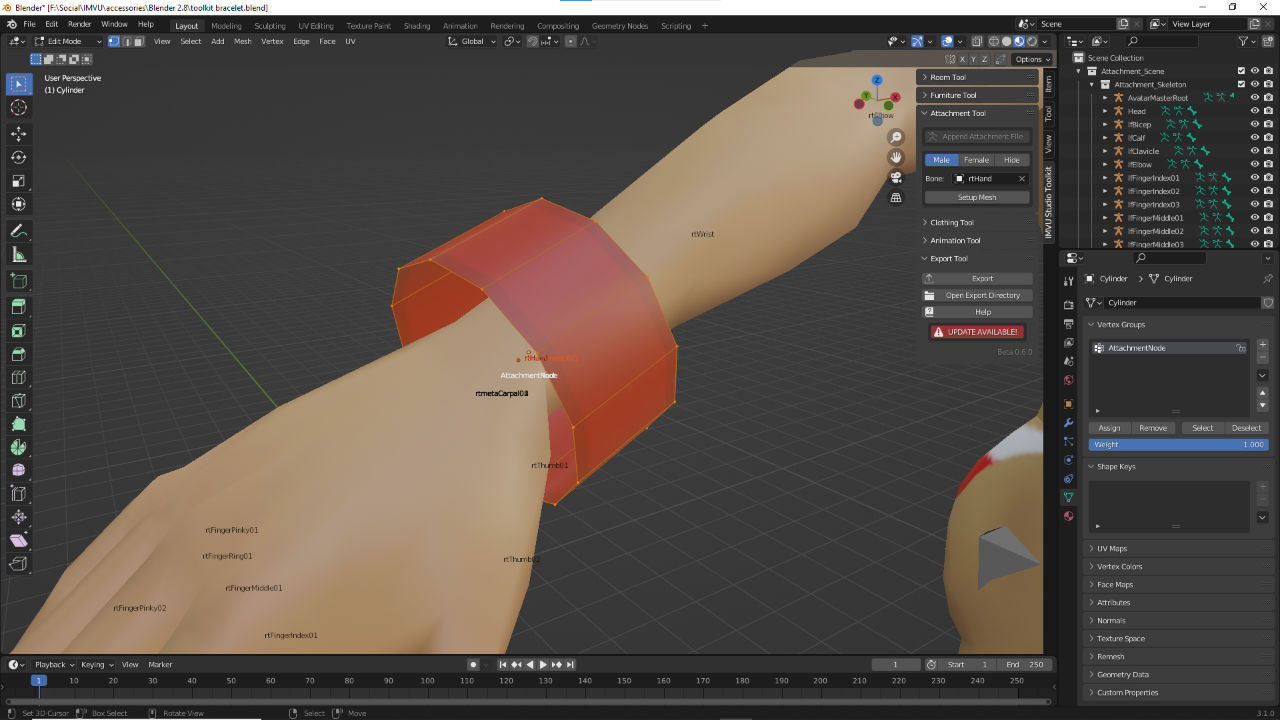
Accessories, or Attachments, are amongst the simplest products to make using the Toolkit because they use their own skeletal structure; essentially most effort goes into the mesh, the object that’s visible to the User. In this exercise we take a look at using the IMVU Toolkit for Blender to make a simple wrist band or strap that’s then exported and assembled in Studio.
Download: KatsBits – Toolkit Bracelet (1 MB, *.blend, *.png, *.fbx).
Design note: Accessory items are not limited to simple objects, they can be as complex as any other product. Keep the following in mind however;
Initial Avatar Selection
initially when clicking the Append Attachment File button only a skeleton is shown so an Accessory target can be more easily selected – buttons will remain inoperable until a target Bone is set [9]. Once this is done the accessory can be meshed in situ before final export prep. To switch between male and female click the Male and Female buttons (both use the same underlying skeleton).
A target Bone [9] has to be set before the avatar displays. This can be done using the eyedropper or selecting a bone from the Bone list.Bone Alignment
Once the Accessory has been meshed the items skeletal hierarchy needs to be established by positioning an Armature at the target bone, e.g. an Armature placed at rtHand – select the accessory mesh and click Align to Bone [12]. Next the mesh needs to be associated with the Armature by adding a Vertex Group – select the mesh and click Setup Mesh [11].
Once the target Bone is set the accessory can be meshed in situ and then prepped for export clicking the Align to Bone [10] and Setup Mesh [11] buttons to create the necessarily relationship between mesh and Armature.Important: depending on the Toolkit version the Align to Bone and Setup Mesh buttons are combined into a single Setup Mesh button [i] that performs all the necessary prep in one action. This does not change the process described except with regards to the ‘set up’ procedure (a single instead of two-step action).
In newer versions of the Toolkit, mesh prep may just be available clicking a single Setup Mesh button.
Timestamps
Times are approximate;
– n/a


