Merge Edges at Intersection
Table of Contents
Overview of merging edges at an intersection.
When editing meshes there is often a need to merge or join edges or other elements together where they intersect, cross or meet to form new structures. Typically this could be done using a Boolean operation on two or more objects, or more simply using the Auto Merge feature/function.
Download: merge at intersection example file (c. 200 kb).
Merge vs Merge
In this context merging creates a new sub-element where two or more edges cross [1] rather than removing or cleaning up a structure as would ordinarily be done using Merge. In other words, where the intersection occurs Blender places a new vertex that acts as a structural element from which all connected edges then flow.
Design note: once the vertex is placed there is typically no need to Clean Up the mesh unless newly created vertices are not coincidental (occupy the same coordinates in space).

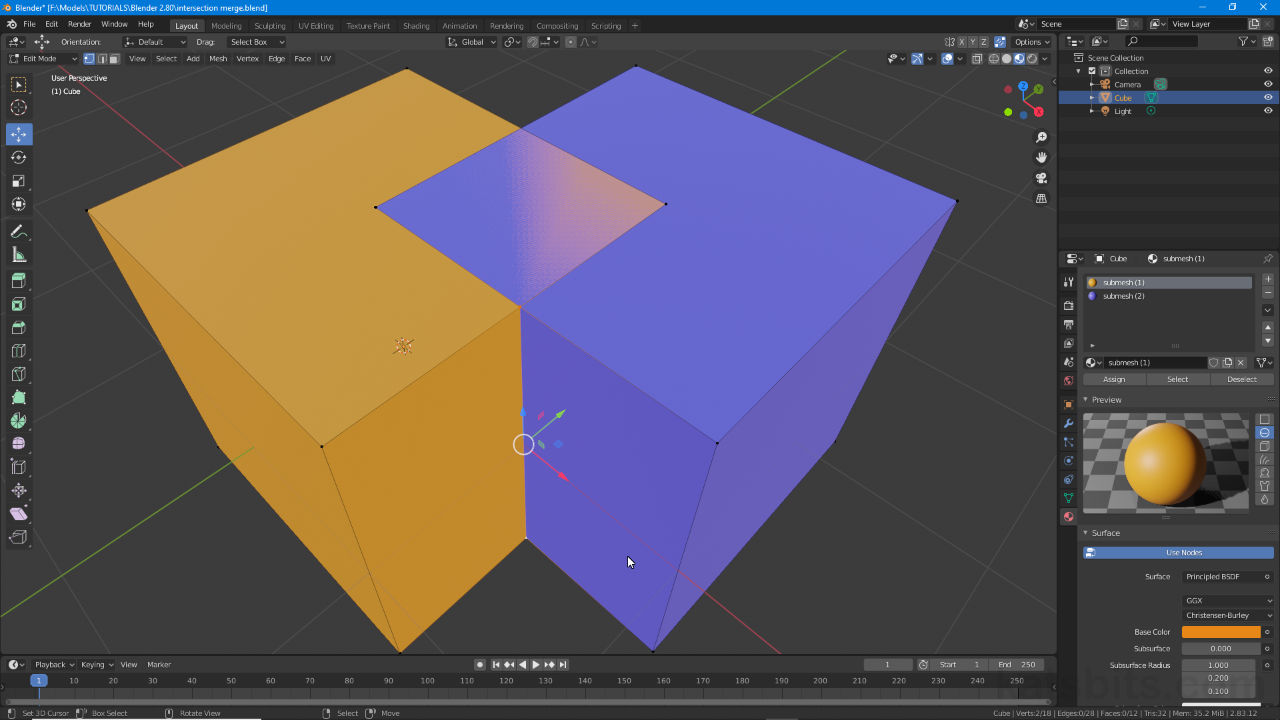
Two sub-meshes that need to be merged or joined where edges intersect each other [1] – as they are part of the same Object it’s not possible to use Boolean or similar operations in this context.
Auto Merge
Step 1: To merge at an intersection open the Sidebar if not already visible – View » Sidebar or press N) – and access the Tool panel [2]. Here expand Options (click the down-arrow) and enable Auto Merge [3] to activate the main feature, then optionally Split Edges & Faces [4] – this is the active function that splits elements where they intersect, creating the new sub-elements as necessary. Once the core settings are active, depending on the complexity of the merge required, the number of intersecting edges there may be, Threshold can be set to change the likelihood new vertices are merged together (in-situ Clean Up or ‘rem dub’).
Design note: although merging uses vertices to control mesh structure, the operation itself can be initiated in Vertex, Edge or Face selection, behaving appropriately based on the active mode (see ‘Face Select’ boxout below).
The options to merge can also be found in the Tool Settings header running along the top of the 3D Viewport. If not visible, from the View menu select Tool Settings (checkbox) – View » Tool Settings. To the right of the bar that appears click Options [a] then activate Auto Merge, Split Edges & Face and set the Threshold as required [b].
Merge options can also be found in the Tool Settings bar running along the top of the 3D Viewport in Options [a & b].


The first step to merging edges at an intersection is to enable Auto Merge [3] in the Sidebar [2] and then Split Edges & Faces [4] – the two settings activate the function.
Move/Edit Edge
Step 2: Once the Auto Merge and Split Edges & Faces are enabled, for Blender to split and merge edges and faces make sure they are appropriately aligned and then manipulate a connected edge in some way [5] – this can be as simple as moving an edge that’s part of an intersected group, or selecting an edge and subdividing it, anything that essentially alerts Blender to the intersections location which, depending on the Threshold set, is then split, vertices inserted and elements merged within range of the manipulation [6].
Design note: Auto Merge does not automatically join intersections immediately upon being enabled, it has to be prompted through User action, which avoids issues caused by inadvertently merging every intersection found – excess geometry creation for example.
Important: Auto Merge is not a Boolean operation, it does not remove unwanted geometry – despite proper vertex placement [c], faces may not split and/or merge as expected so some coincidental or co-planar surfaces may remain [d], some clean up then being necessary.
Because merging in this context is selective and not a Boolean operation, it may mean some unwanted structure remains in place [c] despite the mesh being correctly processed [d], requiring some clean up after the fact.In Face select mode the ‘active’ selection [e] is biased towards merging into surrounding structure [f]. This means the order, or which face essentially cuts/merges into others, is determined by surface selection order, the last face being the active object around which merging occurs. To change the bias, change selection order.
When merging faces the order surfaces merge together is biased towards the active object, even in a group – the last element selected [e] becomes the focal point around which merging occurs, so one face might cut into another [f] or vice versa depending on selection order.


Auto Merge doesn’t merge intersections by default, they need to be prompted so Blender knows which elements to be included in the action – typically simply moving or manipulating a selection [5] is enough to initiate the operation, which then places the necessary vertices [6].
