Armature & Bone Basics (Skeletons) in Blender
Table of Contents
In Blender an Armature is a type of core object that can be used to control other objects using a skeleton structure. The following takes a look at the basics of what Armatures are and how they can be edited.
What Is An Armature
In Blender, an Armature is a type of editable object used to control other objects. This is typically done directly, by manipulating the Armature object itself, or indirectly using a bone or bones essentially contained within the Armature. In practice an Armature in Blender is functionally the same as the Skeleton object of other applications, the only difference being the label used to identify them.
Design note: although skeletal control systems are common between 3D applications, comparative functionality or compatibility will be subject to availability – some features may not be available when importing files from other software.
To add an Armature to a scene, from the Add [1] menu of the main 3D Viewport or Layout workspace, click Armature [2] – Add » Armature. An object will appear at the 3D Cursor [3] ready to be edited. This is the Armature object that can be selected and manipulated the same way as other objects while in Object Mode.
Design note: while in Object Mode, Armatures can be moved, rotated and scaled using the normal ‘transform’ tools (Move (G), Rotate (R) an Scale (S)). In Edit Mode, the Object itself as indicated by the Origin, stays put while bones that may be included can be moved and manipulated.
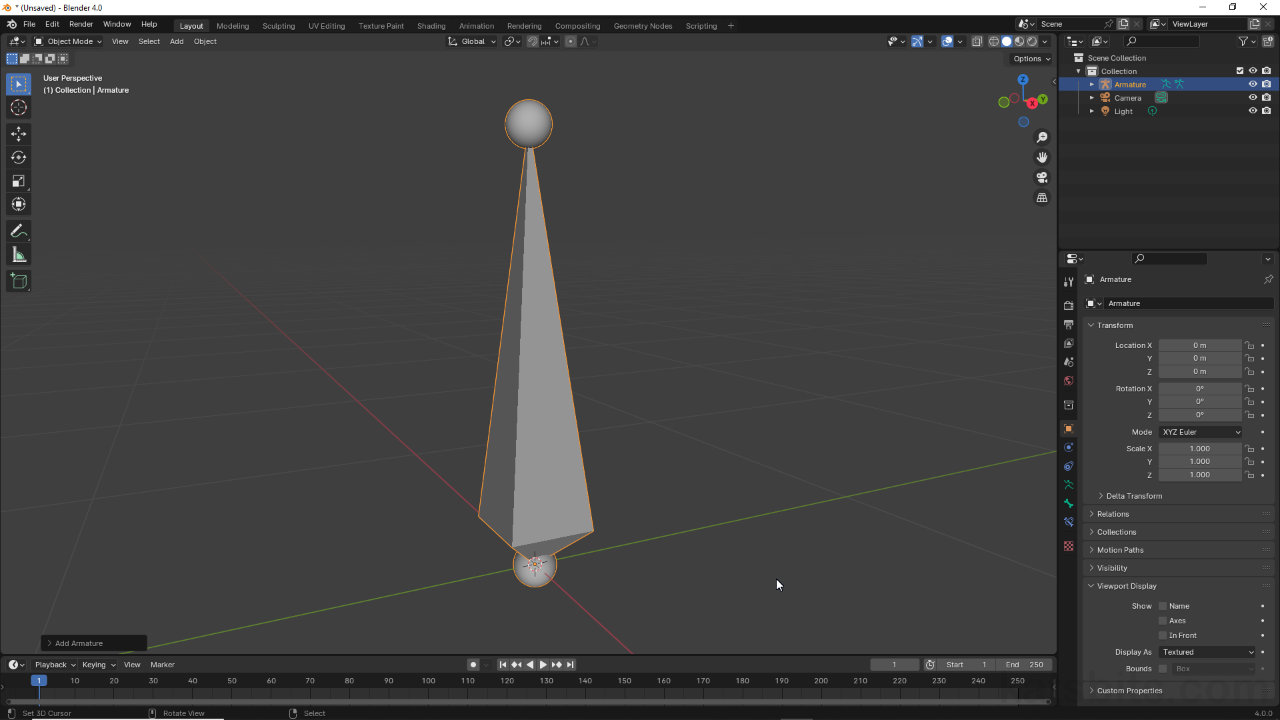
Important: the object that appears is actually a bone that represents the ‘root’ or ‘master’ bone of a skeleton [i]. If this is deleted, what remains is the Armature object itself [ii], essentially an identifier or container of sorts that has an Origin so it can be selected [iii] (in the Outliner, unless Origins (All) is enabled in Viewport Overlays) and positioned.
The initial object that appears [i] is actually a bone. If this is removed, what remains is the underlying object [ii], the ‘Armature’ as a datablock, that can still be selected, albeit from the Outliner [iii], and positioned as normal.
![[descriptive alt image text here]](https://www.katsbits.com/images/tutorials/armature/armature-no-bone.jpg)
![[descriptive alt image text here]](https://www.katsbits.com/images/tutorials/armature/add-armature.jpg)
Like most other objects in Blender, the Add menu [1] is where an Armature [2] can be dropped into a scene at the location of the 3D Cursor [3]. This initial placement includes a single ‘root’ bone.
What are Bones
When an Armature is dropped into the scene a single Bone is shown by default. In Object Mode this ‘root‘ or ‘master‘ bone represents the Armature as a selectable object that, depending on the Interaction Mode – Object Mode, Edit Mode (Tab) or Pose Mode (Ctrl + Tab | ![]() + Tab) – can be manipulated using the Transform Tools – Move, Rotate and Scale.
+ Tab) – can be manipulated using the Transform Tools – Move, Rotate and Scale.
Design note: when selecting an Armature in Object Mode, the Armature object itself is what’s selected; the bone that can be seen acts as a visual aid to facilitates this manipulation.
In Edit Mode (Tab) the initial bone can be used to form bone chains and eventually a skeleton. Bones in of themselves are initially shown as Octahedral shapes that have a top, middle and bottom. Standing up, the top is the thin end and referred to as the “Tail” [4], the bottom is the fat end and labelled “Head” [5] – this is also centred on the Armatures Origin – and finally the middle being the “Body” [6]. Selecting the Tail or Head, each can be manipulated independently of the other whereas selecting and manipulating Body moves the whole bone, Tail and Head included.

Bones comprise three independently selectable parts; the Tail [4], the Head [6] and the Body [6]. Each can be moved relative to what’s selected, and any relationships to other bones.
Bone Relations
While an Armature is an editable object, bones the components within, a skeleton is the totality of the included bones, their relationships and the organisational hierarchy this forms. As an Armature includes one bone by default, ‘root’, this sits at the top of the hierarchy; add more bones and they’ll essentially sit below this forming a Child » Parent relationship or bone chain, which in turn is based on bones having a Connected relationship, that is, bones are physically attached to one another such that the Head and Tail nodes become common shared pivots or points [7] around which bones articulate or can be manipulated; a characters arm for example, might including an upper arm, lower arm and hand bones that form a three-bone ‘chain’ that articulates based on the order or Parent » Child hierarchy between them.
Design note: by default bones are physically linked together, facilitating the chain, so manipulating one bone will also alter bones above or below the selection in the chain. This can be modified in Bone Properties by clicking the Connected checkbox under Relations (see below for more information).

The relationship between bones depends on how they are arranged and/or linked together. By default this means the Head and Tail nodes become common points [7] around which bones are manipulated as a group, one affecting others in a chain.
Editing Contexts
Armatures can be modified or manipulated as intact Objects in their own right, or by altering the individual bones they contain. In other words, depending on the editing context, the active Interaction Mode set – Object Mode, Edit Mode or Pose Mode – different aspects of an Armature, and how they are used or behave, can be changed.
Object Mode
For example, in Object Mode, the default context objects are dropped into a scene, Armatures are generally limited to Move (G), Scale (S) and Rotate (R) using the objects Origin as a focal point – rescaling an Armature to make it twice as large increases its size relative to the Origin [8] as the focus of the operation.
Design note: as the Transform Pivot Point can be changed to use other focal points, the various transform operations – Move, Scale, Rotate – will behave relative to the point set. Median Point is the default.
Highlight: in Object Mode selecting an Armature will highlight the object with an orange outline.

In Object Mode editing or manipulating an Armature is limited to Move, Rotate and Scale transforms, for example rotating uses the current Pivot Point [8] as the focus of the transformation.
Edit Mode
To edit the structure of the Armature, the bones it contains, Edit Mode (Tab) has to be used. Here, bones can be edited, deleted (X or Delete), added (Shift + A), extruded (E), duplicated (Shift + D), moved (G), scaled (S), rotated (R) or otherwise manipulated with or without affecting neighbouring bones. Here too the initial physical relationship between bones can be adjusted, disconnecting [9] them from one another [10] so they can moved freely when posed without directly affecting neighbouring bones.
Design note: changing bone relations in Edit Mode is generally limited to their being physically linked to each other. For complex relationships behaviour can be altered using various Modifiers and Bone Constraints (outside the scope of this tutorial).
Highlight: in Edit Mode bone selections are outlined yellow when the bones Body is clicked, or orange for Head and Tail nodes. The Armature object cannot be selected in Edit Mode.

Editing an Armature in Edit Mode allows bones to add, removed, repositioned or resized as part of a chain, or disconnected [9] so they can be manipulated independently [10] of other bones.
Pose Mode
In Pose Mode (Ctrl + Tab) the Armatures behaviour changes to facilitate the manipulation of individual bones for the creation of animated sequences – the Armature has control over a mesh that it can deform as the bones moved. Similar to Edit Mode, in Pose Mode the Armature itself cannot be modified, only bones, and this is generally limited to Move (G), Rotate (R) or Scale (S). In this context however, bones do behave in a slightly different way depending on the operation being performed, for example, scaling in Pose Mode changes the size of bones within a chain relative to the manipulated bone, which can change the apparent length of a bone chain [11], whereas scaling in Edit Mode resizes bones relative to the bone chain, maintaining its initial length [12]. In other words, modifying bones in Pose Mode can affect the bone chain itself, whereas as in Edit Mode only the bones are affected – bone Relations behave differently.
Design note: more complex articulation is possible using Modifiers that change the default, Connected, relationship between individuals bones, which can be reversed, targeted and otherwise controlled by other bones or objects that form part of a larger articulation ‘rig’.
Highlight: in Pose Mode bones will highlight with a blue outline when selected.

In Pose Mode bones can be selected and moved based on their relationship with each other, however, some changes propagate to other bones which in turn effect the larger bone chain [11] they might belong to, unlike changes made in Edit Mode [12].
Editing An Armature
As discussed above an Armature can be edited in a number of way to create a skeleton but how this is done depends on what’s selected, for example;
Extrude Bones
In Edit Mode, if the Body of a bone is select and Extrude used (Armature » Extrude, press E or use Toolbar tool), two new bones are created at each end, Tail and Head, if the selected bone is Connected to other bones. If not, extrusion defaults to the Tail node and the creation of a single bone.
Design note: clicking the Body element selects the entire bone, Tail, Body and Head.
Similarly, to extrude a new bone from a specific end of an existing bone, select the Tail and/or Head nodes then press E. Here Extrude creates a new bone using the selection as the point of origin regardless of their being a connection between other bones.
Design note: if multiple bones are selected extrusion only works on the Tail and Head/Tail connections; the bone at the start of a bone chain won’t receive a new bone unless the Head node is selected.


Extruding a bone can be done from the bone itself (image-top) which adds a bone at both ends, or from a single ‘node’ (image-bottom) which uses the selected node as the point of origin.
Add Bones
Another way to add bones in Edit Mode is to use Add. Here, individual bones are dropped into place intact without it being necessary to make a bone or bone node selection. This also means new bones will appear at the location of the 3D Cursor, and by default, are not connected to existing bones.
Design note: bones initially appear with the Head node centred on the 3D Cursor and upright, at 90°’s, relative to the XY grid floor regardless of the viewports orientation.
To drop in a new bone, whilst Armature is selected and in Edit Mode, from the Add menu click Single Bone [13] – Add » Single Bone – or use Shift + A. A new bone will appear at the 3D Cursor [14] that can then be manipulated [15] as normal.
Design note: when using Add, bones are not linked physically by default. To correct for this, select the new bone and in Bone Properties [i] set a Parent and then click Connected checkbox [ii] – enabling this may ‘deforms’ the bone to make the connection between the Head node of the new ‘Child‘ bone to the Tail node of the old ‘Parent‘ bone [iii]. One individual bone is added per ‘Add’.
New bones are not connected by default. In Bone Properties [i] this can be fixed by setting a Parent then enabling Connected [ii], which will deform the bone [iii] to physically link them together.


Individual bones can be added to an existing Armature using the Add option [13]. New bones then appear at the 3D Cursor [14] ready for further editing [15].
Duplicate Bones
An alternative to using Add to place new bones is to Duplicate. Here, bones are selected, individually or as part of a larger group, and then simply duplicated in-situ.
Important: Copy/Paste doesn’t work on bones, doing so will copy/paste the last active object, typically the Armature, or paste whatever is in the buffer/memory.
Design note: Duplicate differs from Add largely by also coping across any attributes the parent bones might have had; relationships, position, rotation, roll, etc.
To duplicate bones, make a selection in Edit Mode [16] and from the Armature menu click Duplicate – Armature » Duplicate (or Shift + D) [17]. Similar to duplication generally, this makes a copy of the initial selection that’s locked to, and that moves freely with, the mouse cursor. To release for editing click where the bone should be dropped [18], or press Esc to reset back to the same location as the original bone selection ready for further editing.

Duplicate is a way to copy existing bones including any attributes or properties. Make a bone selection [16] and then click Duplicate [17] in the Armature menu. A new bone(s) will appear [18], moving with the mouse cursor.
Bone Constraints
Where Add, Duplicate and Extrude are used to edit bones and their basic relationships from within an Armature (in Edit Mode), Bone Constraints (bone modifiers) change behaviours externally, that is, in Pose Mode they can be used to modify how bones behave in relation to themselves, the Armature they belong to, and even other objects, all without editing the underlying structure of a bone.
Important: whilst not specifically the subject of this tutorial, there are dozens of ‘constraints‘, each bringing a particular property or behaviour to bear. However, in this context they are generally categorised as; Constraints, which change Armature behaviour, and Bone Constraints that modify Bone behaviour. In other words; a Constraint is assigned to and affects an Armature; a Bone Constraint is assigned to and (generally) affects Bones. This difference essentially allows an Armature, as an Object, to control something else, versus an individual bone or bones within the same Armature acting as a control for other objects, elements or items.
For example, the default hieratical Parent » Child structure of a simple bone chain tends to be bottom up like so;
Root » Bone 1 » Bone 2 » Bone 3
With the assignment of an Inverse Kinematic (IK) modifier the structure is essentially reversed or ‘inverted’ like so;
Bone 3 » Bone 2 » Bone 1 » Root
In practice this then means, rather than Root controlling the movement of bones above it in the chain, with IK assigned to Bone 3, it now controls the chain, i.e. Bone 3 now moves/articulates bones below it.
Design note: depending on the Constraint and changes it makes to bone and/or Armature, the Head node of the Root bone tends to remain in place. In other words without constraint, if Root is manipulated, Bone 3 tends to follow relative to Root and other bones back up the chain, whereas with IK assigned to Bone 3, it can move freely but Root will stay rooted to the Armatures Origin – the Origin or Pivot Point of the Armature is not being changed (in this case).
To assign a Bone Constraint, with Armature in Pose Mode click a bone to select [19], then in Bone Constraints [20] click the Add Bone Constraints drop-down and select an option, e.g. Inverse Kinematics. A properties panel will typically appear where various options and setting can be changed that affect the selected bone or other objects.
Design note: some constraints may only be assignable to individual bones.

Bone Constraints can be used to modify bone behaviour without physically altering the Armature in Edit Mode, adding an Inverse Kinematic [20] for example, allows a bone chain to be controlled from the ‘end’ [19] rather than beginning.
