Toolkit – Accessory (Body-Part)
Table of Contents
Description
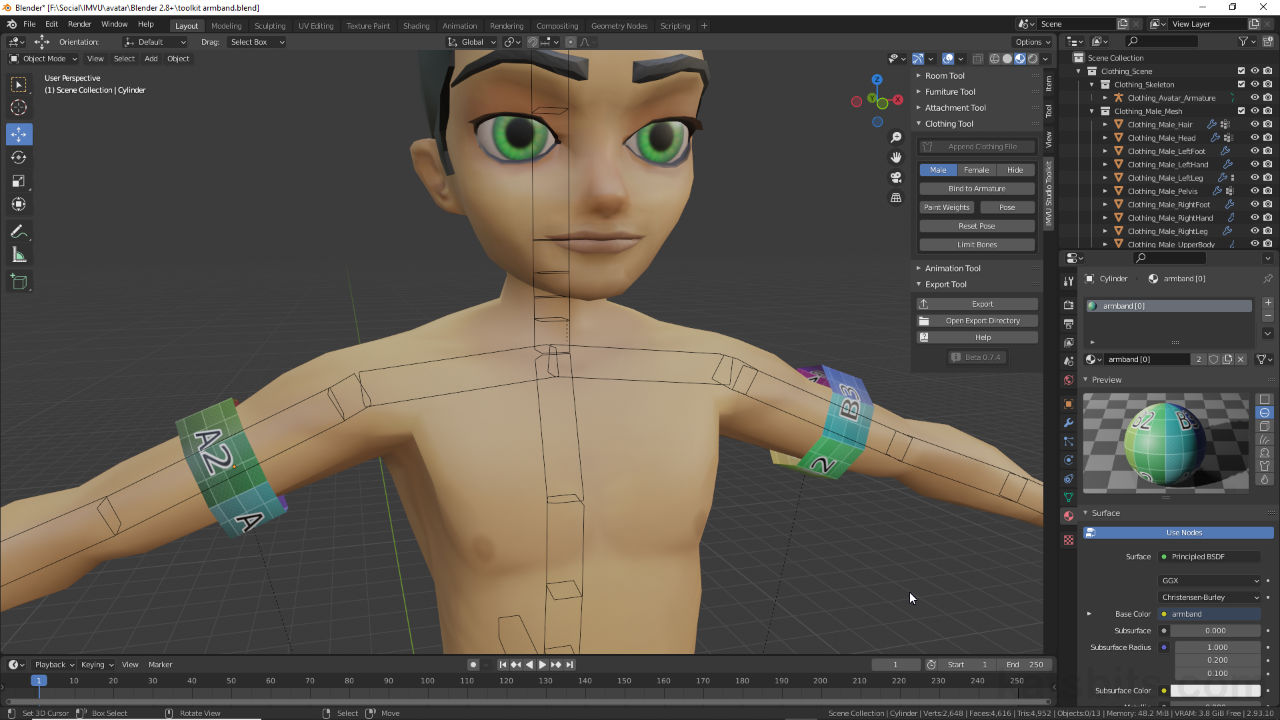
In this exercise we take a look at making an multi-boned accessory using IMVU Studio Toolkit for Blender (2.93 LTS). Essentially this is a body-part based accessory item. First, a Clothing Tool project is created around which the ‘accessory’ meshes are built (cylinders without caps in this example). These are appropriately shaped and positioned then given a shared Material assignment that allows for both meshes to utilise the same UV mapped image. Next, once the accessory items are made the Clothing Tool can be used to link them to the avatar skeleton by clicking Bind To Armature. Multiple bones will then influence the meshes, e.g. lfBicep and rtBicep respectively for each armband. Finally the project can be exported to FBX, again using the Toolkit (included exporter), and assembled in IMVU Studio (derived from Empty Clothing Top).
Duration: total c. 40 mins (00:40:00).
Info: 1080p.
Suitability: Beginner+.
Source: KatsBits – Toolkit Accessory Bodypart (2.5 MB, *.blend, *.fbx, *.png). Requires installation of the toolkit for Blender. Open in Blender 2.93 LTS (preferred) or above.
Product ID: Armbands (PID 61991640).
Design note: additional considerations to keep in mind when making body-part based accessory items for IMVU using the Toolkit;
Managing Vertex Groups
an easier way to correct vertex group assignments is delete all groups and then reassign only those needed. To do this, with object selected access the Vertex Groups section of Object Data Properties [1] and click the Vertex Group Specials button [2]. From the menu click Delete All Groups [3] (alternatively click the – button to the right of the aperture [negative/minus] to remove individually highlighted groups). This removes all listed groups and associations.
An easier way to sort out vertex group assignment issues, in Object Data Properties [1] access the Vertex Group Specials [2] menu and simply Delete All Groups [3] to clear the list.Manually Assigning Vertex Groups
To then assign the correct group to the mesh, click the + button [4] to add a new group then double-click to rename, e.g. lfBicep [5]. With mesh missing a group assignment selected, toggle into Edit Mode, highlight the new vertex group (i.e. lfBicep) and then click the Assign button [6] below the aperture. This assigns the group to the mesh that will now be controlled by the corresponding avatar bone.
A new, specific, vertex group can be created [4] (and renamed [5]) before being assigned to the mesh in Edit Mode by clicking Assign [6].IMVU Import & Mesh ID
To avoid issues importing into IMVU Studio preference should be to use the ‘Empty’ items, e.g. Empty Male Top as this corresponds to a ‘torso’ (Mesh ID 2) based accessory item for the male avatar, then during import set a higher Mesh ID to avoid overriding the default.
Important: in this context, making body-part based accessory items, Mesh ID’s are based on whether the incoming mesh is meant to replace an existing body part, e.g. “2” which replaces the ‘torso’, or they be used in conjunction with existing body parts, e.g. “11” or above for meshes that won’t override a body part.
For body-part based accessory items preference should be to derive from the corresponding ’empty’ clothing item, for ‘armbands’ that would be the fe/male top [7].


Timestamps
Time are approximate.
– 00:00 : Start/Summary/Setup.
– 02:00 : Meshing & Mirroring.
– 09:00 : Materials & UV Unwrapping.
– 17:00 : Toolkit Prep & Weight Painting.
– 31:00 : Export & Studio Assembly.
