Basic Principled BSDF
Table of Contents
In Blender the simplest Materials can be created using just two nodes, an Image Texture node linked to a Material Output node; the former references an image (generated, bitmap etc.), the latter is the output-to-screen element necessary for material display, a combination that approximates Blender Render style materials. In the 3D View, whilst this node set-up does result in images being shown, they appear flat lit (or full-bright), that is the mesh and UV mapped images don’t shade or shadow across surfaces, meshes or objects.
Important: shading and shadows are two distinct visual effects. Shading is a localised effect, it changes the way surfaces and objects ‘shade’ or darken in relation to light, emphasising the selected objects shape, form and depth in three-dimensional space. Shadows on the other hand generally darken scene objects with respect to one other and light sources. In essence shading does not propagate across to or influence the appearance of other objects, shadows do.

Basic materials with Image Texture and Material Output nodes display textured meshes in the 3D View flat-lit, essentially without shadow or shading (note the default cube to the left displaying shadows cast from the building mesh).
Principle BSDF
With this in mind, what the Principled BSDF node essentially does is add a set of baseline properties to the overall material that affect its final appearance, principally the options and settings formally available in Blender 2.79 and below as Material and Texture Properties, that is Diffuse and Specular values, Shading options, Influence settings and so on, all now largely available under or though Principled BSDF, alongside more advanced effects, Sheen, Normal etc.
Design note: using the Principled BSDF node essentially makes the material more receptive to various shader effects and properties, at the very least different types of ‘map’ (Specular, Metallic etc.), and scene lighting so objects don’t appear flat-lit or shadeless.

Principled BSDF shader options (and default values).
To use the Principled BSDF shader, in the 3D View select the object to be assigned, or already assigned, a material to expose associated nodes in the Shader Editor (opened directly or from within the Shading workspace). In the Shader Editor, from the Add menu select Shader then Principled BSDF – Add » Shader » Principled BSDF. When the node appears in the workspace position the node between the Image Texture and Material Output node (assuming a basic material). Left-click to drop it into place automatically connecting the node group together – Color output from Image Texture to Base Color input of Principled BSDF, BSDF output from Principled BSDF to Surface of Material Output.
Design note: if the nodes don’t automatically connect left-click drag the connection nodes to manually link them together.

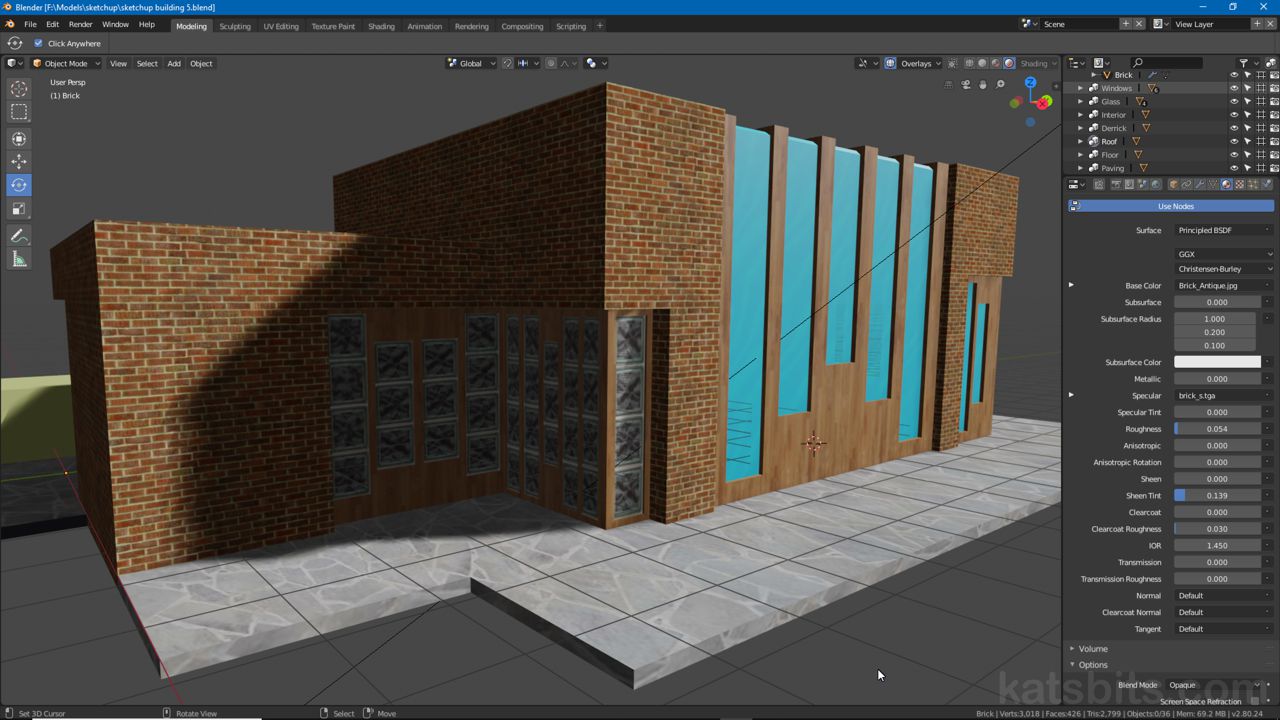
Without Principled BSDF mesh objects tend to appear flat-lit in the 3D View when using Rendered shading options (top-right) – shown above for example the main ‘brick’ material is flat-lit compared to other objects in the scene, windows, frames, ground etc.

Once a Principled BSDF node is dropped into place between Image Texture and Material Output surfaces assigned the material because more responsive to shading and cast and received shadows.
Shown above, the basic steps to add the Principled BSDF node to and existing material, a simple Image Texture and Material Output material, using the Shader Editor (whilst using the Shading workspace) – select Add » Shader » Principled BSDF.
Principle BSDF +Specular +Normal
In practice, to make a basic material that utilises the Principled BSDF node a simple ‘next gen’ material can be generated associating a specular image with the Specular setting, and a tangent space normal map with Normal. To do this, with an instance of the Principled BSDF node between the initial Image Texture and Material Output nodes ([Image Texture] Color » [Principled BSDF] Base Color | BSDF » [Material Output] Surface), add two more Image Texture nodes (Add » Texture » Image Texture). In one, generate, add or load the specular image, in the other the normal map – click the Browse image to be linked button to assign an already loaded image, the + New button to create a Generated image, or Open to load an external bitmap. Each Image Texture node heading/title will change to reflect the image referenced by the node.
Design note: normal maps may appear inverted when used inside Blender. To fix this invert either/or/both the green or red channel in an image editor (typically only one channel needs to be flipped).
Next add a Normal Map node. Click Add and select Vector, from the list click Normal Map – Add » Vector » Normal Map. Place this between the Image Texture Node housing the normal map image and Principled BSDF. Check Tangent Space is set then link the nodes together; the Normal output from the Normal Map node [2] links to the Normal input of Principled BSDF [3], the Color output from the Image Texture node [1] referencing the normal map connects to the Color input of Normal Map [2]. For the specular map simply link Color output from its Image Texture node [1] to the Specular input of the Principled BSDF node [3].
Design note: the images used to control specular highlights are typically grey-scale but can be coloured or colour tinted depending on the destination/where meshes/models are to be used; game engines for example may only permit the use of grey-scale single channel (8 bit) images which Blender should have few issues using (if any).

Aside from essentially enabling shading and shadows in Rendered mode using the Principled BSDF node also allows for the addition of specular and normal maps (as images in the above). Simply drop in an Image texture node for each bitmap [1], a Normal Map node [2], then link everything together – specular [1] » [3], normal map [1] » [2] » [3].

A before (left) and after (right) example of a basic ‘brick’ material using Principled BSDF with specular and normal maps controlled using images.
