Marvelous Designer, Material & UV Prep in Blender
Table of Contents
Description
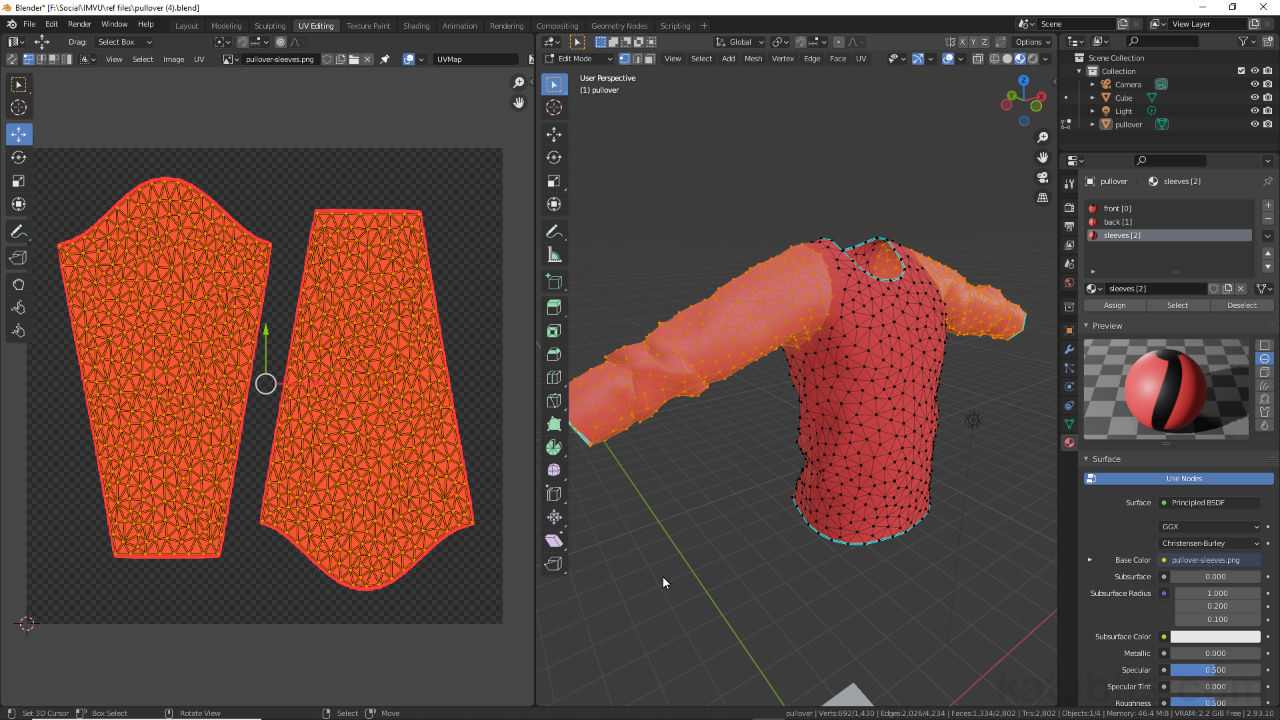
Once clothing has been imported and scaled approximately to size in Blender, some adjustment is typically needed for compatibility with IMVU and in particular IMVU Studio Toolkit. Generally speaking this means assigning additional materials and modifying the objects UVs. In Material Properties then, one or more material instances are created and optionally coloured for ease of recognition (no images assignments yet), each assigned to the mesh, using the UV mapping imported with the mesh as a selection device, in UV Editing Workspace – sections are selected and materials assigned to those selections. Once this is done materials can be finalised with images assigned to replace the default imported with the mesh.
Duration: total c. 15 mins (00:15:00).
Info: 1080p.
Suitability: Beginner+.
Source: (see below).
Product ID: n/a.
Download: ZIP files include both male and female avatars plus textures;
• Avatar Starter Files | c. 1.5 MB.
• Marvelous Designer *.zprj and *.avt files | c. 2 MB.
Design note: when using Marvelous Design to make clothing for IMVU, keep the following in mind;
Marvelous Designer, Materials & UVs
When exporting from Marvelous Designer at least one material should be assigned to the mesh beforehand. However, when doing this any images that might be export along side the mesh may be mapped in a way that it’s not easy to override or replace in Blender (as discussed in the video above). To mitigate this multiple materials can be assigned to the item in Marvelous Designer [1] so each pattern segment or segment grouping uses its own Fabric [2] (material), which is then exported as a separate material and image [3] that will then be properly mapped to the mesh in Blender [4].
To aid the prep process, in Marvelous Designer assign additional Fabric materials [1] to the various segments or segment groups of an item [2]…
… this will then import into Blender with multiple materials [3], each with their own corresponding image asset [4].Marvelous Designer & UV Layout
In Marvelous Designer the UVs are laid out such that each major area occupies a quadrant of the UV Editor grid. Doing this serves a number of purposes; 1) each UV section corresponds to a defined section of the resulting mesh making selection and editing easier in Blender, 2) the grid defines the available texture space [5], one grid unit corresponding to an equivalent image assignment in IMVU i.e. 512 x 512, so UV positioning set in Marvelous Designer can be used as is, and 3) images exported from Marvelous Designer are defined by the UVs, their size and position within a quadrant [6], that occupancy then forming the basis upon which images are generated (including transparency or alpha) [7].
UV layout in Marvelous Designer also determines texture space usage [5] and image placement [6], how exported assets map to the item.
Image generated by Marvelous Designer upon export, based on clothing segment UVs, their size and position duplicated relative to the generated asset [7].


Timestamps
Times are approximate;
– n/a
