IMVU Studio & Normal Map Basics
Table of Contents
Description & Info
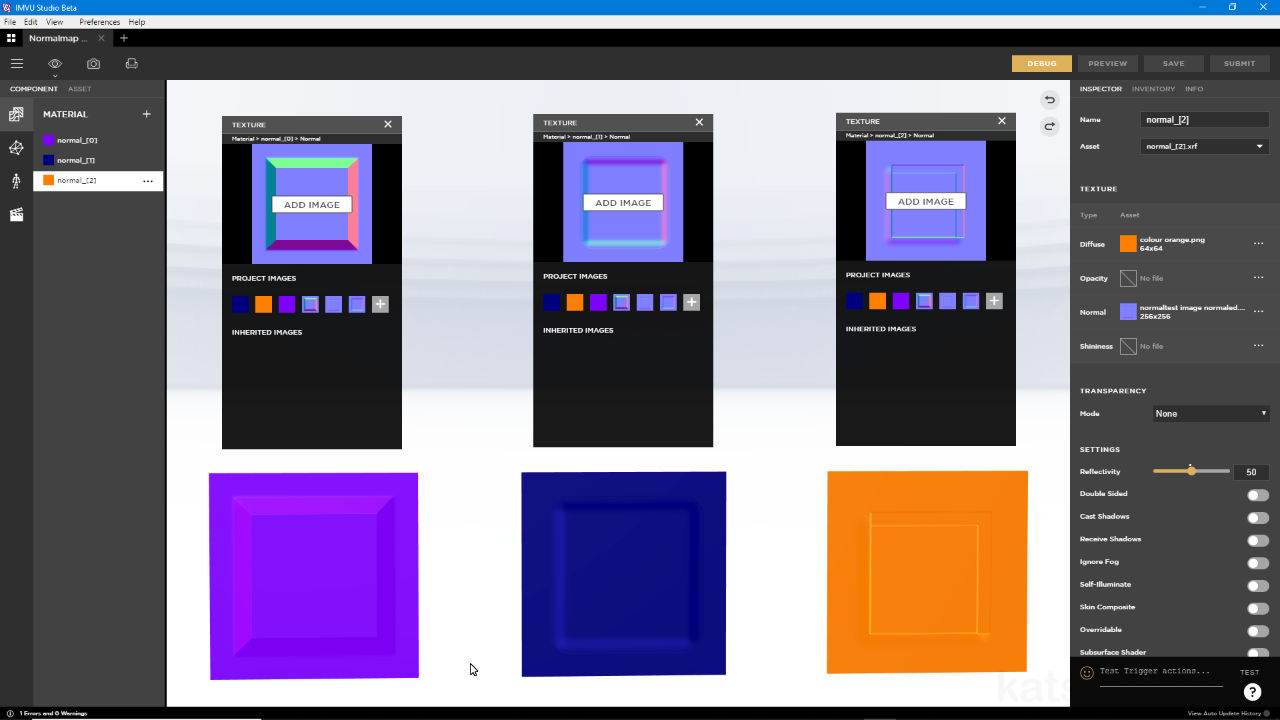
Normal maps are a relatively simply way to describe three-dimensional structure using a image. This is done, essentially, by representing and interpreting three-dimensional structures as, and from, colour. In this video we take a look at three different ways to make normal maps; 1) a 3D mesh in Blender, 2) a painted greyscale image and 3) an image representing a typical photograph. While each process results in a functional normal map that can be used in IMVU Studio, they are not equally as effective.
Duration c. 15 mins (15:00).
Info: 1080p | c. 40 MB.
Source: KatsBits – Normal Test (zip c. 250KB – *.fbx, *.blend, *.png, *.psd).
Product ID: n/a
Design note: the most effective way to create a normal map is to use a high-resolution mesh to ‘bake’ an image from. In Blender, but this also applies to other 3D applications, a high-resolution mesh is built to include core detailing that’s to be represented by the normal map, from simple fabric seams and cloth patterns, to folds and deeper details. A corresponding low resolution mesh is also created that has a material and image assignment, and is UV unwrapped and mapped, defining where the and how the high-resolution structure will be rendered. This process produces the most accurate type of normal map.
• for more on Normal Maps and IMVU Studio see here.
The best type of normal map is generated from high-resolution meshes that are essentially rendered down to an image based normal map. This is the most accurate type of normal map but require knowledge of 3D to create.The next best approach to creating a normal map is to convert a grey-scale image where black equals depth, white height, with tonal (grey) intermediaries. Here shapes can be drawn out or painted using tones of grey to represent ‘fake’ three-dimensional structure that can then be converted to a normal map using a filter, plugin or app. Whilst not as accurate as texture baking from a high-resolution mesh, the results can adequate.
Producing a normal map from an image is relatively straight forward but does require some pre-planning; although working in grey-scale is similar to painting shading and shadows, tonal variance in this context more accurately represents structure rather than the play of light.And finally, similar to the above, a functional normal map can be generated passing an unmodified colour image or photograph through the normalising filter. Doing this without compensating to ensure proper compliance to the black equals depth, white height rule however, means shadow, shading and darker colours being incorrectly interpreted as representing depth, for the purpose of a normal map, rather than shade, shadows or darker colours. While passing a photo or other image through the filter does create a normal map it won’t behave properly with respect to normal map function and should be avoided as much as possible.
Similar to converting a grey-scale image, processing photos will produce a normal map but as shadows, shading and colour is incorrectly interpreted as normalised structure, the resulting normal map won’t look as good as expected.


