Import Minecraft Worlds or Blocks into Blender
Table of Contents
Description
Minecraft Bedrock includes a little known feature that allows map sections, or block creations/collections, to be exported directly from the game as 3D models. These can then be imported, fully textured, into a 3D application like Blender. First a section of a map has to be defined using a special in-game tool and exported, then the resulting 3D object can be directly imported into Blender, textured and ready for editing, lighting or rendering.
Duration: total c. 15 mins (00:15:00).
Info: 1080p.
Suitability: Beginner+.
Source: KatsBits – Minecraft World Export (c. 10 MB | *.blend, *.fbx, *.png).
Product ID: n/a.
Design note: additional considerations when exporting worlds from Minecraft and importing them into Blender.
Important: Minecraft needs to be in Creative game mode with Cheats enabled to access commands. If wanting to export a block collection from an ‘active’ world be sure to make a copy of that world and edit that duplicate so as to not lose achievements or other gameplay rewards/awards.Structure Block
Exporting map sections or block creations from Minecraft utilises a special ‘editor’ block called a structure_block. Its not ordinarily available as a placeable item so has to be added as a ‘command’. To do this, press T to open the chat/command input field, type the following and press Enter;
/give @p structure_blockThis drops the structure block into the inventory as a usable item that can be placed and ‘used’ the same way as the crafting table or other higher-level crafting blocks by right-clicking it. Doing this opens the Structure Block Editor.
The Structure Block [1] is a special ‘command only’ block that appears in the Users inventory once added. It can be used in similar ways to other ‘high-level’ blocks types – simply right-click it.Structure Block Editor
The Structure Block Editor is an in-game editor that allows regions of a world to be selected on the X, Y and Z axes (up/down, left/right, front/back) relative to the blocks position in the world. This creates a boundary or region that captures whatever world objects are inside it. To use it, set;
• Mode: to 3D Export [2].
• Size on the X, Y and Z – 1 unit = 1 block [3].
• Offset on the X, Y and Z – the structure block is the selection regions origin.Once an area has been selected it can be exported clicking the Export button. This opens Windows File Explorer where the save location can be set, and file saved as a *.glb package.
Important: the editor only captures static ‘world’ objects and elements, characters, mods, and other ‘dynamic’ objects won’t be included.
To exported block selections the Structure Block Editor needs to be in 3D Export mode [2] – others are available. Here the size (dimension) of the selection area, and its position relative to the structure block itself can be set [3] before export [4] as a *.glb package.Mesh Optimisation
Exporting block selections from Minecraft using the Structure Block Editor creates a ‘unified’ or ‘game-ready’ 3D object. In other words, the resulting *.glb file is heavily optimised. In practice this means that, rather than capturing each individual block contained within the selection boundary (region), only visible surfaces are saved, surfaces or structures hidden from view or not visible are excluded. In essence the exported glb model is a skin.
Important: to maintain Minecraft’s flat shading, block surfaces are physically Split apart into triangulated square plains.Aside: exporting every individual block within a selection can quickly create a glb file that is excessively large and difficult to manage, a relatively small in-game area that’s 10 x 10 x 10 on the X, Y and Z for example, contains 1000 blocks, each potentially having its own set of associated assets. Opened in Blender, this small area export will be a *.blend file that has 1,000 objects, each likely to have its own properties and associated assets. For Blender, the more objects there are, the slower the application becomes (performance degradation is tied more closely to the number of objects being managed than it is to how many polygons the project contains).
World or block selections exported from Minecraft only include what’s visible to the player. In Blender this means objects are essentially ‘skins’, there is nothing inside them as might be expected.Texture Optimisation
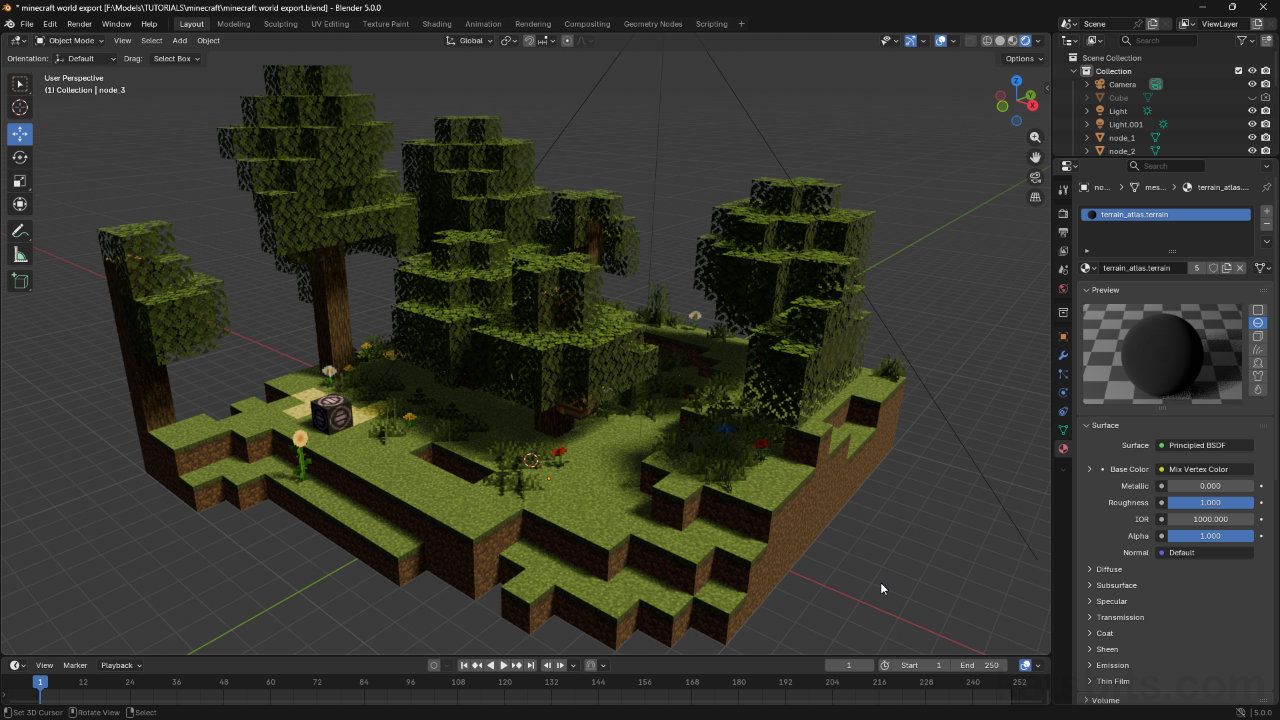
Textures are similarly optimised. Rather than being included in the exported *.glb as individual assets a single material sheet or texture atlas is included, typically a 2048 x 2048 pixels *.png, meshes then being UV mapped to their respective ‘unit’ within the image.
Aside: depending on the blocks captured, exports from Minecraft will include two versions of the same texture atlas;
• Image_1 = standard textures
• Image_0 = transparent textures
Exporting block selections from Minecraft, a texture atlas containing all the default assets is included – each block texture is mapped to a specific area of the image.UV Optimisation
Hand-in-hand with the use of a texture atlas, UVs are also optimised in that the UV mapping for each block type, e.g. grass, is mapped to the same segment of the atlas [5], in other words the UVs associated with faces textured with ‘dirt/grass’ trim, will be overlayed, or layered, on top of one another.
Aside: as a consequence of the Minecraft programmatically minimising pattern repetition due to tiling the same image over large areas, the UVs for a given selection may not all use the same orientation on the texture atlas.
UVs are mapped based on block type so all ‘grass’ will use, be UV mapped, the same dedicated area of the texture atlas [5] – TNT is shown ‘incorrectly’ mapped above to illustrate this.Editing in Blender
Depending on the reason for exporting blocks from Minecraft, imported meshes may needs some basic prep before they can be edited; Merged by Distance and Triangles to Quads. For each imported part, switch to Edit Mode and select everything, A. Next, from the Mesh menu find Clean Up, then choose Merge by Distance – Mesh » Clean Up » Merge by Distance. This ‘merges’ everything together into a single closed surface, no co-located or coincidental duplicate vertices.
Aside: the two mesh-prep steps described here can be carried out in any order. The result is the same.Next, with everything selected, from the Face menu, select Triangles to Quads – Face » Triangles to Quads. This merges, or converts, what is effectively a triangle-soup into a series of faces or quads, two triangles per face. With both steps done, editing should now be much easier.
Aside: the imported mesh, once fully prepped, should maintain its flat shading, that is, each linear surface will shaded flat independently of surrounding surface plains. To ensure this is maintained manually, in Object Mode, from the Object menu select Shade Flat – Object » Shade Flat.
To make editing the imported Minecraft block section easier it’s best to clean up the mesh using Merge by Distance [6] to remove duplicate or collocated vertices…
… and then merges triangles together using Triangles to Quads [7]. This then means a loop cut for example, will flow around the mesh instead of being blocked by triangle edges or physical edge splits.Lighting & Rendering
Block selections exported from Minecraft doesn’t including lighting so this needs to be added manually in Blender. Depending on the scene created, this can be done adding a Light source, for example a Sun [8], to approximate directional sunlight style illumination. While in Object Mode, from the Add menu select Light, then the type of light to place, e.g. Sun – Add » Light » Sun.
Aside: there’s a unit scale difference between Minecraft and Blender that influences light behaviour. When initially added the lights default Strength may too high so can be reduced appropriately.Adding a Sun however, introduces strong directional lighting, shadows and mesh shading. A simple fix for this is to add a second sun [9] and rotate it 180 degrees to the primary light so the two are essentially pointing in the opposite direction. Selecting the secondary light, its click the Shadow checkbox to disable shadows – only one source in this instance needs to cast shadows. Then set the Color to use a different or darker shade or tone.
Minecraft exports exclude lights or lighting so this needs to be added in Blender. Depending on the scene, for outdoors this can be done using Sun [8] that has an ‘opposite’ [9] to offset how dark shadows can be.Pixel Shadows
Blenders default settings for image rendering assumes soft shadows which can look out of place for a Minecraft project. To fix this so shadows render as ‘pixels’ or blocky as they are in Minecraft, in Render properties [10] check that Shadows is enabled, then set Rays and Steps [11] to “1” respectively. This forces both the 3D viewport and the image renderer to parse shadows simplistically, ‘pixelated’, without blur or anti-aliasing.
Aside: shadows will essentially ‘LOD’ (level of detail) in the 3D viewport as an optimisation – the further away from the scene the viewport camera is from an object, the simpler shadows appear.
To replicate Minecraft ‘pixel shadows’ in Blender, in Render properties [10], adjust Rays and Steps [11] to then force Blender to render shadows simplistically [12].Android/iOS Minecraft
For Minecraft on Android or Apple/iOS devices, while it is possible to add and utilise the structure block and the block editor using the procedure described above, there are no options to export selections as a 3D model.
Aside: there may be a way to save, transfer and load selections created on Android and iOS devices but doing so depends being able to find the location Minecraft stores game data, and being able to access it; for (Android or Apple) devices, Minecraft saves world and structure data to the same ‘internal’ location, which is encrypted and not readily accessible.
Mobile devices, Android and iOS, do grant access to use the structure block but selections cannot be exported as 3D models.


Timestamps
Times are approximate;
– 00:00 : Overview & Setup
– 02:00 : World Editor & Export
– 05:00 : Blender Import
– 08:00 : Lights & Rendering
– 11:00 : UVs
