Make Rooms & Scenes for Frenzoo using Blender
If you’ve used Blender 3D before to make furniture items for Frenzoo, then moving up to making rooms and scenes should be a much easier to do as you’ll already be familiar with the number of prerequisites necessary to both ‘types’ of product.
If you’ve not tried furniture items yet it’s recommended you give that a go; although Frenzoo furniture and rooms both use similar principles, rooms are a bit more complicated and involved than furniture so it’s best to understand the basics associated with simpler objects before trying your hand at more complex objects.
With that out of the way, as with the previous tutorial you’ll need to understand the basics of using Blender 3D as it’s not within the remit of this material to go into any great detail regards to how Blender is used. Instead, the tutorial will discuss the preparatory process, export from Blender and subsequent conversion of the assets to Frenzoo’s "efa" format, ready for loading as a usable item in the chat client.
The following requires Blender 2.48.1 or above.
Global Scene Scale & Grid Size
The first thing to do before starting any work, ideally, should be to set up Blenders global scale by changing the "Grid" settings in the "View Properties" panel.
To open the "View Properties" panel click "View » View Properties". In the "Grid" section change "Spacing:" and "Divisions:" to "10" (or multiples of it the object is large). Increase "Clip End:" to "1000" or as far as it will go (left click drag) if making a very large scene – an outdoor area for example. (Please see note in Conclusion at the end of this tutorial).

Setting up Blender grid settings before making a Frenzoo room
Required Objects for Frenzoo Rooms
Making a simple (non-animated) room for Frenzoo in Blender requires a few necessary items if the scene is to work correctly. Similar to furniture, the basics include a couple of extra room specific objects;
- Avatar ‘pose’ spots.
- Avatar ‘start’ spots.
- A ‘floor’ mesh.
- The ‘room’ itself.
Other items can be used but they’re considered ‘optional’ and not an absolute necessity for making fully functional rooms. These include;
- Furniture meshes.
- Additional ‘Attach Mesh’ surfaces.
The image below shows a simple cube room broken down into sections alongside the required and some optional items, as outlined above, all of which have been sized relative to the Frenzoo avatar dummy helpers so as to make sure everything is correctly proportioned and positioned. We’re going to look at each in turn. First the mesh objects.
 objects")
Frenzoo rooms have a similar requirement to furniture items; a mesh, avatar spots and ‘attach mesh’ (AM_) objects
Rooms & ‘Attach Mesh’ Surfaces
In Frenzoo meshes can perform one or two functions, it can be just a surface – a wall – that looks good, with lots of interesting details (modeled or textured). Or it can be that same wall with the additionally ability to act as a surface onto which other objects can be ‘attached’. These are called "Attach Mesh" surfaces and are required any time you want to ‘attach’ objects to each other. As with furniture items, rooms that use attach surfaces need to use the "AM_" object name prefix.
Design note: it’s usually best to combine AM_ objects together into a single object as there is a limit on the number of meshes available for use as attach surfaces.
For example, shown below is the room broken down into its basic components, one of these being a ‘wall’ onto which other items can attach. In the "Links and Materials" panel of the Edit buttons ("F9"), the "OB:" text box displays the name given to this mesh object as "wall". For it to work correctly as an ‘Attach Mesh‘ in Frenzoo it needs the "AM_" prefix placed in front of the name thus, "AM_walls". Any surface can be treated in this way so long as the general caveats are observed as listed by Frenzoo here. There is one exception to this though and that’s flooring.
 objects if necessary")
All other surfaces can be marked as Attach Mesh ("AM_") objects if necessary
Rooms & ‘Floor’ Surfaces
Although, as mentioned above, the "AM_" prefix is a generic surface tag that can be applied to any surface, there is one exception to this and that’s by way of ‘floor’ objects; Frenzoo needs at least one of these surface so it knows where to place furniture items. And although objects that form this surface can be given any name, for it to correctly function inside the client it must be prefixed with "FL_". In other words an object currently named "floor" would need to be changed to "FL_floor".
Design note: as with AM_ surfaces, it’s best to combine FL_ surfaces into a single mesh where-ever possible due to the limitation applicable to Frenzoo rooms and scenes.

A ‘floor’ mesh is required, prefixed with "FL_"
Avatar ‘Pose’ and ‘Start’ Spots
Rooms and scenes in Frenzoo make use of two types of avatar locators; ‘start spots‘ and ‘pose spots‘. Start spots are required items for rooms, otherwise the rooms won’t work, limited to a minimum fifteen (15) spots up to a maximum of twenty (20). Pose spots on the other hand are optional and subject to a maximum number of one hundred (100 – includes any start spots) per room/scene.
Both are created from the use of an "Empty" in Blender, the distinction between them being a object name prefix; start spots require "SPS_" as the prefix; avatar spots require "SP_". Additionally, like other items the ‘name‘ "SPS_" and "SP_" prefix can be anything (what the item was called) although it’s a good idea to make sure to use a unique ‘identifier’ when more than one of a particular type of spot is used. For example, several ‘start’ spots could be named as follows;
- SPS_avispot1
- SPS_avispot2
- …
- SPS_avispot15
Additionally ‘pose’ spots could be sequentially named as follows;
- SP_avispot1
- SP_avispot2
- …
- SP_avispot100
Avoid or clean out the automatic numbering Blender does when duplicating objects, ".001", ".004" and so on, will be sequentially appended to the name of an object as each is subsequently copied. Whilst they don’t explicitly cause problems when exporting to Collada, it’s best to remove them or at least remove the ".", for example "SPS_start.001" might become "SPS_start001".

Avatar spot prefixed with "SP_"

Avatar spot prefixed with "SPS_"
To add the Empty’s press the "Space Bar" then select "Add » Empty" from the pop-up menu. Place a couple of them into the scene, press "F9" to make sure the Edit buttons window is visible, then in the "Links and Materials" panel click in the "OB:" text box and edit/change the name present to reflect the function of the Empty as outlined above.
Object Center & Origin Points
Rooms, like furniture items, need to be properly centred on the grid in Blender because of the way Frenzoo works when loading furniture items into a scene which, by default, appear at the physical origin point of the mesh – the spot shown in Blender as a pink sphere when a mesh object is select (see below).
What this means is that depending on the physical structure and design of the mesh, the part that’s used as the main area where furniture is to be placed and general interaction carried out, ideally needs to be centred on Blenders "0,0,0" grid centre point (where the green and red line intersect on the grid). This also means everything else that constitutes the entire scene needs to be centred in this way as well. In the example shown below a set of mesh objects used as static furniture need to be re-centred on the grid else come time to export the objects will be placed relative to their current origin points and not that of the entire scene.
To address this issue use the "View Properties" panel (if it’s not visible open it by clicking "View » View Properties") to accurately position the cursor at the centre of the grid by changing the "3D Cursor" "X:", "Y:", and "Z:" values to "0.000"; the cursor should jump as the values change. Once done select the objects that need to be re centred and click "Center Cursor" in the "Mesh" panel of the Edit buttons ("F9"), the little pink dots will relocate to the cursor.

A collection of static furniture objects that need to have their centre point of origin relocated to Blenders "0,0,0" grid centre

Using the "View Properties" panel to accurately position the 3D cursor

Once all objects are selected click "Center Cursor" to relocate object origin points
The same is true of all mesh objects in a scene, including the ‘room’ itself, which has to undergo the same process of origin point relocation. Shown below for example, is the sample room composed of three separate sections – ‘floor’, ‘walls’ and ‘ceiling – for which the origin points are in different locations. After repositioning the cursor they can be centred on grid "0,0,0", making them ready for use in Frenzoo.

A simple room composed of three parts, each of which has a different origin point location that needs to be changed

Room objects after changing origin point locations
Materials & Joining Multiple Objects Together
When making room or scene content for Frenzoo it’s important to keep in mind that materials, textures and images are assigned to on a per-object basis; if several items share the same material, texture or image it’ll break in Frenzoo’s client (it’ll appear as a white un textured surface in Frenzoo). To get round this problem objects need joined together so just one material is associated with a single individual object.
Shown below for example are some objects that form a set of static furniture object for the sample room. Each is an individual object using the same material. This means that although there is just the one single material (‘datablock’) called "seatmarkers", there are in fact several links to that material; it’s being used for several ‘instances‘ or ‘iterations‘ of the original material. This will cause problems if exported like this and needs to be fixed by joining the objects together.
To do this, first make sure to be in Object mode, hold the "Shift" key down whilst right-mouse clicking the objects that need to be joined, then press "Ctrl+J". Click "Join Selected Meshes" – note that the origin point of the objects will then be that of the last object selected so it may need to be repositioned as explained above. This needs to be done for all objects that are similarly separated.

Several individual objects using the same material and texture

Wireframe of the above to highlight the individual objects

Objects are combined into a single mesh because they use the same material
Materials and ‘Multiple’ Materials per Object
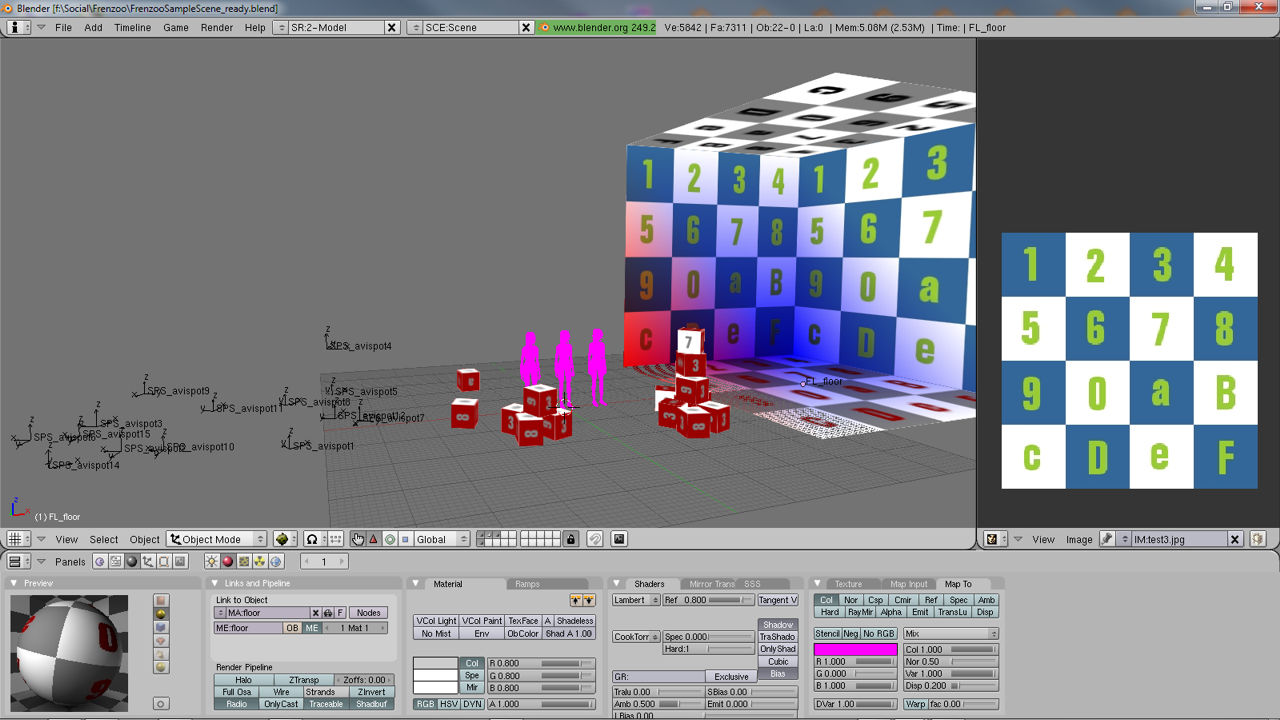
In the same way that meshes need to be joined together to form a single object, materials themselves also need to be treated in a similar fashion. Usually the result of joining meshes, it’s often the case when making content, that objects have more than a one material applied referencing the same UVW mapped texture image. As with exporting multiple objects, exporting objects with multiple materials like this will ‘break’ the product in Frenzoo client where it’ll appear white. To fix this, the "Links and Materials" panel has to be used.
Whilst in Object mode, make sure the Edit buttons are visible ("F9") so that when an object is selected the material assignment ‘index’ section is visible – this shows the number of materials the selected object has applied to it. In the example below it’s currently displaying two materials indicated by the numbers "2 Mat 2" with the currently ‘active’ (as in selected) material showing as a light blue colour sampler. As these two materials use the same texture image (which is also the same image UVW mapped to the object) the unused or ‘dead’ material references need to be removed.
To do this, click the object to select it (whilst in Object mode), press either the left of right hand arrows either side of the number indicator ("[n] Mat [n]") to select the unused materials and then press the "Delete" button to remove it. Repeat for each material until only a single reference is left; one material must be present on the mesh.

An single object UVW mapped with a single texture…

… but using more than one material; the unused references need to be removed so only a single material remains
Materials and "Map Input" Settings
As with furniture items, when applying material to any mesh based object, make sure to be using the correct "Map Input", namely "UV" and not "Orco" which Blender defaults to. In the "Shading" buttons ("F5") find the "Map Input" panel and click the "UV" button. Do this for all materials.

Materials and map input settings, make sure "UV" is selected
Preparing Room for Export to Collada
Once all the separate objects that go into making a room are correctly set up with the right name prefixes, material set up and object consolidation, it’s time to ready the entire scene for export to Collada. Shown below are the objects used in the sample scene; the main room mesh composed of three separate sections – "FL_floor", "AM_walls" and "AM_ceiling"; the static ‘furniture’ mesh; an avatar starting spot Empty "SPS_avispot1" (minimum of 15, excluding any optional SP_ markers). Material assignments have been checked and each separate mesh object uses a single material that references a unique texture and image.
Design note: it’s important to note here that the scene itself must remain composed of separate elements, joining things together will delete, change or modify information Frenzoo requires for proper functionality in the client, especially where ‘sticky’ (attach mesh) surfaces are concerned with regards to the placement of furniture items.
So far so good, at this point rooms go through a similar preparatory process as furniture items, namely "triangulation", "smoothing" and "mesh set".

The objects of the sample room collected together and ready to export to Collada
")
Showing the different textures and materials assigned to each item of the room (pink Frenzoo avatars are shown for size only and are not exported)
Triangulation Before Export
Triangulation is best done before export and by manually processing each mesh; using the export script to automatically do this as part of the process usually results in faces flipped at odd angles, particularly on round or organic shapes. It also needs to be done to all mesh objects.
To triangulate the mesh, enter Edit mode ("TAB"), select all ("A") and then press "Ctrl+T" which should result in all the faces of the mesh splitting along the diagonal as shown below. If doing this on a complex model you see faces cave inwards, select the offending faces ("Shift+RMB") and use "Ctrl+Shift+F" to ‘flip’ the faces around to fix the problem.

Meshes by default are made from a series of square surfaces called "quads"…

…these need to be broken down into their basic parts, triangles
Mesh Smoothing (smooth groups)
‘As with furniture items, whether ‘Mesh Smoothing‘ (‘smooth groups‘) is a used will depend a great deal on the physical characteristics of the model being made. The sample room for example is a box so it’s edges need to be ‘hard’ that way the viewer gets a ‘valid’ impression that a corner exits where one is supposed to be. Round, curved or organic shapes on the other hand, require smoothing so the mesh presents the proper impression that the surface is indeed curved due to the distribution of lighting across smoothed surfaces.
To add smoothing to an object you need to be in Object mode. Select the item in question and make sure the Edit buttons window is visible ("F9"). Press the "Set Smooth" button in the "Link and Materials" panel.
Design note: If you need to control smoothing, i.e. you need a hard edge on an object somewhere, switch to Edit mode and then switch "Select mode" to "Edges" ("Ctrl+TAB", select "Edges" from the pop-up). Once in that selection mode RMB click the edges you need to be ‘hard’ and press "Ctrl+E", from the pop-up select "Make Sharp". Exit Edit mode once done to find ‘marked’ edges sharp/hard.

Hard edges on models by using "Set Solid"

‘Softening’ the appearance of meshes using "Set Smooth"
Apply ObData Mesh Set (apply rot/size)
This is an essential step that needs to be carried out on all mesh objects before export to ensure any rotational, scaling or positional changes made in Blender when putting a product together aren’t lost during export because of the way the process lock onto the original positional data held in the objects data.
To fix this, select the mesh objects – "A" to toggle select/deselect, or "B" to loop select objects – and then press "Ctrl+A". From the pop-up select "Scale and Rotation to ObData" to ‘set’ the position of the selected objects. Now on export, the objects will retain their ‘correct’ position relative to the Blender file.

Make sure to ‘set’ the scale and position of all mesh object before export
Exporting Rooms to Collada & Frenzoo
Exporting to Collada is relatively straightforward. Press "A" to "Select All" the objects in the scene, or hold "Shift" and right-click each object in turn making sure to select a mesh object last (typically the "FL_" mesh), this just ensures that the scene is exported relative to what should be, the "0,0,0" position of that objects origin point. Then simple click "File » Export » Collada 1.4". Review the check list below to make sure nothing obvious has been missed before exporting.
- Meshes triangulated and smoothed where appropriate.
- Meshes have correctly centred origin points.
- Use correct naming for attach mesh surfaces.
- Correct naming for start and pose spots.
- Each object has a single material, texture and image assigned.
- Mesh objects are ‘fixed’.

Selecting all the scene objects to be exported out to a Collada file
Collada Export Settings
On starting the export process the screen below appears. As with furniture items make sure "Triangulate", "Only Export Selected", "Use Relative Paths" and "Use UV Image Mats", this last one, "Use UV Image Mats" is important when exporting multiple mesh objects, especially when there are multiple objects in the scene making use of the same materials. Also be sure to browse to the location the file is to be saved and make sure to add ".dae" appended to the back of the file name else the file will be exported without and file extension, making it hard to find. In other words, instead of the file name being shown as "sample-room" it should be "sample-room.dae". Once all the correct options are selected click the "Export and Close" button to export the scene objects to a Collada *.dae file.

Collada export settings needed for Frenzoo rooms
Convert Exported Room *.dae to a Frenzoo *.efa File
Converting rooms use the same basic steps used for furniture, so as the export process has been covered before we’ll instead discuss the specifics of processing rooms in this instance. Normally when converting dae files to efa’s, the command used in the CMD prompt would look like this;
FrenzooDaeConverter.exe mycolladafile.dae mycolladafile.efa
For rooms, two additional commands are available;
- -scene_type=scene
- -unit_meter=[value] (optional)
This means the full command line would look similar to the following;
FrenzooDaeConverter.exe -scene_type=scene (-unit_meter=[value]) mycolladafile.dae mycolladafile.efa

New commands for the CMD prompt to convert dae into efa files
The ‘-unit_meter’ parameter is optional and only required if the avatar dummy helper has not been used as a fixed reference for scale and size in Blender. If it has the command looks like the following;
FrenzooDaeConverter.exe -scene_type=scene mycolladafile.dae mycolladafile.efa
If it hasn’t been used, to correctly size objects relative to Frenzoo type the command line below, substituting "[value]" with "0.032" (or other value) so the command line looks similar to the following;
FrenzooDaeConverter.exe -scene_type=scene -unit_meter=0.032 mycolladafile.dae mycolladafile.efa
It’s recommended that objects are sized in Blender relative to the dummy before being exported, if this isn’t done expect to spend more time experimenting with unit values to approximate a 1:1 match in Frenzoo that may change the next time a new item is made and exported.
Conclusion
A couple of quick notes to conclude with. First, if a scene contains any animation an extra step is required to produce the "*.fob" file Frenzoo uses to store animation data. In Blender each animation ‘track’ will need to be exported out to Collada as a separate file, so two animations – "bounce" and "spin" – would need to be exported to two separate Collada files – "bounce.dae" and "spin.dae". These are then converted individually using the DAEConverter using the following command ("-unit…" is optional, see above);
FrenzooDaeConverter.exe (-unit_meter=0.032) mycolladafile.dae mycolladafile.fob
This will strip the animation data from the Collada file and save it as an *.fob file that can then be loaded into Frenzoo at the same time as the main product *.efa.
Second is an important note on Blenders scale system and how that relates to making content. Frenzoo’s 3D artists use a ‘metric’ measurements system inside 3DS Max to produce their content, so for them, "1" ‘unit‘ equates to "1" ‘centimetre‘. Blender and game engines in general don’t do this – including Unity 3D which Frenzoo uses as its client renderer – scale to them is an arbitrary system in the sense that ‘measurement‘ is in units only, it doesn’t know or care whether that unit is a ‘centimetre’, ‘inch’ or ‘mile’; that’s up to the artist to decide.
Also bear in mind that games don’t use ‘decimal’ or ‘metric’ units ("10", "100", "1000" etc.) to measure distances, it’s done using a rule commonly called "power of two", where measurement is related to texture size – 8, 16, 32, 64, 128, 256 and up (it’s technically more complicated than that but in essence an objects physical characteristics relate directly, in ratio, to the dimension of an images).
So making rooms for Frenzoo isn’t too different to making furniture items, there are a couple of extra steps of preparation needed and a few new ‘objects’ required for them to work correctly but the actual process of converting assets from dae to efa and fob files is relatively straightforward.

