Outdoor Lighting Principles In idTech4 – Using Parallel Lights
In the previous tutorial, "Lighting principles in idTech games", we ran through what is effectively a process applicable largely to ‘indoor‘ lighting using the default ‘point’ light setup; i.e. lighting that makes use of there being a number of light sources available which illuminate a scene using standard volumetric point lighting (more on this later).
Download: Katsbits Dynamic Light Example (c. 5 KB | *.txt) Rename *.txt *.map and open in Radiant.
The same principle gets tricky to use for ‘outdoor’ scenes precisely because it is based on Doom 3’s standard ‘point’ lights; what outdoor scenes need is ‘area light(ing)’, but as Doom 3 doesn’t have that, this tutorial will discuss a method to approximate it using what’s available.
As with the previous tutorial it’s assumed that you know a little bit about editing; how to create, place and edit light entities, and move around the editor.
Overview – The Different Types Of Lights; Point, Projected & Parallel
Lights in Doom 3 have three basic settings all of which are based on ‘point’ illumination, that is, light emitting from a point in space rather than a ‘volume’ or ‘area’ of space.
- ‘point’ (‘standard’)
- ‘projected’
- ‘parallel’
‘Point’
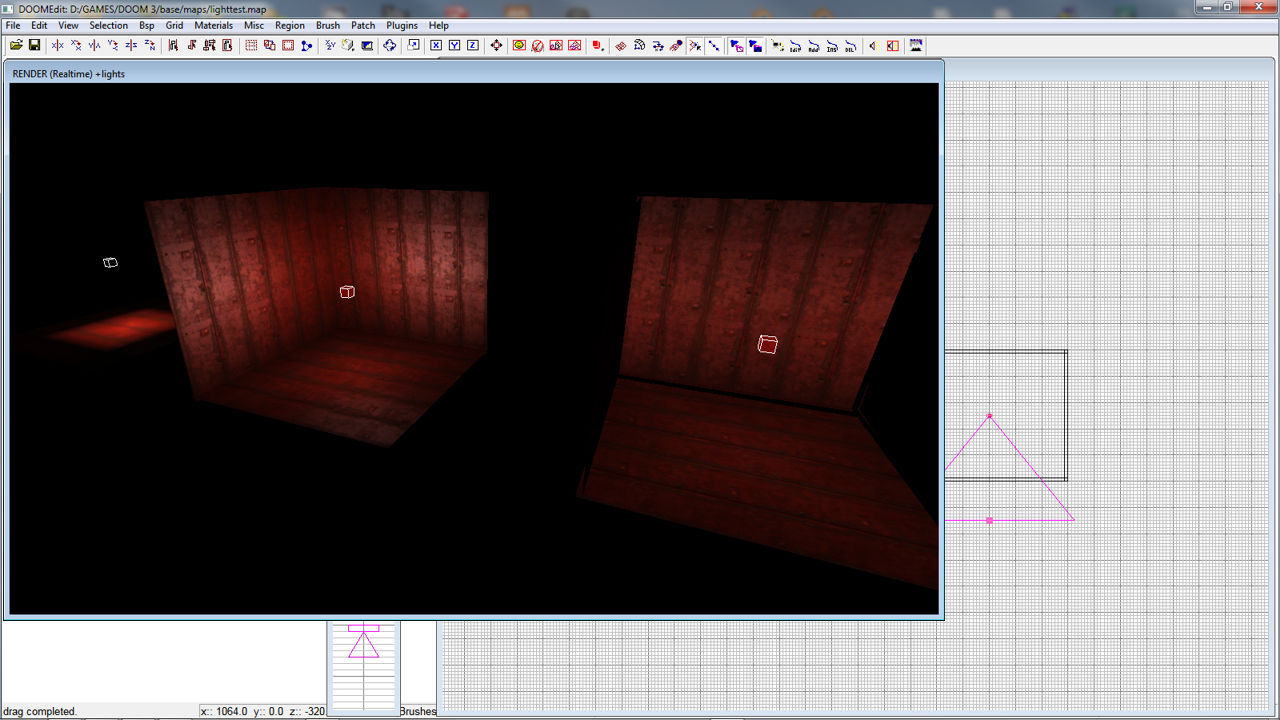
Lights work by basically spherically projecting light from a point in space (the light entities ‘point of origin’ [POO] or ‘centre point’) so it fades in a spherical pattern towards the light volumes bounding box limits. This is the most commonly used type of light. Point lights create ‘hotspots’ or ‘spotting’ if placed to close to surfaces (as shown below).

‘point’ light showing illumination effect
‘Projected’
Lights work in the same way a spot light works in real life, it shines light from the POO in the direction it’s pointing; the light volume is a square cone by default although you can alter the ‘shape’ of the light itself by using ‘masks’ (more on that in another tutorial). Projected lights use an angle of projection – an angle based on the direction and orientation of the light volumes bounding box relative to the lights POO, light ‘projects’ along that axis.

‘Projected’ light showing illumination effect
‘Parallel’
Lights flatten the distribution of light across the lights volume rather than spherically project it from the POO like point lights mentioned above. This means all the surfaces contained inside the lights volume receive approximately the same amount of light, there’s no or very little ‘spotting’. The light isn’t as bright as the standard point light of the same size and light value (brightness).
Parallel lights also use a ‘projection’ angle, but whereas a projected light uses the light bounding box volume to produce this angle, parallel lights use a ‘projection point’ – a small box appears, ‘gizmo’, just above the POO when activating parallel lights which can be moved to various locations independently of the main light entity object – the distance and angle between it and the POO creates the projection angle along which light is cast.

‘Parallel’ light showing illumination effect
Design note: [sample map] save (or copy/paste) the text from the sample map to your base/maps folder as ‘lighttypes.map‘ and then open it with D3edit. Hit F7 to go into and refresh render mode to see the different light types in effect (there’s a bug in the Doom 3 editor that means parallel lights don’t display properly, you may find you have to manoeuvre yourself around a bit before you see anything).
As mentioned above, parallel lights tend to flatten the effect of light quite a bit; it’s more or less a ‘flat fill’ light so everything can be evenly lit. It also reduces the heavy ‘spotting’ or ‘hotspots’ associated with point lights (visible in the top image) because of the way light is distributed inside the lights volume. This also tends to make parallel lights dimmer than their point light counterparts, so you often need to increase the physical size a parallel light’s volume well outside the area of a map you want to influence in order to get an equivalent brightness to that of a point light. Keep this in mind when designing maps that have outdoor and indoor areas, you need to keep and eye on light volume overlaps.
Outdoor Lighting – Which Lights To Use For Outdoor Maps?
The most useful lights for outdoor maps in Doom 3 are parallel lights as they approximate ‘soft’ or ‘area’ lighting (relative to the Doom 3 engine that is), exactly the type of flat light you get when outdoors. Of course you their use isn’t exclusively for outdoor areas but rather anywhere you need a good ‘fill’ light.
Setting Up Outdoor Lighting
Now that we have the basics covered in terms of what the lights do and which one we need to use, we can move on. The basic setup for most outdoor light situations is as follows.
-
Primary parallel light
Acting as the main light source, the direction the sun or suns are in the sky which give the angle of projection. This is a ‘full’ light in that it should cast shadows, diffuse and specular. -
Secondary parallel light
Projecting light in approximately the opposite direction using a complimentary colour to that of the primary light. Essentially this light acts as ‘ambient’ or ‘background’ light (more on this later) so it should cast no shadows.

‘Parallel’ light setup – editor side view
red = primary
green = secondary
Why A Secondary Parallel Light?
The secondary light is actually quite important for a number of reasons, but in a nuts shell it’s acting as an ‘ambient’ light or very loosely as ‘radiosity’, i.e. the way light is ‘reflected’ or ‘bounced’ off different surfaces in the world adding a softer global ‘indirect’ light to everything. It’s the reason why shadows aren’t pitch black in real life.
Apply this to Doom 3 and you see it’s most noticeable effect in ‘softening’ shadows cast by objects as well as taking the harshness out of the light produced by the primary light; shadows are no longer pitch black and lighting over all isn’t quite so hard and of high contrast.
If we pay particular note of the shadows cast by the giant puffball plant on the (lower) right and the cave entrance to the left (cave is out of sight) in the shots below we can see how the primary and secondary lighting method works.
Primary Light
In the first image the shadows cast by using just the primary light are pitch black, you can’t see the ground surface ‘contained’ in the projected shadow volumes because technically it’s not even being rendered. This is the area we really want to correct so in order to do so we add the secondary light.

Primary light only – Primary lighting and pitch black shadows
Secondary Light
The image below shows the effect of the secondary light only. Although there are some highlights and shaded (shadowed) areas there are no cast shadow volumes because that has been turned off for this entity. This is important to do for natural ‘sky’ light – unless of course you’re doing something whereby you have more than one sun or heavenly body in the sky casting light on the world.
Note also the colour of the secondary light, it’s on the blue side (gray-blue), the opposite of the orangey-brown colour of the primary light and quite dark at about 1/3rd the brightness; because it’s only acting as ambient light it doesn’t need to be full bright.

Secondary light only – Secondary light only – ‘flatter’ light with no cast shadow volumes
Both Lights Together
When both lights are ‘combined’ the effect of the secondary becomes immediately apparent; we can see into the shadows and the lighting of the map has far less contrast.

Primary and secondary light together – Primary and secondary lighting together producing a more natural light
Positioning The Secondary Light
Although the secondary lights volume (the pink outline in the editor) can be placed so it’s roughly covering the same area as the primary light, it’s the ‘projection points’ position that fairly important here – this is the ‘gizmo’ object mentioned above that controls the axis along which light is projected in relation to the POO – generally speaking it has to be facing roughly in the opposite direction to the primary light (in top down view – as shown below); this is essential if it is to have an optimum effect on the shadows. If this isn’t done you may end up with shading on objects where they wouldn’t normally be.

‘Parallel’ light setup; red = primary; green = secondary
Tying Up Loose Ends
The general principle of outdoor lighting is to use two parallel lights set up so they occupy the same amount of space (that often being 50% larger than the map itself) but with two main differences;
- Opposing colours.
- Opposing projection axis (editor top view).
This will work fine for any ‘normal’ set up where the object is to simulate a single ‘sun’ or ‘heavenly body’ in a sky or large area. If there is more than one ‘sun’ then things will get tricky because adding more lights increases the number of rendering passes the engine does for each surface in the map – one pass per light (see previous tutorial for more info on this). Obviously you’ll need to find a compromise in such situations which at some point means approximating some sort of representation of the sky light to the player rather than explicitly replicating it.
‘Ambient’ Lighting Without Using An Ambient Light
In addition to what’s been discussed above you can go one step further and increase the ‘ambient’ light, without using the ambient light shader, by adding a fog light. This is simply a light entity that has a ‘texture’ applied to it called fogs/basicfog (applied from the light properties editor). It’s pretty thick by default so just add the following key/value pairing to the entity;
- key = "shaderParm3".
- value = "25000" (distance to opaque – larger numbers = thinner fog).
What this does is add a light fog to a map that has the visual effect of making everything a little more diffuse and softer, it doesn’t actually add any more light to the scene but it’s a useful tool to have in the mappers arsenal as it helps to create even more of an ‘ambient’ feel when Doom 3 lights are limited to a single texture/material being applied to it (unless you write a custom multistage material) – you can’t for instance, apply fog to an parallel light, doing so simply turns the light into a default fog volume.
Ambient Material On Parallel Lights
If you do want to use the ambient texture the good thing about it is that it can be applied and used on parallel lights, fog can’t, it has to be it’s own entity.
You can see in the images below the effects of using ambient; shot one shows the light on it’s own displaying the ‘flat’ light that ambient creates on everything, no shading, shadows or specular highlights; it’s a true ‘flat light’. Shot two shows the two light types combined.
Secondary Ambient
This does mean you have to be somewhat careful with it so as not too reveal too much of that flatness as that can break the illusion of light and depth upon which bump mapping relies. Although over exaggerated in the shot below so the effect can be seen, the lights colour value should normally be set closer to ‘black’ (relative to the colour you’re using) than with other lights so you don’t ‘flatten’ objects too much as mentioned above.

Secondary parallel light with textures/ambient applied
Both Primary & Secondary Ambient
Adding the ambient texture to lights doesn’t have the great a direct effect on cast shadow volumes, it doesn’t necessarily make them lighter as per above, it does however, have a direct effect on the ‘shading’ of the world geometry. It’s primary purpose is to add a light values to all surfaces to thusly provide a flat light ‘baseline’ from which to then add more light detail.
Design note: It’s important to understand that ‘shadows’ are composed of two elements in Doom 3;
- Object cast shadow volumes – projected shadows volumes cast from objects in relation to light hitting them. The ‘ambient’ texture applied to lights tends to have very direct effect on this.
- Object shading – the ‘shading’ or ‘darkening’ of the opposite side of an object in relation to a light source. The ‘ambient’ light texture has greatest effect on this aspect of Doom 3.
When both the primary and secondary ambient light are combined, the overall effect in terms of light brightness is approximately the same as when using the two parallel lights mentioned at the top of this tutorial but, there is a striking difference in how the ambient texture effects the shaded side of objects; as can be seen below they’re quite ‘bright’ and well lit.
With this in mind you can see in the two shots below the difference between using a ‘proper’ ambient lights Vs the default parallel lights; the light levels are approximately the same and so too is the intensity of the shadows cast by the shadow volumes. The main, and quite marked difference, is in regards to the objects ‘shading’, there’s quite a difference between the two, most notable on the pod plants.

Primary and secondary – with ambient texture – Primary plus secondary parallel light with textures/ambient applied
Primary and secondary light – without ambient texture – Primary and secondary lighting together producing a more natural light
The big advantage of using a parallel light with the ambient texture is that it only effects the shading of geometry; trying to a similar thing using the default settings of parallel lights would bleach out everything, including the shadow volumes.
Outdoor Lighting Conclusions
That’s basically it, not much to outdoor lighting once you understand what’s going on and how to use the entities. However, keep in mind that we’ve only discussed light placement and not light optimisation for outdoor areas, which has to be done with great care in maps containing big brushwork objects instead of models. Because of what was mentioned in the previous tutorial about how light renders and effects surfaces you need to keep in mind the light count per surface (r_showlightcount 0/1) and ‘optimise’ as appropriate, models don’t necessarily need this treatment because they’re usually constructed from smaller triangular polygons instead of the much larger ones often associated with brushes.
That said, the one ‘disadvantage’ about models is that they load and are treated by the engine based on their physical bounding box limits and not ‘per-polygon’. By default models don’t block and are not blocked by the placement of VISportals (this is a special brush surface that forces a ‘break’ in the BSP so that anything past that point doesn’t get drawn onscreen if it can’t be seen) so large models that extend beyond VISportal boundaries will continue to be drawn and that means so too the light count of surfaces you can’t actually see (this is the calculation of them rather than just the drawing on screen).
The upshot of this is that really large models, terrain’s for example, can be optimised by being cut into smaller sections which results in fewer overheads for the engine at runtime.

