Converting IMVU Meshes to Frenzoo using Blender
You been making or you made products for IMVU with Blender 3D; furniture, scene and rooms, the odd item accessory, pet or piece of clothing and are wondering if you can use those in other 3D chat worlds like Frenzoo.
The short answer is "yes", all that’s needed is a bit of ‘cleaning’ and necessary tweaking to prepare *.blend files for export, conversion and then import in Frenzoo chat.
The following tutorial will run through the core differences between IMVU and Frenzoo and what you need to do, as an IMVU content creator or developer, to get your Blender made items into Frenzoo using the least amount of work.
Differences Between IMVU & Frenzoo
The main difference between Frenzoo items and products made for IMVU is ‘size‘. For example, Frenzoo is approximately 10x larger than Blender’s default sizing, whereas IMVU’s content is approximately 100x larger by comparison.
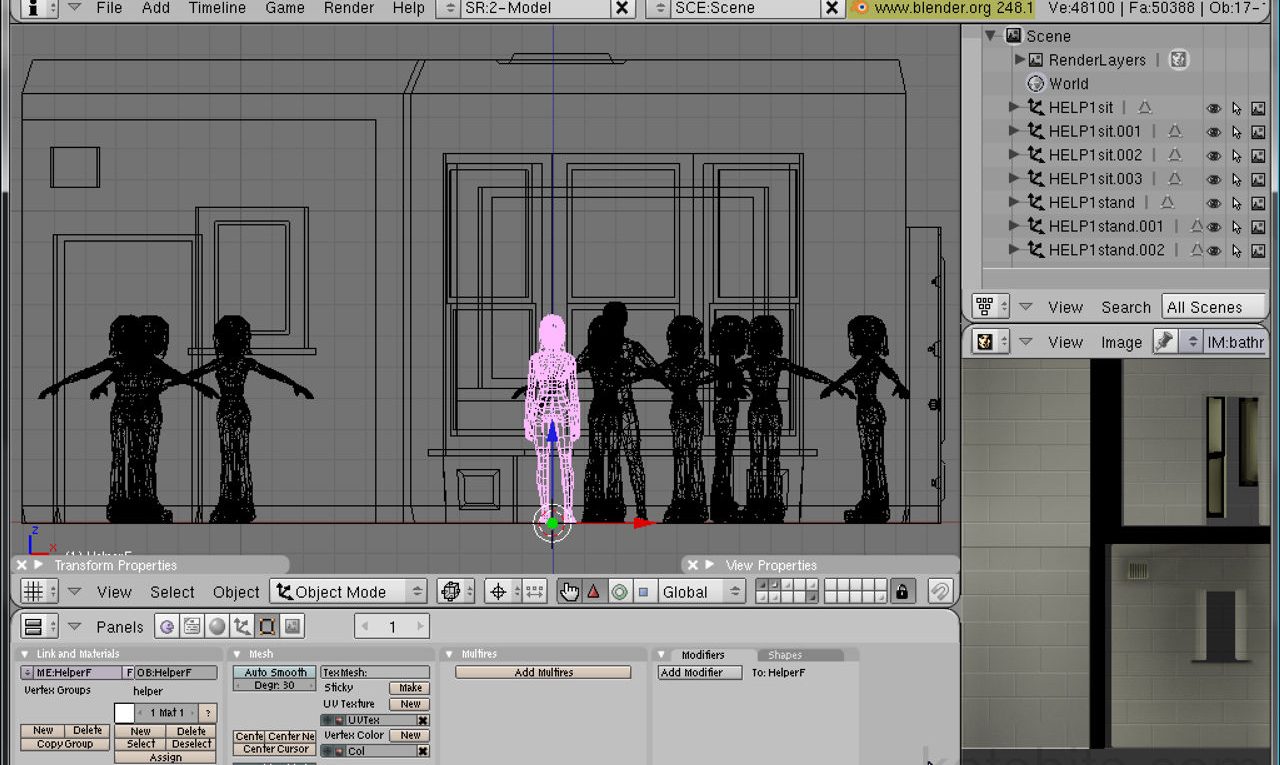
Often this will mean that when IMVU meshes are loaded or appended into a Frenzoo scene, they’ll be far too big to be seen properly, as shown below.

Appending IMVU ‘dummies’ into a scene with a pair of Frenzoo dummies

Relative default size of Frenzoo and IMVU avatars
Changing Camera Clip Settings
The way to address this problems is to adjust the "Camera Clip" parameters available in the "View Properties" panel. To open it into the 3D window, select "View Properties" from "View » View Properties.." in the menu header.
For objects and items that are based around the avatar’s immediate area, change "Spacing" to "10.00" and "Clip End" to "100000.00", this will ensure anything in the vicinity of the IMVU avatar becomes fully visible in the scene. For larger objects, IMVU rooms and scenes for example, spacing will need to be increased to "100" and the clip end value increased to as high as it will go.
Design note: clip distance is based on "Spacing" values, the larger the spacing the higher the clip value will go

The default grid and Camera distance settings

Changing various "View Property" settings
Once the IMVU items have been import and resized, it’s best to drop the values back to their defaults, or for larger objects, using "10" as the maximum spacing value, the reason being that if the settings are left relative to IMVU, it’ll become difficult to zoom in close up to object as you work on adapting the scene – spacing effects both the clip distance, how far out the camera will go; and "Clip Start", how close the camera can get to the object – the larger the clip end value the further away from an object the slip start value is.
IMVU & Frenzoo Object Size & Proportion
As mentioned above, IMVU objects are approximately 100x larger than Blenders default, when you load or append an object it’ll likely be scaled "1.000", this needs to be changed by using "S" (+ "Ctrl" to snap) to resize the object down to match the Frenzoo helpers. For more precision use "Transform Properties".
To do this, whilst the mouse is over the 3D window press "N" to open the "Transform Properties" panel, then click in and change the "ScaleX:", "ScaleY:" and "ScaleZ:" values from "1.000" to "0.057" – optionally press the "Link Scale" button and change one value to see the other auto-update.
If an object is not sized at "1.000" on initial append or import, use "Apply Data" ("Ctrl+A", select "Apply Scale and Rotation to ObData") to set the relative size of the object before then adjusting the size/scale as outlined above.
Obviously the size and scale of objects is slightly arbitrary and wholly dependant on what they are and how big they’re supposed to be relative to the avatar – irrespective as to that being IMVU’s or Frenzoo’s; it’s best to regard the above information as a "rule of thumb" rather than a technical requirement.

Resizing IMVU avatar objects so they’re compatible with Frenzoo
Cleaning out IMVU Files
A typical IMVU scene or room contains a mesh or meshes, an armature containing a series of bones that represent ‘mount points’ for seating and furniture as well as lighting entities, as shown below. For Frenzoo content however, everything except the mesh and associated materials, textures and images, needs to be stripped out of the scene, there should be any ‘parents’ or ‘associations’ with other objects or items.

An IMVU furniture room showing the usual components comprising the scene

Wireframe shot of the components of a typical IMVU room scene
Using the simple apparently room as an example, above is the room as built per use in IMVU. Shown below is what should be left after the ‘IMVU’ specific objects are removed. Make sure to un-parent items so there are no ‘residual’ relationships to ‘data blocks’ inside Blender (meaning that you can delete the physical object but the ‘link‘ to those objects will still be active and available).

IMVU ‘objects’ cleaned from a room scene in preparation for use in Frenzoo

Wireframe version of the above ready for prep for Frenzoo
Once the file has been cleared of the unnecessary parts used to make an IMVU scene the Frenzoo avatar helpers objects can be appended to the file through the use of "File >> Append or Link" ("Shift+F1"). On loaded the scene it’s simply a matter of re scaling everything relative to the dummy mesh as shown below and as explained above.
One thing to note here. If loading Frenzoo helpers in to a scene in this way (loading the helpers into an IMVU room rather than the other way around), "View Properties" will need to be changed ‘backwards’, i.e. instead of increasing "Spacing:" from "10" to "100" as was done above, it’ll need to be decreased once the IMVU has been re-sized, changing it from "100" down to "10" – assuming the IMVU objects were made using the correct spacing required for that type of content. This then allows objects and camera clipping to work correctly in relation to the Frenzoo avatar sizes as mentioned previously above.

A giant IMVU room with a Frenzoo avatar dummy appended into the scene

IMVU room rescaled to approximate Frenzoo – Frenzoo dummy selected with IMVU dummy helpers also present
Conclusion
Exporting scenes from Blender as Frenzoo furniture items or room scenes is best dealt with as separate topics because once a file has been cleaned as described above, very little else needs to be done to it to make it useful in Frenzoo’s chat client. To read how to make Frenzoo furniture with Blender, click here. To read how to make Frenzoo rooms, click here.

