Make IMVU rooms with Blender #4 – Extras & Issues
In the fourth and final part of "Making IMVU furniture rooms in Blender" the slightly more advanced aspects of room creation will be discussed; these are caveats that depend greatly upon which version of Blender and the Cal3D export script is being use to product an IMVU room product – exported files are not necessarily compatible with IMVU so some testing and experimentation may be needed.
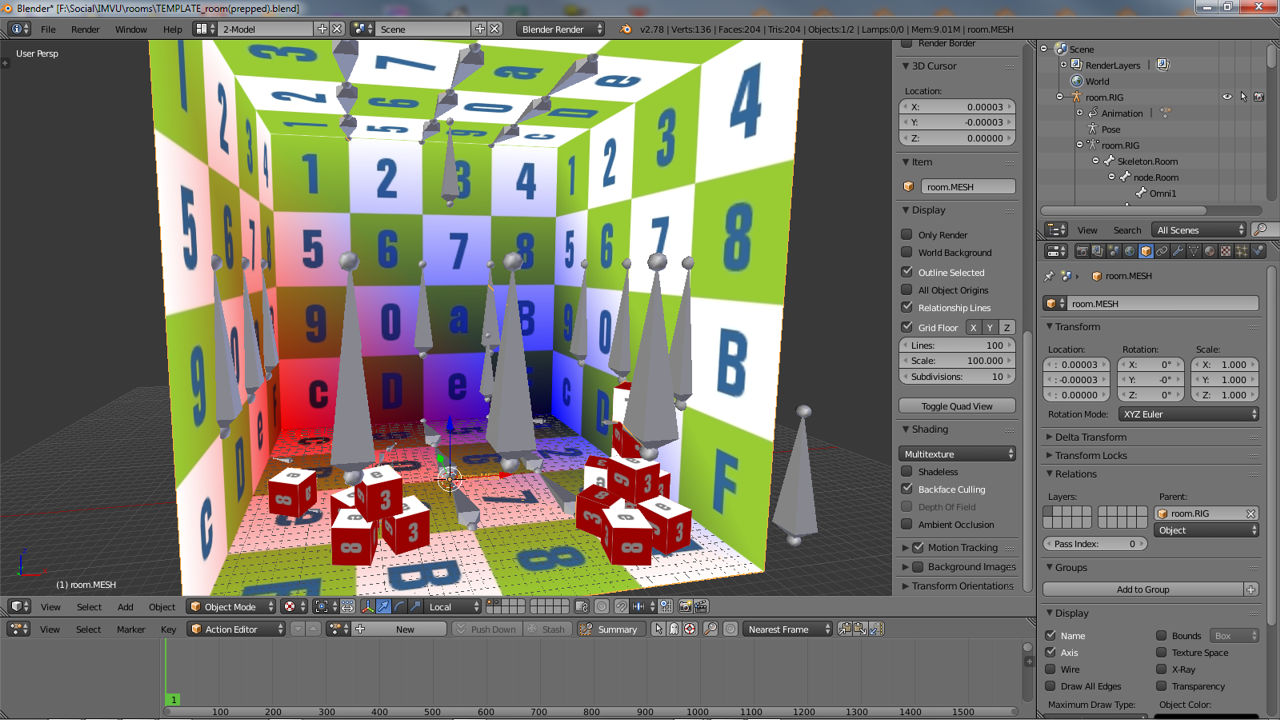
Download: Katsbits IMVU Room Template (c. 1.5 MB | *.blend, *.xsf, *.xmf, *.xrf, *.jpg).
This is of course notwithstanding the rooms size and scope and the affect those criteria have on production.
Room Feature Support
A number of additional features are available to the Creator to improve the general appearance of a room. However, whilst the means with which these can be done are possible within Blender simply as part of its general tool-set, their compatibility in IMVU varies, largely dependant upon the Cal3D export script version. This might means that although vertex colours might be assigned to the mesh, final output and assemble in Blender doesn’t show them when the setting is activated. This is because the export script doesn’t support the feature from.
In addition to this general caveat thought also needs to be given to the products eventual use in terms of it being produced for the Creators own use, or for others to derive. If the latter is true then product design and feature inclusion may need to be tailor with that purpose in mind so products are as easy to use as possible.
Vertex Colours/Mesh Painting
One of the more interesting features available for use is "Vertex Painting". This can be used to tint the mesh and change its colour without affecting assigned textures or, using various shades of grey, give the impression of shading and shadows – the latter is particularly useful in IMVU due to limitations on the number of lights a scene should contain and the way they work. Where vertex colours are supported the relevant information will be written to the XMF file on export and once loaded into Create Mode, is made visible by clicking the "Vertex Colours" checkbox option of the selected Materials "Material Parameters".
Design note: where vertex painting is unavailable thought will need to be given to possibly including shading or other tinting in the textures assigned to the mesh which may mean redesigning the mesh to accommodate this.


Support for "Vertex Colours", shown above painted to the mesh in the latest version of Blender (top) and Blender 2.49 (second top) varies depending on the version of Blender and export script used


Once a mesh has been successfully exported with vertex colours from Blender, to see the effect in IMVU the "Vertex Colours" checkbox of the selected Materials "Material Properties" needs to be checked (ticked)
Flipped Or Upside-Down Textures
Applicable only to early versions of Blender, particularly Blender 2.45 and the included Cal3D export script. Later improvement to the script for Blender 2.49 negated the need to ‘warn’ or ‘remind’ creators that when exporting rooms using older versions of Blender that textures need to be flipped upside-down (top-to-bottom) because of the inverted UVW map exported to the XMF file. This is not an IMVU issue.
Design note: rooms should be constructed and exported as normal. Depending on the item avoid the temptation to flip UVW maps that might be assigned as that can cause disparities between mesh, texture and UVW.

Exported from Blender 2.45, textures are typically inverted due to an incompatibility between Cal3D output and IMVU which requires textures be flipped before use. This only affects Blender 2.45
No Lighting
As discussed in part 1, lights in Blender are bones belonging to the rooms Armature rather than Lamp objects. As a result, and depending on the export script used, this may mean additional editing of the final XSF file because vital colour and brightness information may not be present. It’s important to make sure then that any bone to be used as a light is properly named, in this instance "Omni[n]" – where "[n]" is a numerical value so IMVU know the room is being light by ‘light’ objects, without them rooms are pitch-black.

Armatures that don’t contain ‘light’ bone/s or any associated properties result in black rooms
To compensate for this IMVU provides two useful settings; material "Self Illuminated" and skeleton "Ambient Light". There is a difference between the two however as the former, "Self Illuminated", acts upon textures only so will still leave a ‘black’ avatar in the room. Using the latter, "Ambient Light", applies to everything, avatars included so is more suitable to use for rooms that don’t contain lights.

Setting a Material as "Self Illuminated" partially solves the problem of black rooms in that surfaces appear ‘lit’ whilst avatars won’t
To set a texture as being "Self Illuminated" simply select a given "Material" slot in the "mesh" properties area and activate (check or tick) the "Self Illuminated" option of its "Material Parameters". Click "Apply Changes" to update the main view. On the other hand, to set the rooms "Ambient Light" value click "config" and then change the "R", "G" and "B" sliders under "Ambient Light" to a suitable value – "255, 255, 255" is ‘white’, "0,0,0" is ‘black’, with varying levels of brightness in between.

A better way to solve black rooms without editing the XSF file is to set an "Ambient Light" value. This illuminates the surfaces of the room and any avatars (and items) it subsequently contains
Omni-Directional Light
Although the above approaches to black rooms work, it tends to produce a light that’s flat – everything is lit equally. Whilst this might be preferable in some situations, it’s generally more desirable for the room to contain both normal lights (bones) and ambient light. So, as was briefly mentioned above, in instances where the room is black this typically means editing the XSF file. Generally speaking then, if ‘light’ bones are included in the Armature they will export. This means the missing component is actually the information relating to the light effect itself, i.e. the colour and/or brightness – its this data that needs to be placed into the file for the effect to work in IMVU.
Design note: generally speaking the brightness of a light is based on it’s colour values relative to being fully white, or fully dark with either shades of grey or colour in between. In other words, lights actually have a fixed brightness based on ‘saturation’ – "255, 255, 255" or "R, G, B"; it’s generally not possible to make a light brighter than these values.
Before editing the file, and to make it easier to identity the correct bones, ensure that each ‘light’ bone is properly named "Omni01" (or "Omni[n]", where "[n]" is a value where more than one light is used) and parented correctly to "node.Room" (unless it’s animated). Once exported, open the resulting XSF file into NotePad or similar text based editor and find the following (the exact text may vary depending on the room);
<BONE ID="2" NAME="Omni1" NUMCHILD="0">
And append after the "0" but before the ">" closing bracket the below (note that a space should front the text);
LIGHTTYPE="1" LIGHTCOLOR="0.881726 0.869392 0.858118"
The result should go from something like this;
<BONE ID="2" NAME="Omni1" NUMCHILD="0">
To this;
<BONE ID="2" NAME="Omni1" NUMCHILD="0" LIGHTTYPE="1" LIGHTCOLOR="0.881726 0.869392 0.858118">
Save the file and reload the *.xsf into the Create Mode to see the difference it makes to the room.
Design note: generally speaking to change the colour of a light, it’s typical to alter the first two numbers after the decimal point, e.g. "0.881726" to "0.451726" – "1.000000" is full saturation (‘white’ when all colours are that value), and "0.000000" is no saturation (‘black’ when all colours use the same value).

 mode in Blender, isn't directly converted for use in IMVU")

Example room in Blender showing as ‘flat lit’ (on the left) and ‘lit’ (on the right). Although Lamps can be used in a general sense to give an idea on the rooms final appearance in IMVU, they will need to be replaced with appropriately named bones before export to IMVU
Ambient Light
Similarly, adding an "Ambient Light" value to the XSF means editing the file in NotePad or similar. Doing this results in a ‘default’ level of illumination when the XSF is loaded into Create Mode which can still be over-ridden using the "Ambient Light" sliders in "config".
Design note: ambient light generally is a flat background light that illuminates all objects with the same level of brightness, it does not have a ‘direction’ like Omni-directional light so objects are evenly lit and absent any shading.
To add this to a file open the "*.xsf" skeletal file into NotePad or similar text editor and find;
<SKELETON NUMBONES="[n]">
Append the following after "[n]" but before the closing ">";
SCENEAMBIENTCOLOR="0.525176 0.555059 0.545235"
The result should be going from this;
<SKELETON NUMBONES="92">
To this;
<SKELETON NUMBONES="92" SCENEAMBIENTCOLOR="0.525176 0.555059 0.545235">
Save the file and reload the *.xsf into Create Mode to see the difference made to the room.


A rooms Ambient Light can be set and exported from Blender (top) or otherwise manually edited into the XSF when using Blender 2.49 or below. This provides a ‘default value (middle) that can still be over-ridden in Create Mode using the "Ambient Light" property sliders
Light Colour
As briefly discussed above, IMVU lighting is based on a set of numerical values representing "Red", "Green" and "Blue" colour channels. The colour associated with a room is set by changing the values per each channel between "0.000000", no-saturation (colour), to "1.000000", full saturation (colour). Individually each channel is calculated based on hue, saturation and intensity, setting the red channel to "0.000000" or "1.000000" equates to either no-colour (black), or full colour (100% red). In other words, channel colours by themselves are not ‘black/white’ representations but based on the amount of colour they display – to achieve a ‘white’ light or similar, all channels need to use the same value, "0.500000" for example would produce an ‘average’ un-tinted light. Generally speaking then, room lighting, both directional and ambient, can be tinted by changing the values attributed to each "R", "G" and "B" channel which can either be done in Create Mode for "Ambient Light" colour, or by editing the XSF file for both "Omni-directional" and XSF based "Ambient" colour.

Light colour is not set as ‘black/white’ but instead as ‘no-colour/full-colour. So a value of "1.000000" on the red channel of a direction light means it illuminates the room with 100% hue, saturation, and intensity or ‘red’

Similarly, setting the red channel of the Ambient light properties means the room will be flat lit ‘red’ at full hue, saturation and intensity (note that a strong ambient light value may over-power the shading attributed to a directional light)

Given both the Directional and Ambient ‘lights’ an averaged value equates to an evenly lit room. Using this as a baseline, a room can be tinted slightly by altering any one of the RGB channels
Conclusion
With careful thought and a little planning Blender can be used to make all manner of rooms for IMVU from simple boxes to complex terrains to architecturally decorated halls. The only prerequisite is that a little time be spend learning how to use Blender before attempting relatively complex projects.
[1: Room Basics | 2: Room Skeleton | 3: Room Export | 4: Extras & Issues]

