Make Animated Pets For IMVU
This tutorial assumes basic knowledge of using Blender 3D to create content, including but not limited to; making and editing a mesh, applying materials to objects, UVW unwrapping and applying textures to objects, navigating the interface, creating actions and exporting objects out for use, as well as creating and applying vertex groups.
Download: Katsbits IMVU Templates for Blender (*.blend, *.jpg, *.png, *.xsf, *.xrf, *.xmf).
Note also the following was originally written with Blender 2.45 (with Python 2.5.4 installed) in mind using the included CAL3D exporter. However, the same basic principles are used when using other versions of Blender.
Before you begin it’s worth noting here that the complexity of your animations is currently restricted to relatively simply movements – up-down, left-right, spin on a single axis – because of the way IMVU decided to implemented the CAL3D format. As Blender isn’t fully compatible with IMVU you can expect your exported animations to be distorted and/or corrupted on playback. This is not a limitation of Blender, but of the export script and IMVU implementation of CAL3D.
The tutorial also assumes a model is already available as a pet and ready to be prepped for export; it does not discuss how to actually model any content in 3D (it’s not the scope of this tutorial to cover that), but does require an understanding of the terms and instructions stated.
Important: IMVUs default scale, the size objects appear to be in the 3D View, is approximately 100x LARGER than Blenders. Always start a project by opening the appropriate template for the product type being made to ensure everything is the correct size relative to IMVU, else scene "Scale" and "Clip" values will need to be increased to properly view view content (press "N" to access "View" properties, adjust "Scale:" under "Display", and "Start:" and "End:" under "Clipping").
Basics Of Animated IMVU Pets
Pets are basically the same as any other avatar accessory in that they are composed from three core component;
- Mesh
- Armature
- Animation
The IMVU product item is then put together in a two stage process;
- Blender 3D
Building & construction, animation and export to CAL3D (‘xml’ files) – it is not within the scope of this tutorial to show how you use Blender . - IMVU Previewer
Composition in IMVU’s product creation tool, importing the CAL3D files into the Previewer.
How Does A Pet Work?
As with any type of item for IMVU, a pet is ‘tagged’ or ‘linked’ to a bone or bones in the underlying skeleton of the avatar; it’s this that partly determines where the pet appears and how behaves in relation to the avatar and avatar actions. In other words, if the root of a pet is at it’s feet (a bird for example), the same pet could be ‘linked’ to any given bone in the avatar and thus appear relative to the link bone – wrist, shoulder or toe areas.
Where To Put The Pet
When building the pet think about where it’s going to be positioned, usually a ‘flying’ pet will be at shoulder height as it’s being made in Blender 3D, a floor pet is built close to or on the floor. Once the mesh is made the Armature needs to be created and as above needs to be positioned relative to the final outcome in the chat client.
If the pet is to ‘fly’ it’s best to create and position the ‘root’ bone of the pet approximate to either/or;
- zHead
- AttachmentRoot
If the pet is to not to be effected by avatar movements, then the root bone needs to be placed at the base of the avatar;
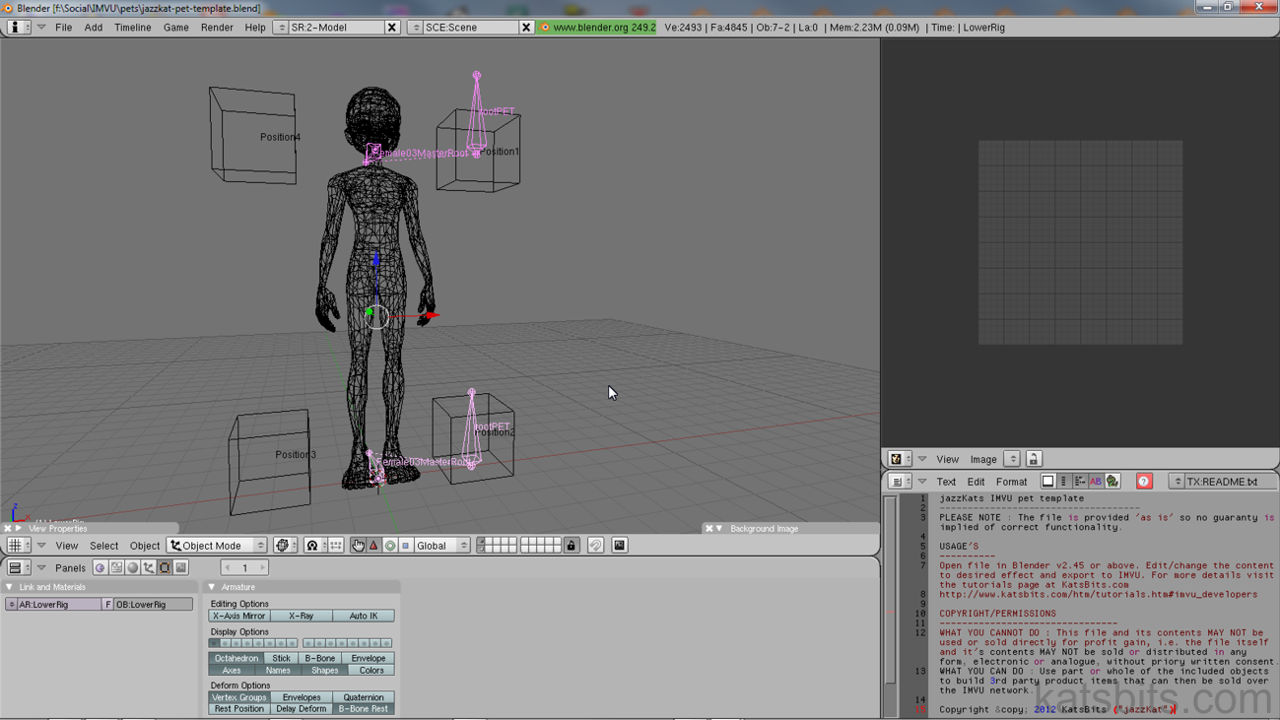
- Female03MasterRoot

Note the names of the main pet connection points, "Female03MasterRoot" at the feet of the avatar, "zHead" off to the side of the avatar at approximately shoulder height and "AttachmentRoot" at the base of the neck (hidden in this instance ‘under’ another copy of Female03MasterRoot). Pets are typically ‘rooted’ to these default locations.
What this all means is that as the pets armature is being created, a bone will need to be moved to one of the locations mentioned and named appropriately. It’s also important to note that bone names aren’t so much important as the relationship between them; the ‘root’ bone must be the bone to which all other bones are connected.
Animating The Pet & Making It Move
This is distinct from the section above about bone positions as this is related to what the pet does rather than where it does it. What this means is that there are two types of ‘movement’ achievable with pets;
- Only move when the avatar moves – essentially a ‘static’ pet.
- Move ‘independently’ of the avatar – an ‘animated’ pet.
Although both do require an ‘action’ (animation) be present before exporting anything from Blender to CAL3D for use in IMVU, the latter is a little more involved as it means creating ‘extended’ animation’s that progress along the timeline for several seconds or minutes depending on the desired results; the only difference between an animated item and anything else is simply related to using more keyframes and more time to carry out a movement or motion.
So, create actions as normal but extend their length and the complexity of movement of bones in the armatures associated with an object.
Design note: Although the ‘root’ bones should be keyframed (at the start and end frame), they should not in actuality be moved or manipulated in any way.

List of individual animation’s timelines for each action
Exporting Pet Animations
Each pet movement needs a separate action/animation and each of these animation’s need to be exported individually for best results – it’s not really possible to ‘batch’ export animation data so each action has to go through the CAL3D export process on it’s own. At the end of this process there will be a number of different *.xaf files sitting in the projects folder, each one being a specific export of a particular animation action. These new files now need to be put together in IMVU’s Previewer tool.
[1: Pet Basics | 2: Prep & Export | 3: Assembly]

