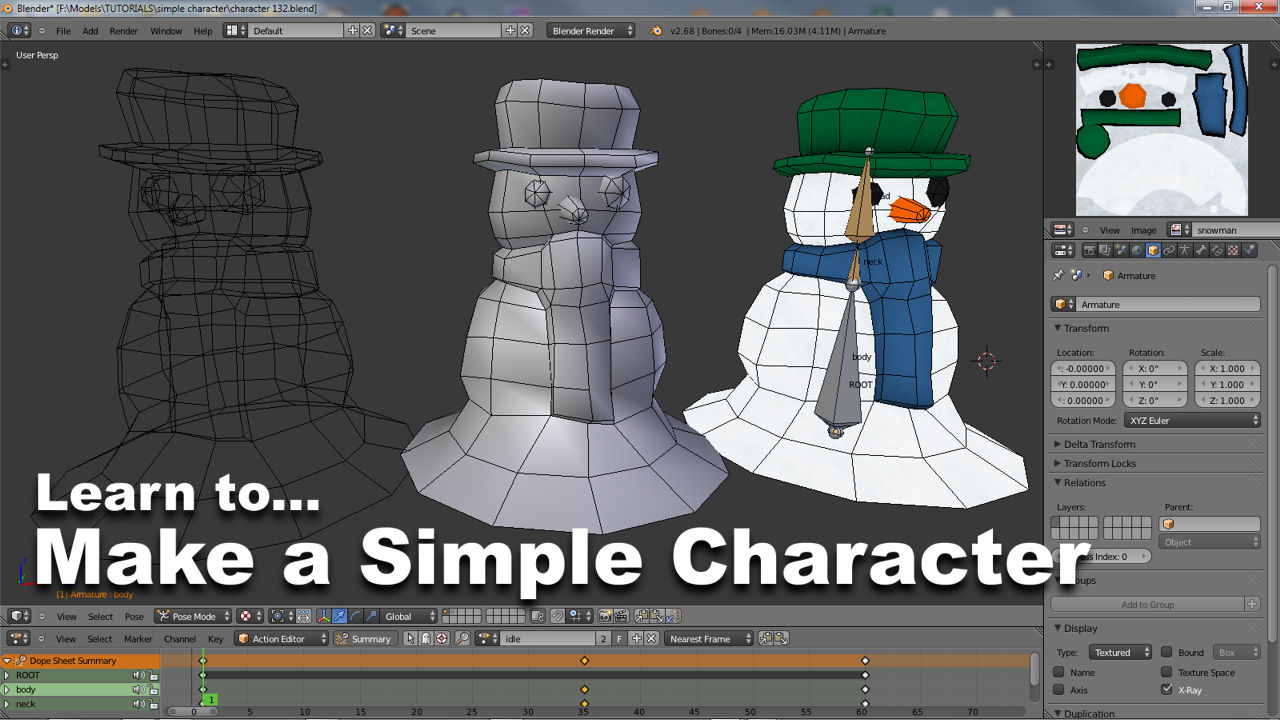
Snowman – UV Unwrapping & UV Mapping (#4)
The principle behind UVW mapping is relatively straightforward, a ‘map’ is generated and an texture assigned. For best results however, a number of simple requirements need to be followed to ensure the mesh is properly ‘unwrapped’. In the following chapter the UVW mapping process is discussed in detail, the different considerations, tools and options available for use.
It is recommended the Reader have completed previous chapters so as to fully understand the context in which UVW maps and unwrapping occurs.
Download: KatsBits – Snowman Character Source (c. 40 MB | *.blend, *.tga, *.psd, *.xcf). Zip file includes each stage of the process as indicated throughout.
UVW map basics
UVW maps can be thought of in a similar vein to gift-wrapping a box; the box is the mesh, the wrapping paper the UVW map, and the pattern on the paper, the texture for display. This means the act of ‘wrapping’ the paper around the box, the placement and positions of folds and sticky-tape, determines the distribution of the pattern. It’s this ‘determination’, the ‘how‘ and ‘where‘ of the process, that is analogous to a UVW map, the patterned paper being a manifestation of that (the pattern shows the distribution by virtue of its orientation). In 3D the same is true, the UVW map, the ‘how’ and ‘where’ of the mesh, determines placement of the texture across its surface.
From a ‘procedural’ point of view (the steps taken to get from “A” to “Z”), there are two key aspects to unwrapping; 1) marking-up the mesh in the 3DView, and 2) editing and manipulating the UVW map using the “UV/Image Editor“; an object selected marked-up and unwrapped, the resulting UVW is then edited where necessary and texture assigned to the mesh to complete the process. The type of object being mapped has little bearing on the mechanics of the process itself (again the steps taken to get from “A” to “Z”) so applying UVW maps to a character mesh is more-or-less the same as for any other type of 3D object; a chair, sword and even a level, use the very same principles and steps, any differences generally relate to the items ‘physical structure‘ and/or whether the object should be mapped to a single or “unique” texture, or multiple textures.
Design note: the likelihood of using single or multiple texture assignments is typically done at the Material assignment stage (the step usually done before unwrapping).
Switching to the UV/Image Editor
With the above in mind then, the Snowman, being a relatively simple character, is not complex enough to warrant using multiple textures so will be mapped to a single image. To make the process easier to manage first click the “Editor List” button far-left of the “Outliner” Header (window top-right of the screen) and select “UV/Image Editor” from the list. A grid, which is square by default, will appear indicating the editor is active. This is the “Texture Space“, an area within which an image will appear once assigned to a UVW map.
Design note: the UV/Image Editor grid area is defined by the dimensions of an image. Square by default, it can be any rectangular shape as determined by the assets height and width (it always makes use of the “Power of Two” rule so cannot be an odd shape or size). The area outside the grid can be used as a ‘work zone’ to temporarily place UVW material whilst it’s being edited.

Although Blender does have a number of different UI layouts available – “Animation“, “Model“, “Material” and so on – it’s often more straightforward to simply switch one of the current views. Shown above, the “Outliner” editor is swapped for the “UV/Image Editor”
Design note: As an alternative Blender does provide a number of pre-set ‘layouts’ which correspond to particular activities – ‘animation’, ‘UV editing’, ‘scripting’ and so on. They can be accessed from the main application Header via the “Choose Screen Layout” button, “Default” being the default. Whether they are used will depend on preference rather than requirement.
UVW unwrapping a mesh
By default mesh Objects tend not to have UVW maps assigned with one exception, the small cube present in a new scene. Beyond this a UVW maps will need to be created on a individual basis (per-object). To do this RMB select the Object to be unwrapped, “Tab” into Edit mode and press “A” to “Select All“, selecting the entire mesh in either its “Face”, “Edge” or “Vertex” sub-element form depending on the last-used “Selection Mode”. This is important because both UVW map and texture assignments are based on selection.
Design note: it’s worthy of note here that because unwrapping is selection based it means texture images can in fact be assigned independent (absent) of any Material associations. Care must be taken with respect to this because a given image asset (the bitmap used) can be referenced directly using an ‘absolute‘ system path – “/root/content/asset/image.tga”- or in a virtual sense using a ‘relative‘ path – “models/snowclean”. There are ‘Pros and Cons’ to each but in either case it’s important to ensure correct texture/material/UVW assignment based on technology requirements.
Once everything is selected, make sure the mouse cursor is over the 3DView and press “U” to access the “UV Mapping” menu. A pop-up list will appear. Click “Unwrap” (or “Mesh » UV Unwrap » Unwrap” from the Header menu). This will generate an initial ‘unwrap’ and changes the UV/Image Editor view so the previously discussed grid area displays orange indicating the presence of the UVW’s – ‘new’ mesh objects will always unwrap initially in this manner.
Design note: when unwrapped the UVW map should always appear as described above because each face is treated as an individual ‘unit’ absent any relational connection to its neighbours; the orange colour simply indicates a default pre-selection (of the UVW’s) highlighting. The additional types of unwrapping available from the “Unwrap” menu generally don’t work too well within the context of unique Objects like character models, usually because the often awkward shapes cause more problems than are fixed by using them.

In Edit mode, select the entire mesh and press “U” to generate an initial UVW map by selecting “Unwrap” from the “UV Mapping” menu (note the blank UV grid top-right, this indicates a UVW map has yet to be assigned)…

… as the mesh has yet to be properly prepared for unwrapping, doing so now creates a ‘reset’ map where each face is mapped individually (top right) to the available texture space grid [blend 61]
UVW maps & texture assignments
The next step, once the initial unwrap is done, is to associated an image (texture) with the UVW map. To ensure the texture is assigned to the entire mesh, and thus UVW map, it first needs to be fully selected in Edit mode. In the 3DView then, press “Tab” to enter Edit mode (if not already active) and select everything, “A“. The entire mesh should highlight (MMB rotate around the scene to ensure this is the case). Then in the “UV/Image Editor” press “A” in similar fashion to select the entire UVW map, it too will highlight. The end result should have the mesh and UVW map highlighted in the 3DView and UV/Image Editor respectively.
Design note: make sure to have mouse cursor over the correct view when using “A” so as not to select/deselect the wrong elements. As always when making global selections, “A” may need to be pressed twice, once to deselect any active selections, and then again to reselect all.

In the UV/Image Editor, click the “Browser Image to be linked” button to assign the Image previously created to the UVW map just unwrapped…
Remain in the “UV/Image Editor” and click the “Browse Image to be linked” button to the left of “+ New“. The item which appears in the list should be the texture created in the previous chapter – “snowman” in this instance. LMB click to select it. This creates the necessary linked association between the UVW map and texture which is then displayed immediately in both the UV/Image Editor and 3DView.
Design note: after assigning, if the image isn’t visible in the 3DView make sure to be in “Texture” mode using “Alt+Z” (or select “Texture” from the “Display Mode” selector in the Header).
However, because of the way UVW’s are initially unwrapped, each UVW face is mapped 1:1 against the texture which results in an unnecessary and unwanted amount of repetition across the mesh. This needs to be fixed through the use of “Seams“.

… this texture will appears assigned to the mesh where the initial ‘reset’ map become apparent – each face is mapped to the same space within the ‘bounds’ of the texture. This needs to be fixed by properly ‘marking’ the mesh so the map can be unwrapped more efficiently and appropriately (relative to the objects structure [blend 61b]
Working with UVW Seams
Complex shapes like characters cause a few problems for UVW maps, their irregular shape often makes it difficult at best to fully unwrap a mesh in a way that makes sense visually. As has already been seen for example, the initial unwrap carried out above maps the entire mesh in such a way that the same texture is assigned to each individual UVW face. This is not ideal and should be fixed. To do that, “Seams” can be used to ‘split‘ or ‘cut‘ the UVW’s such that, rather than one large smushed-up map, several smaller sections result (typically corresponding to particular areas on a mesh – a “body“, “neck/scarf“, “head” and “hat” section for example), which are better able to wrap around the model. This in turn means being better able to ‘map’ the objects UVW’s segments to the available texture space using the UV/Image Editor grid as a ‘boundary’ (“Texture Bounds“) within which the map should reside. In other words, much of the UVW mapping process is about managing UVW splits and the subsequent placement of these “Islands” (sections which results from seam splits) within a permitted “Texture Space” area.
Design note: in addition to using ‘Seams’, UVW maps can be ‘split’ and ‘sectioned’ indirectly by making specific changes to the mesh itself. Based on selection again, once a selected has been made, pressing “Y” will break the relationship between neighbouring surfaces causing a “Split” (this also creates a “Smooth Group“). Doing this in a number of locations makes it possible to achieve similar results as Seams. Having said that, it’s best to avoid doing this as it’s not as controllable.
In Edit mode use “Ctrl+Tab” to switch “Mesh Select Mode” to “Edge” (preferable) or “Vertex” – using “Face” for the following doesn’t work as effectively as the former options. Using a combination of “Alt+RMB” “Shift+RMB” and/or RMB, select a series of edges in such a way as to effectively ‘isolate’ various areas of the mesh into virtual sub-sections – the selection should highlight edges around the ‘scarf/neck‘, ‘head/hat‘ and ‘underside/body‘ (shown below), delineating the ‘hat‘, ‘head‘, ‘scarf/neck‘, ‘body‘ and ‘base‘ areas. Once done, use “Ctrl+E” to access the “Edges” menu, selecting “Mark Seam” from the list. The edges will colour-tint orange indicating successful mark-up; where-ever one of these edges are encountered the UVW map will split.
Design note: the orange tinted highlight may not appear on the mesh if selected edges already carry a marking from another tool, the pale-blue of “Mark Sharp” may over-ride ‘seam’ markings for instance. It important to note that this only affects the visual aid markings seen in the 3DView and not the efficacy of the tool and/or function itself.

As with marking edges “Sharp“, use “Alt+RMB” to select various loops and once active “Mark Seam” using “Ctrl+E” to access the option from the “Edges” menu

Continue around the mesh, strategically placing additional seams with the intention of reorganising and ‘splitting‘ the UVW map into a number of smaller contextual areas, a ‘scarf‘[3], ‘head‘[2], ‘body‘[4], ‘hat‘[1] and ‘base‘[5] area for example (shown above) [blend 62]
Unwrapping a Seam marked mesh
Once seams have been marked around the mesh, select everything and press “U” to bring up the “Unwrap” menu again. As before select “Unwrap” from the list to rebuild the UVW map. Upon doing this the UV/Image Editor will change to show a series of distinct shapes instead of a single mass of UVW’s, and the 3DView, rather the each surface being mapped with the entire texture, UVW’s will instead be distributed across the image such that each ‘face’ has a corresponding area of texture dedicated to it.
Design note: it’s typical this second pass is repeated to check UVW seam markings create a ‘clean’ set of Islands; connections left in place between neighbouring sections tend to cause distortions or inefficient mapping that can be problematic to sort out later on, especially once a texture has be painted-to-fit.

Re-mapping the UVW again after placing additional seams results in proper unwrapping (surfaces no longer treated as individual units) and much better division of the map into logical/appropriate segments called “UV Islands“, or simply “Islands” [blend 63]

The remapped UVW showing the distribution of this second pass over the UVW map (use “Shift+F10” to view the UVW/Image Editor in the main 3DView) [blend 63b]

In “Texture” shading mode, the default scenes “Lamp” object needs to be moved to a different layer (“M“) or deleted so the mesh can be seen without being influenced by the lights shading… [blend 64]
Before progressing further it’s best to remove any “Lamp” objects from the Scene so the mesh can be viewed without any visual impediments – shading caused by the presence of lights sometimes make it difficult to see what’s going on so are best deleted or moved to an unused “Layer”. To move the objects RMB select the “Lamp” to be moved, press “M” and LMB click a “Layer” button. To delete, RMB select the object and press “Del“. The Scene should become ‘flat’ lit on doing this making it easier to see the mesh.
Design note: due to the Lamps default colour being ‘white’, the resulting mesh shading is typically white/grey/black; if the image being used to unwrap the mesh is also similarly toned, being able to quickly and clearly ‘read’ what’s going on in the Scene can be impaired, particularly in tonally similar locations.

… then then means the texture distribution across the UVW can be seen more clearly, and in this instance although the re-map results in better alignments than previous a number of distortions remain. These need to be corrected by judicial seam placement [blend 65]
Although the ‘second pass’ editing the UVW made significant changes there are still texture distribution problems, mainly in the form of distortion, due to the way Blender is trying to wrap a flat 2D image around an irregular 3D object. Shown below for example, the grid texture can be seen unevenly distributed around the mesh, larger in some areas, smaller in others. Typically these types of problems need to be fixed by the placement of additional seams so the UVW map can ‘flatten’ better.

Texture distortion visible on mesh after placing Seams – due to awkward shape of the object being unwrapped, some distortion is likely and will need to be fixed by additional UVW editing
Hiding Seams
One of the fundamental problems unwrapping UVW’s is in knowing where to place seams. Ideally they should be placed such that any splits they cause result in an evenly distributed, ‘flat’, UVW map (as little distortion as possible), whilst at the same time remain (largely) hidden from vie.
Design note: because the UVW and texture are being mapped ‘uniquely’ it’s not always possible to create a like-for-like relationship between each side of the split; one of the reasons for using a grid texture is to highlight these disparities, which the placements of seams is trying to avoid, and making later texture production as straightforward as possible.
Shown below for example, the body section of the UVW map has been seam-split down the front, then down the back of the mesh to show how placement directly affects the UVW map. Whilst both approaches have the intended effect of flattening the UVW map so it wraps around the mesh with little distortion, they do this is very different ways – placing the seam along the front takes advantage of the ‘scarf’ structure to disguise or distract the eye from the fact that a seam is placed there. In this way a meshes physical attributes can be used to ‘hide’ seam markings.

Unwrapping spherical objects typically means splitting the UVW so the map ‘flattens’ out. This often results in a dislocation between each side of the split which tends to be visible and often obvious, but it does evenly distribute the texture [blend 67]

Splitting the UV down the front of the mesh results in the above UVW layout when the mesh is unwrapped again (blend 67b)
Whereas placing the seam along the back of the mesh, whilst this reduces the possibility of any split in the UVW map being seen by the Viewer (assuming a face-front use), it may increase the risk of distortions along the front of the mesh being visible as the UVW’s squash and shape themselves within the allotted space.
Design note: depending on the shape being unwrapped, seam placement can result in greater amounts of UVW distortion despite best efforts to avoid this. This is due to the way UVW’s have to unwrap relative to their neighbours, in a centre-of-mass where there may be a reduced amount of room available, this can mean more UVW’s sharing less physical texture space than desired, resulting in distorted texture assignments.

Generally seams should be hidden from view or positioned where they won’t be too readily seen, either in a crease or fold in the mesh, or of that isn’t available, along/down a side not normally facing the player/screen (down the ‘back’ of the mesh in this instance) [blend 67c]

Placing the seam along the back-side of the mesh means the front of the mesh is now ‘clean’ upon re-mapping [blend 68]

UVW map with seam marked down the back of the mesh results in a slightly different layout compared to the seam along the front [blend 68b]
Generally speaking then, UVW mapping isn’t always as straightforward as it might first appear, it is an inherent part of the process that a certain degree of trail-and-error is going to be required to 1) fix texture distribution problems, 2) that some distortion may always be present, and 3) compromise and mitigation is often the name-of-the-game when successfully unwrapping a complex shape. For the purposes of continuing with the tutorial, place the seam along the back of the mesh, in Edit mode select the corresponding edges (indicated above), press “Ctrl+E” and select “Mark Seam” from the “Edges” menu.
Design note: use “Alt+RMB“, “Shift+RMB” and/or RMB as normal to select the appropriate edges or paired vertices. Although not specifically necessary, to rebuild the UVW after placing this new seam, simple press “A” to select the entire mesh (in Edit mode) then “U“, selecting “Unwrap” from the list. The UVW will update appropriately in the UV/Image Editor and in the 3DView.
Separating UVW islands
Next is the ‘neck/scarf’ UVW map section. Looking at the results of the second pass, because the area is treated as a single segment there is significant distortion present which needs to be fixed. This is done using seams to ‘detach’ the two components into separate UVW islands – a ‘neck’ section (wraps around the neck) and a ‘drop’ section (drops down the front of the mesh). This serves two main purposes, 1) it increases the amount of UVW space used and reduces the amount of texture distortion, and 2) by straightening the UVW’s it eases subsequent texture painting. In practice this again means looking at the mesh to determine the best placement for seams to facilitate the aforementioned, which in this instance simply means running the seams up each side of the ‘knot’.
Using a combination of “Alt+RMB“, “Shift+RMB” and/or RMB, select the appropriate edges on either side of the scarf ‘knot’ (shown below), press “Ctrl+E” to access the “Edges” menu and click “Mark Seam” to set. A new group of seams will appear. To rebuild the UVW map “Select All“, “A“, then press “U” selecting “Unwrap” (or “Mesh » Edges » Mark Seam“) from the list. The UV/Image Editor and 3DView will then update to show the new changes – a separate ‘neck’ and ‘drop’ UVW island independent of each other.
Design note: remember that using the term ‘flat’ or ‘flattened’ in the context of UVW maps refers to the way the UVW’s are laid out; an analogy would be to think of the UVW’s being a box cut down the sides and laid flat on the floor versus just being squashing flat. UVW maps by-and-large, behave the same way – without seams being placed, UVW’s are ostensible ‘squashed’ in similar fashion.

Shown in “Texture” shading, the seams marked along the side of the scarf knot so as to split the ‘horizontal‘ structures from the ‘vertical’, allowing for better UVW map use (layout) [blend 69]

Using “Alt+” or “Shift+” and/or RMB select the edge loops running down the side of the scarf knot, separating it and the ‘drop’ from the ‘neck’ section [blend 69b]

UVW map of the above, both the ‘knot’ and ‘drop’ section is a separate UVW island. Note that in doing this the ‘neck’ area straightens out into a more regular shape [blend 69c]
UVW unwrapping spheres
Moving on to unwrap the ‘head’ it’s easy to see why seams need to be used; left unedited the disparity between the top and bottom of the mesh is readily apparent; the larger UVW’s at the ‘top’ means an increased amount of texture space is dedicated/wrapped around that area compared to the bottom. Looking at the texture grid and how it is displayed on the mesh, the larger pattern at the bottom does not mean more texture is used, it reveals the opposite in fact; a reduced area is being mapped to a reduced amount of UVW space so it appears larger on the mesh.

The yellow area is the corresponding ‘head’ UVW. In the box-out the red highlight indicates the upper head, yellow, the lower. As can be seen, this mean more UVW space is being used to unwrap the upper head than the lower which equates to a higher “Texture Density”…

… the upshot of this is a lower texture resolution on the bottom half of the head compared to the upper. Where-ever possible this disparity should be addressed and corrected, especially in areas which are to have texture details painted
To fix these sorts of issues the UVW map needs to be split so the map can be properly flattened. However, this needs to be done keeping in mind the previously discussed concerns, in particular where the seam is placed; because a ‘face’ is to be painted to this section of the texture the split should be placed at the back of the head. Using a combination of “Alt+RMB“, “Shift+RMB” and/or RMB, select the appropriate edges at the back of the head and use “Ctrl+E” to “Mark Seam” (or “Mesh » Edges » Mark Seam“). Upon unwrapping the entire mesh again, the UVW map will flatten out into a strip and the overall layout will redistribute itself to take advantage of the changes to the UV’s in the UV/Image Editor.
Design note: keep in mind that only the head is being done here so the edge from the just above the neck of the scarf to the underside of the hat needs to be marked as seams. When rebuilding the UVW’s press “A” and “Select All” beforehand, this ensures the new section and its place in the overall map is rebuilt – ideally rebuilding should be done each time a complete seam is placed.

Unwrapping the characters head by adding a seam down the back-side, note the initial distortion dues to the semi-spherical unwrap Blender has used to try and unwrap the UVW’s [blend 70]

With the seam placed and head unwrapped the UVW island that’s produced straightens out, note that as a result of the new shape the overall UVW map has changed the default distribution of each island/section relative to other parts [blend 70c]

The characters UVW map distribution around the mesh as it stands up to this point [blend71]
UVW maps & convex/concave shapes
Although a relatively simple character, it’s structure still presents a number of fundamental challenges to UVW mapping because the mesh makes use of “convex” and “concave” shapes to describe it’s general appearance. The hat sat atop the mesh for example, considered in the literal sense (as ‘a hat’), presents a very complex shape to unwrap as a single UVW segment – when processed, the structural differences between the brim of the hat and the ‘bowl’ will result in some major distortion when both a ‘small’ and ‘large’ surface area are attempted to be unwrapped to the same UVW island/texture space. On the other hand, splitting the UVW into smaller sub-section alleviates this but might result in texture usage issues (the amount of space used to fit the entire map). This ‘struggle’ to find a ‘compromise’ between the shapes a mesh contains and the amount of UVW/texture space that can be dedicated to those, is the essence of the process, and with this in mind, shown below below the hat area of the mesh is seam marked and unwrapped using three approaches to the same problem, each highlighting different layouts with different UVW distributions and differing levels of texture distortion as a result.
Design note: for the sake of clarity the ‘hat’ has been unwrapped separate of the rest of the character to make the difference between each of the following seam markings and UVW layouts clearer to understand. Use the usual “Alt+“, “Shift+” and/or RMB to select edges, and “Ctrl+E” to select “Mark Seam” from the “Unwrap” menu.
The first approach marks seams so the UVW’s are split in to segments corresponding to the overall structure of the mesh; a ‘brim’, a ‘body’ and ‘top’ section. As a result of this the UVW’s have a relatively ‘relaxed’ distribution, because they are no longer fighting each other for space, so texture distortion is minimised.
Design note: strict UVW splits are useful where textures with fine details need to be mapped across a surface without stretching/distortion – fine text or ‘filigree’ patterns for example. However, because the UVW’s are split this results in an increased number of ‘edges’ which can be difficult to paint across/match up both sides of a split.

Placing a seam down one side of the hat and around the rim means the shape can be unwrapped with a relatively ‘flat’ layout, doing this does create a larger number of edges that have to be dealt with [blend72]

Wire view of the above unwrap showing the location of the seams as placed around the hat. N.B. blue lines indicate ‘sharp’ edges for smoothing [blend72b]

The resulting UVW map layout from adding seams to split the UVW around major edge loops [blend72c]
A second approach to unwrapping the hat might be to separate the brim and hat body so the latter remains a single ‘unified’ UVW segment rather than being ‘pealed’ like an orange. This reduces the number of exposed edges but increases the likelihood of texture distortion due to UVW distribution issues over the mesh.
Design note: because an awkward shape is being unwrapped there is an inherent risk of texture distortion where text or fine design work is concerned.

Placing a seam around the rim/body edge loop unwraps the hat body as a single elements which typically results in distorted texture distribution [blend73]

Wire view of the above unwrap. UVW seam is placed around the rim/body edge loop, shown above marked in blue due to the seam being previously marked ‘sharp’ for smoothing [blend73b]

The resulting layout resulting from marking seams so the hat body is a single UVW island [blend73c]
A final third approach would be to compromise between the exposed edges of the first, and texture distortion of the second, to, in affect, combine the benefits of the two into the one map. This means marking seams to split the UVW in to two main segments, reducing the number of edges, then adding another seam to split the hat body so it flattens out, reducing UVW distortion. Whilst this does mean a major seam split has to be contended with, the alternatives, approach “1” and “2”, would require more effort to work around.
Design note: compromise when unwrapping a UVW does not inherently mean producing better results in any literal sense. Rather it’s simply a matter of mitigating the problems a ‘stricter’ approach UV mapping might present.
Before progressing with the remainder of the tutorial use approach ‘1’ to seam mark the mesh and unwrap the hat UVW’s

Placing the seam down one edge and across the top of the hat split the UVW so that it typically flatten out more than with other placements without exposing as many edges [blend74]

Wire view of the above seam placement down one side and across the top of the hat (to the centre ‘pole’ – central vertex). N.B. blue line indicate edge loops marked ‘sharp’ for smoothing [blend74b]

The resulting UVW layout of marking seams to split the UV up one side towards the centre (pole) vertex atop the hat [blend74c]
Changing UVW maps mid-project
It was mentioned previously that seams are placed where they cause the least amount of trouble ‘visually’ (where they are less likely to be seen). Doing this however, doesn’t always mean they are located in the best place relative to the UVW map itself. For instance, if the characters body is mapped so the seam travels up/down the back of the mesh it creates a problem when unwrapped because the integrity of that section is undermined at the front by the scarf cut-out – as there are no UVW faces available to prevent that area collapsing in on itself, this is what happens. Problems like this are not always immediately apparent, typically cropping up mid-way through a project because they are the result of a preceding action rather than a fundamental error in construction
Design note: this problem does need to be avoided where-ever possible because overlapping UVW’s duplicate (repeat) whatever is within the bounds of the problematic area – whilst not necessarily noticeable on a uniformly textured object, pattern repeat is usually a dead give-away there is an issue.
For the Snowman character then, fixing this problem means removing the seam placed up the back of the mesh and replacing the one up the front. Using “Shift+RMB“, select the edges to be removed, press “Ctrl+E” to access the “Edges” menu and then select “Clear Seam” to complete the action (or “Mesh » Edges » Clear Seam“). Using “Shift+RMB” again, select a set of edges running from the corner of the scarf cut-out to the bottom-front edge of the mesh, press “Ctrl+E” and click “Mark Seam” to confirm. Rebuilding the UVW map – select all, “U”, “Unwrap” – after doing this produces a layout absent the overlap.
Design note: the relative positions of other UVW elements may also be changed.

If the main UVW split for the body runs down the back of the mesh it will result in an overlap in the UVW which will cause problems in later stages. This should be changed [blend75]

The UVW map for the above showing overlap of the body section due to the seam running up the back of the mesh, the gap caused by the scarf section being separate tends towards a distortion of the layout [blend75a2]

Running the seam for the body down the front side of the mesh produces a layout without overlap but does mean the potential for issues hiding the seam when producing the textures later on [blend75b]

The UVW map of the above with seam marked down the front of the mesh, note that UVW segment distribution is approximately the same except for the body section [blend75b2]
Join Objects & UVW mapping
At this point a number of other objects have yet to be process and remain detached from the main character. So, whilst the latter has been worked-up to a point where it has an initial UVW map, the overall model is not yet complete. There are one of two ways to go forward from here; 1) UVW map and process the objects independently, or 2) merge them all together for processing as a whole. Although both approaches have their uses (Pros & Cons), the latter is typically easier to do and tends to result in a more uniform UVW map. To do this, objects have to be ‘Joined‘.
Design note: if different textures were to be assigned, or the objects were meant to be used independently of the main mesh, the former of the two options might be the better choice. Generally speaking however, the latter is typical.
First press “Tab” to ensure “Object Mode” is active (joining Objects cannot be done in ‘Edit’ mode). Using “Shift+RMB“, select each item in turn, the main mesh being last – selection order is important. Finally press “Ctrl+J” to “Join” the objects together into a single mesh (or “Object » Join” from the 3DViews Header).
Design note: although objects can be selected in any order, the last object selected is the one to which everything else it joined, so left/right eye, nose then main mesh; left eye, nose, right eye, main mesh, any combination so long as the main mesh is always selected last. The 3DView will update the mesh display so the ‘darker’ sub-selected objects will turn brighter orange (because they are now merged into the larger whole). Beyond this though there is little indication the ‘Join’ action has completed.

Using “Shift+RMB“, select the eye and nose objects and connect them together using “Ctrl+J” [blend76]
In the 3DView, once objects, areas which don’t yet (or didn’t) have either a UVW map or texture assignment prior to being merged will display ‘white’ in “Texture” (“Alt+Z“) shading mode. To correct this the texture previously mapped over the main body of the mesh needs to be reassigned to include the new additions.
Design note: a ‘white‘ mesh indicates a missing UVW or texture assignment, ‘pink‘ means a broken or missing asset link (the texture cannot be found).
Press “Tab” to enter Edit mode and “Select All“, “A“, in the 3DView. To then reassign the texture, in the UV/Image Editor click the “Browse image to be linked” button and select “Snowman” from the list. In the 3DView the ‘white’ areas of the mesh will change to show a default per-face mapping (similar to the mapping present on the mesh at the very beginning of this process).
Design note: although it has been mentioned in various places throughout the tutorials, it’s worth highlighting again that during the entire process of unwrapping the model, the 3DView has been toggled between “Wire“, “Solid” and “Texture” shading depending on the function or action carried out. The keyboard shortcuts to do this – “Z“, “Alt+Z” – are essential tools when working with Blender and should form the ‘core’ of productive learning.

Once connected to the main mesh, reassign/reapply the Material image to the mesh by clicking “Browse image to link“[1] in the UV/Image Editor and selecting “snowman“[2] – white areas (the eyes and nose) indicate sections not yet textured (but that may have material assignments) [blend77]

The texture image assigned to the mesh displayed using the default ‘reset‘ mapping (each face maps the texture in its entirety) – the entire model will need to be unwrapped again [blend77b]

The white areas visible above indicate the ‘reset’ UVW’s of the objects just combined with the main mesh through “Join” (“Ctrl+J“), these are the new areas that will need to be remapped/unwrapped again [blend77c]
Next the UVW’s need to be remapped incorporating the new additions. Whilst still in Edit mode from previous, ensure the entire mesh is selected again, “A“, press “U” and click “Unwrap“. In the 3DView the mesh will update to show the improvements, the eyes and nose properly mapped.
Design note: when the UVW map is rebuilt the relative positions of each previously unwrapped UVW will likely change so as to accommodate the new additions – this is why it’s generally important to UVW first, texture second, to avoid remaking other ancillary assets (textures etc.).

Re-mapping the UVW map now has the texture distributed properly over the entire mesh [blend78]

The final UVW map including all the sub-mesh elements [blend78b]
Using the UV/Image Editor
So far the UV/Image Editor has been used to carry out basic UVW editing, namely viewing the changes made during the process of seams marking the mesh. This isn’t by any means its only function. Because it’s an actual ‘editor’ it can be used to change the UVW’s through the manipulation of sub-elements in a similar way to editing the actual mesh; there are similar ‘selection modes’ available for instance, as well as using the same general manipulation functions and keyboard shortcuts. With this in mind, the general purpose of using the editor in this context is to improve and/or optimise the UVW maps layout, increasing the relative ‘texture density‘ of important parts, whilst reducing it for other, non-essential areas.
Design note: “G“, “R” and “S” function much the same in the UV/Image Editor as they do in the 3DView. Similarly using “Ctrl+Tab” changes “UV Select Mode” between “Face“, “Edge“, “Vertex” and “Island“. Together they form the primary tools for manipulating and editing UVW’s in the UV/Image Editor.
First, in the 3DView “Select All“, “A“, in Edit mode to ensure the entire mesh is selected. Next, use “Shift+F10“, or click the “Displays current Editor type” button extreme-left of the 3DView Header, switch to (former) or select (latter) “UV/Image Editor“. The 3DView will change to display the UV/Image Editor with the texture assigned to the mesh/material and UVW map itself visible.
Design note: when using the shortcut, “Shift+F10“, make sure the mouse cursor is over the view that needs to be changed, the action (changing views using short-cuts) is ‘context-sensitive‘ and will change whatever view is under the mouse at the time of activation. Used in combination with “Shift+F5“, the UV/Image Editor and 3DView can be toggled back and forth. It’s important the entire mesh be selected in Edit mode before changing views as this makes the entire UVW map available for editing.

Throughout the above section the UV/Image Editor has been used to simply show what each stage of UVW unwrapping looks like once done. It will now be used to edit the layout toggle “Shift+F10” and “Shift+F5” UV Editor & 3DView
Setting up the UV/Image Editor
Before editing the UVW’s switch “UV Select Mode” to “Island” using “Ctrl+Tab“, this enables selection based on a UVW element being an individualised unit of the overall map – when working with UVW’s, “Island” and “Vertex” are typically the most frequently used modes.
Design note: the UV/Image Editor works in a similar way to the 3DView in terms of managing objects and elements; in addition to “Island“, it has the same “Vertex“, “Edge” and “Face” select modes selectable via “UV Select Mode” and accessible using “Ctrl+Tab“; object and element manipulation uses the same “A“, “G“, “S” and “R” for “De/select All“, “Grab“, “Scale” and “Rotate” control, as well as “Shift+“, “Ctrl+“, “RMB” and “LMB” for multi-selection and confirmation of actions.

Using “Ctrl+Tab” to access the “UV Select Mode“, click “Island“. This allows each separate block of the UVW map to be selected as a whole component rather than having to select groups of faces or vertices
Although as a general rule of thumb this next step is not required per-say, it is frequently useful when wanting to manipulate UVW’s or selections based on the cursors location. To enable this press “.” (‘period’/’full-stop’) to switch, or from the “Rotation/Scaling Pivot” property in the UV/Image Editor Header, select “2D Cursor“.
Design note: the default Pivot is “Bounding Box Centre“, which can be toggled using “,” (comma) – using “.” and “,” toggles between the two main pivot point options.
To control the location of the cursor itself, open the UVW/Image Editor ‘Properties’ panel using “N“, in the “Cursor Location:” sub-section, change “X:” and “Y:” to an appropriate value – in this instance using “0.000” for both will (re)position the cursor bottom-left of the texture where it’s needed for the next section.
Design note: the cursors location in the UV/Image Editor is largely representative of a ‘pixel’ based unit of measurement; if “0.000/0.000” is bottom-left, “512.000/512.000” would place the cursor top-right, assuming a mapped texture was 512 x 512 pixels width x height.

By default the 2D Cursor is located bottom-left of the texture map, this will be used as an ‘origin point’ for the following steps. [blend79]

If the cursor isn’t located bottom-left, press “N” to access the “Display” properties and set the “Cursor Location:” X/Y values to “0.000” [blend79b]
Finally, and specifically for content related to games, is ‘pixel snapping‘. With this enabled vertices are locked (‘snapped’) to the pixel making it easier to position individual vertices relative to their neighbours. Enabling this feature from the UV/Image Editor Header, click “UV’s” and select “Snap to Pixels” from the list of available functions (there is no confirmation of activating this in the viewport).
Design note: when pixel snapping is active the respective locations of individual vertices is determined by a set of coordinates values comprised of ‘whole’ rather than ‘decimal’ (‘floating’) numbers, “0/128” versus “0.134/127.913” for example. Using the latter there is an increased risk of various types of error, texture alignment issues being the most common.
![]()
Make sure “Snap to Pixels” is activated, as the model is being textures using a relatively low res image, the position of each UVW vertex relative to individual image pixels is important
Editing UVW’s in the UV/Image Editor
With the UV/Image Editor set-up the map itself can now be edited. Generally speaking when editing a UVW map the goal is to manipulate the overall layout so a ‘ best-fit’ (read that as ‘most efficient’) within the available “Texture Space” is achieved. For a ‘unique’ object, i.e. an object mapped to a single texture image, this typically means the layout will undergo varying degrees of scaling, repositioning, re-shaping and moving of individual UVW vertices, faces and/or segments (‘Islands’) so that all UVW’s end up positioned relative to, and inside, the aforementioned area.
Design note: the position of UVW’s within a standard unwrap are not particularly efficient relative to the constricted requirements of game-art where the space and the use there-of are at a premium. Typically the automated unwrap process places objects ‘axial’ into the texture space area, i.e. perpendicular (at right angles) to it irrespective of their shape.
The very first ‘pass’ to make at this stage is to ensure the UVW uses as much of the available texture space as possible. This is done by scaling the entire map relative to the largest section of the UV, in this instance this is the ‘body’ (not the base – see below). First, make sure the cursor location is set to bottom-left and that it’s being used as the pivot point (see above). Next, press “A” to “Select All” (this may need to be done twice, once to deselect, then again to reselect). With the entire map active press “S” and “Scale” everything ‘up’ (larger) so the ‘body’ section fits approximately across the entire width of the image. LMB click to confirm.
Design note: the lower-left cursor placement acts as a fixed reference point – as the map was already unwrapped favouring that point if means scaling will be relative to it, the end result being more-or-less in position by proxy.

Use “A” to “Select All” then “S” to scale the entire UVW map so the section associated with the characters body occupies the width of the texture – this will cause some elements to sit out-of-bounds, this is fine for now
Using “MMB+up/down“, “Zoom” the view so now re-sized UVW map is visible in its entirety; this exposes more of the work area. Then either press “A” to deselect everything or simply RMB select each of the separate UV Islands in turn, except the body, and move them into the work zone (use “Ctrl+Tab” and ensure “UV Select Mode” is set to “Island“). LMB click to confirm each action. This simply clears the ‘live’ area and saves possible confusion when manipulating the UVW’s.
Design note: when making a selection clicking RMB will automatically deselect any previous selections. When moving a selection RMB can be used to cancel the action midway (which will reset the selected items). To “Undo” an action use “Ctrl+Z” (or from the 3DView Header select “Object » Undo“).

Using MMB and/or MMB+Scroll, manipulate the work zone so the entire UVW map can be seen (MMB = “Grab/Move“, MMB+Scroll = “Zoom” [in/out]) [blend81]

With “Island” select mode active, move everything except the main body UVW into the workspace of the Editor (the ‘grey’ area surrounding the texture), and then switch the “Pivot” point back to “Bounding Box Centre” [blend81b]
With the individual UV island in the work area, place them back, “G“, with the exception of the large ’round’ element representing the underside of the mesh base, into position so their overall organisation results in a more efficient use of the available texture space; this may mean rotating, “R“, and/or minor amounts of scaling, “S“, of each island, the latter action being kept to a minimum. LMB click to confirm each action before making new selections/performing new actions.
Design note: be mindful of “Texture Density” when scaling UVW elements – ideally the distribution or ‘amount’ of texture dedicated to a particular area needs to remain fairly consistent across the entire mesh otherwise some sections may look low-re’s and pixilated compared to others.
The final layout should be one where the separate UVW islands occupies its own space, remains ‘relative’ in size to their neighbours, and allows some degree of breathing space, or “Margin“, around/between each to compensate for any image related anti-aliasing or pixelation issues.
Design note: margin values need to be proportionate; a 2 pixel gap between UV segments mapped to a 128×128 image may appear larger than a 12 pixel gap between the same UV’s mapped to a 512×512 image. However, a larger image does allow for more accuracy, minimising anti-aliasing and pixelation issues, so lower margin values can be used, notwithstanding circumstance and UVW layout complexities.

Using “G” to more each UVW Island once they are selected (individually), the ‘important’ elements are positioned whilst making sure to keep their sizes relative to each other, thus equalising the texture density [blend81c]
Once the main UVW elements have been juggled together all that remains should be the large circular ‘base’ section. As this part of the mesh, and by extension its associated UVW’s, is not likely to be seen or used it can be reduced considerably in size and moved to an unused, non-essential area of the map – it still needs to be present however, just not in a way that would mean it received any significant texture/images resources. As above, RMB click to the select the island, press “S” and down-size enough for it to fit into an unused area of the map – in this instance bottom-right (see pink area shown below). LMB to confirm. Press “G” to move it then LMB confirm the action again.
Design note: it’s important to note again that any changes to individual UVW sections scale should be kept to a minimum, and/or/where-ever possible, to the entire map thus ensuring texture density (resolution) remains relatively equalised.

The underside of the mesh is not important so it can be Scaled down in size and placed in an incidental location on the UVW map [blend82]

The mesh with the image assigned and UVW mapped as best as possible whilst keeping the texture density equalised between each element [blend83]
Saving a UVW map & textures
Once the UVW layout has been finalised, both the generated texture mapped to the object (created in the previous chapter), and the UVW map itself, can be saved as images for further use painting the characters texture in a photo-editing application. This is an essential step, especially where the generated texture is concerned because, as was discussed previously, it’s currently just a simple “datablock” – it’s not a ‘real’ image but a set of parameters and coordinates. Saving converts that into a usable image.
Design note: generated textures are ‘virtual’ in the sense that they don’t exist outside Blender. When being saved to disk, the information associated with the datablock is converted into a usable form that can be edited and manipulated independently of the application.
To do this, from the UV/Image Editor Header, click the “Image*” and select “Save As Image” from the available options. The “File Browse” view will appear. In the “Save As Image” subsection of the property panel to the left, be sure to select a suitable format from the options available, select the location to which the file is to be saved, then click “Save As Image” top-right. Blender will then return to the UV/Image Editor indicating the image has been saved (and ‘made real’ as a result).
Design note: a “*” (star) is appended to indicate the active image has not yet been saved. In other words, “Image” changes to “Image*“. When saving images from Blender, be sure to choose a loss-less image format – TGA, BMP, TIF etc. – because compression artefacts have a tendency to cause varying levels of visual issues when working on the resulting file in a photo-editor – the ‘blocks’ caused by JPG compression for instance are difficult to remove and can be quite noticeable, when re-saving again to JPG, the additional compression distortions can exacerbate the original issue caused by original compression artefacts.

Saving the grid texture assigned to the UVW map – until this data is ‘saved’ it’s simple a datablock and not a ‘real’ image; using “Save As Image” will ‘make real‘ the associated data [blend84]

In the “Browse” view, find the location to save to[1], ‘name’ the file[4] (“snowman” in this instance), choose the format[2] – preferably an uncompressed format such as TGA or TIF – and then click “Save As Image“. Optionally, check “Relative Paths” to make so the image ‘source’ data is shown ‘relative’ to the working file
Finally, to save the UVW map layout in the UV/Image Editor again, click the “UV’s” menu option and select “Export UV Layout” from the list. The “File Browse” view will appear once more. As before browse to a location to save the file (the default should be the last location opened/accessed) and then in the “Export UV Layout” property subsection on the left select “All UV’s” to ensure the entire map is exported, change the “Format:” to which the image is to be saved (see note above), and then the required “X/Y” dimensions of the image (may be indicated by a numerical values only). Once done click the “Export UV Layout” button top-right. Blender will return to the UV/Image Editor confirming the action. This is the entire UVW map saved as a wireframe image ready for use.

For the purposes of painting textures, using “Export UV Layout” to save the UVW map to an image, helps in this regard, acting as a guide or template for texture production [blend85]

In the “Browse” view, select a location[1 & 2], change the image format[3b] and size[3c], make sure “All UV’s” is active[3a] – this ensures unselected elements are included – then click “Export UV Layout”
With the images saved UVW mapping the characters is done so using “Shift+F5” toggle the UV/Image Editor back to the 3DView in preparation for the next step in the process, texture baking ambient occlusion maps.
[1: concept | 2: model | 3: material | 4: UV maps | 5: bake | 6: rig | 7: animate]

