Import SketchUp models into Blender
SketchUp is a relatively powerful tool for quickly making buildings and other structures for games. Its limited export options present a bit of a problem however, because content is not specifically ‘game ready’ or in a ‘workable’ state. For that, material is typically exported from SketchUp and ‘converted’ for use in another application. The following tutorial explains this basic process of export from SketchUp and import into Blender.
Design note: the following relates to Blender but is equally applicable to any 3D software supporting the specific mesh formats discussed below.
Prerequisites
A basic understanding of both SketchUp and Blender will be needed for the following, as will having a model ready and available for export (from SketchUp). The ability to open *.zip files is also required (using Windows own native support or through third-party programs, e.g. WinZip, WinRAR, 7zip etc.) and it may be a necessary to install Python for full import/export script functionality.
Design note: Python API may be needed if import into Blender fails. This issue/requirement is version dependant due to script changes and the way they reference the API. Check Blender Console for errors and/or details.
Which Version of SketchUp
There are two versions of SketchUp; SketchUp Pro and SketchUp Make. For the most part the latter is generally the more popular, and often used to make content for games, because it’s free. It has two major limitations however, one being its use for non-commercial purposes only. The other its export capabilities generally being limited to *.kmz (all versions), or latterly *.dae (newer versions from c. v6 or above). Aside from availability, the difference between the two simply relates to the way files and associated data is packaged; *.dae (Collada) typically exports assets to a folder, whereas *.kmz is self-contained and collates everything together into a single file.
Design note: KMZ being collated relates to its use in distributing Google Earth content; all the necessary assets belonging to a particular model have to be contained into a single file.
Before beginning the process of importing SketchUp models into Blender (or other application) first check which version is being used and what export options are available; the procedure then used will be determined by this.
Design note: SketchUp’s native *.skp files can’t be used because they are a binary compiled format – it is effectively a file dump that holds scene data that might not otherwise be of use outside the application.
What can be Exported From SketchUp
Generally speaking SketchUp exports the (visible) contents of a scene so before proceeding it’s best to clean it up based on what needs to be saved; this might require regioning the model and/or saving sections to separate files for later individual processing. Data exported typically includes mesh, materials and textures (images) where assigned, else ‘blank’ assignments are used on the mesh.
Design note: to export specific items, make a selection and then activate "Export Only Selected Set" in "[*] Export Options" during export, else SketchUp defaults to ‘export all’. Only available for DAE files.

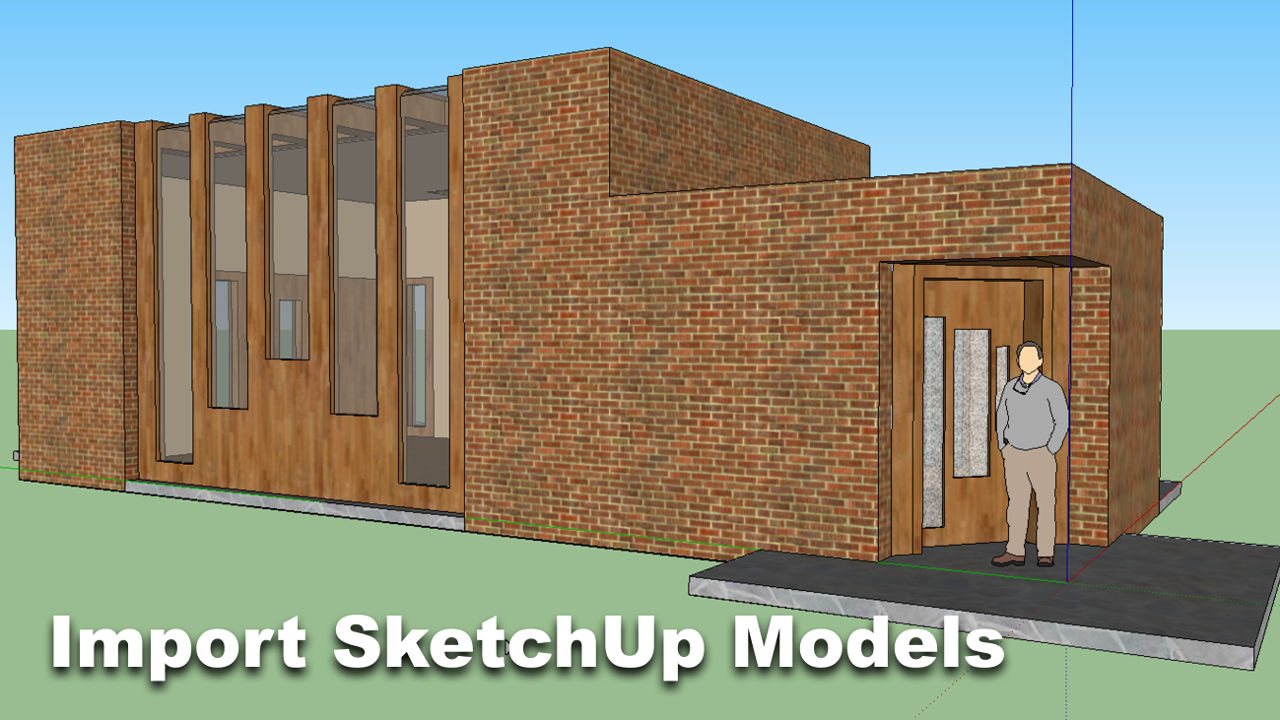
A simple building model in SketchUp with various architectural features ready for export – note that textures used are from SketchUp default library (and subject to licence). The model is built using SketchUp’s default units of measurement and scaled/sized appropriately
Export Models From SketchUp
Once a model is ready nothing else needs to be done except to simply export it to *.dae or *.kmz. From the "File" menu select "Export » 3D Model…". The "Export Model" dialogue will appear. Browse to a location where the files are to be saved; change the "File name:" as needed; select an "Export Type:" option, either "COLLADA File (*.dae)" or "Google Earth File (*.kmz)", and then click the "Export" button. Depending upon the amount of data being parsed SketchUp will pause momentarily before returning full functionality back to the user, completing the export process. The end result should be a file and/or set of assets of either [filename].dae or [filename].kmz respectively saved to the location of choice.
Design note: after export to DAE an additional window may appear; "Collada Export Results" displays information about the scene including the number of faces, triangles, textures, etc. metadata generated by the export process.

The non-commercial version of SketchUp has limited export capabilities but does provide one or two options to save content for external use – select "3D Model" from the "Export" options to start the process
")
Selecting "Collada File (*.dae)" as an export option allows content to be exported to a format that can be imported into Blender or other 3D application without further work (DAE export may not be available in some versions of SketchUp prior to v6, in which case fallback should be to KMZ)

A secondary export format available in SketchUp, "Google Earth File (*.kmz)" allows content to be exported when the Collada DAE option is not available. Choosing this options requires an additional number of steps before content is usable (KMZ is common to all versions of SketchUp)
Export Options
Although models can be exported to both *.dae and *.kmz using SketchUp’s default settings a number of additional options are available that have an affect on the mesh and can be used to export selections in a way that more closely resembles SketchUp.
Design note: activating certain options may result in malformed, broken or otherwise missing meshes or section thereof because of the way SketchUp works when building structures. Some experimentation may be necessary.
To access the extra options, after progressing through the initial steps to export a scene, in the "Export Model" dialogue that appears (where file name, type and save location are set) click the "Options…" button bottom-right. Depending upon the "Export type:" (file type) previously selected this will open either "DAE Export Options" or "KMZ Export Options" properties where these auxiliary options are located.
Design note: generally speaking dae will always provide more options than kmz because its an actual mesh format whereas kmz isn’t, it’s a container.
When exporting to Collada dae this then grants access to various options that directly affect the geometry, materials and general scene structure, models can for example be exported without tessellation and in a form that more resembles the way they look in SketchUp, potentially making them easier to edit, or at least reduce the amount of additional work often needed to make meshes editable in Blender. On the other hand, exporting to kmz provides few options by comparison.
Design note: although models can be exported from SketchUp reflecting their immediate structure using "[*] Export Options", doing so is potentially problematic because the Boolean and Ngon calculations needed to ‘translate’ SketchUp structures into a generally readable form can result in malformed surfaces or mesh sections that are otherwise ‘null’ (because their structure is too complex they would produce invalid surfaces so the export process ignores them for the sake of generating a valid file the can still be imported/opened).

SketchUp does provide some basic export options for Collada DAE files that change the way mesh data is exported – using one or more may mean less work cleaning up models once imported into Blender

KMZ also has a number of export options but due to the format itself being a container, these are generally limited to properties that don’t necessarily affect model data
Using SketchUp KMZ Files
When files are exported as KMZ they will need to be ‘processed’ before use. This basically involves a change of format and an extraction of contents, possible because KMZ files are actually simple containers and can be managed, packaged and extracted in much the same way as a ZIP or RAR. To do this locate the exported *.kmz in Windows Explorer ("Win+E"), make a duplicate copy and then change its extension to ".zip" from ".kmz" – "house_r2.kmz" to "house_r2.zip" for example.
Design note: there are several ways to access Windows Explorer; by pressing the "Windows Key+E", using "Start » All Programs » Accessories » Windows Explorer", or double-clicking the "Computer" ("This PC") Desktop icon. To rename a file right-click its icon and select "Rename", or click the file name twice (slowly) to enable ‘edit mode’. Delete "kmz" and type"zip" – "house_r2.kmz" to "house_r2.zip" as shown below for example. Press "Enter" to confirm or click elsewhere on screen.
Additionally, note that Windows may need to be set up so "Hide extensions for known file types" is disabled otherwise files appear in Explorer as just a name, absent their respective file extension, making it sometimes difficult to know if a file has indeed changed, i.e. the file will always display as "house_r2" instead of "house_r2.kmz" because the file extension is hidden. To resolve this problem, with Windows Explorer open, click "Organise » Folder and search options" then on "View" to access the respective options. In the list view scroll down to "Hide extension for known files types" and deselect the checkbox to the left. Click "OK" to close and exit (this procedure assumes Windows 7 or 8).

KMZ files need to be ‘converted’ before they can be of use. Duplicate and rename the exported file from KMZ to ZIP – this may require "Hide extensions for known file types" to be enabled to see the file extensions, otherwise they appear in Windows Explorer (or the Desktop) as just file names
Extracting the Contents of the (KMZ) Zip File
Once the KMZ becomes a ZIP its contents can be extracted using Windows own native archive management system, or a third-party application like Winzip or WinRar. With the file still available from the previous step either, use Windows Explorer to drag and drop the files available to a location of choice, or double-click to open the zip in WinZip/WinRar or other archival program and use their respective "Extract" tools.
Design note: how files are extracted will depending on preference, for instance Windows treats zip archives as if they were folders that can be inspected, managed and copy/pasted the same way as other files and folders, all from within Windows Explorer – Windows operating system has native support for right-click extraction; highlight a file and right-click, selecting "Extract All…" from the menu, follow prompts to save the files (note that this ability may be over-ridden with additional third-party options if another archive management program is installed). Alternatively with WinZip or WinRar installed, a number of file and system tools are generally available using right-click when a file is selected to facilitate extraction, or from within respective programs using their "Extract" processes.
There should be three types of file available once done; a single "*.kml" – a XML document containing metadata about the kmz file itself (what it is); a "*.dae" – another XML document, containing mesh and material data; and one or more "*.jpg" images for textures. Of the three *.dae and *.jpg will used during the import process.
Design note: there should generally only be a single KML and DAE file, and if the mesh if textured in SketchUp, at least one image, else nothing will be present in the KMZ file or DAE asset folder.

KMZ typically contains three types of file – kml (XML), dae (XML) and jpg images – all of which are accessible once the file extension has been changed from KMZ to ZIP (file can then be opened in WinZip or other ‘zip’ file management application)

The contents of the renamed KMZ extracted and showing the main items to be imported into Blender – a set of textures (if assigned to the mesh and exported as per Export Options) and a single dae file. Exporting as DAE would show a similar folder structure where-ever the assets were saved during the process
Import SketchUp *.dae into Blender
The important file from this process is the Collada DAE file, "house_r2.dae" in this instance, which is then imported directly into Blender. To do this, with Blender open, from the "File" menu select "Import » Collada (Default) (.dae)". The "File Browser" view will appear. From here browse to and select the extracted .dae file then activate "Import Units" in the "Import COLLADA" sub-section lower-left. Click the "Import COLLADA" button top-right to import. Blender will pause momentarily whilst the data is parsed before returning back to the main 3D View with the mesh visible in the viewport, completing the SketchUp model import process.
Design note: there is no need to separately import texture assets as these are automatically pulled in and set based on Material metadata held in the dae file. The scene may need to be zoomed outwards because of differences in size and scale between SketchUp and Blender – the object may appear very large.

With the DAE file available it then simply needs to be imported into Blender using an appropriate Collada import script. From the "File" menu select "Import » Collada (Default) (.dae)" to start the process

The "File Browser" view showing the DAE file selected and ready for import. Ensure "Import Units" is active so the ‘units of measurement’ used to make the model are replicated in Blender, making it easier to continue working where needed (Blender will set the Scenes "Units" options relative to the content)

The SketchUp made and exported model finally imported into Blender and shown in the 3D View – displayed in "Solid" shading (meshes typically display untextured initially). Note the units of measurement top-left of the 3D View set using the metadata included in the dae
Conclusion
SketchUp’s simplicity is its strength, making it an application favoured by beginners to 3D in general, and although it can be used to produce relatively complex models and content, as with everything this takes time and practice. Having said this, because it is not a fully fledged 3D application like Blender, it can be tricky to use for the production of efficiently optimised content for games directly – one of the reasons for importing content for further work in other applications. However, and this is vitally important to keep in mind, commercial use of SketchUpof any kind is not permitted (Non-Commercial and Education versions) making its use for content creation problematic. Be sure to read through the licence and fully understand its implications before using it to any extent producing content for games.
Video
Video outlining the basics of importing SketchUp models/files into Blender. Available export options from SketchUp may vary depending on the version used.
Video run-through of the basic process exporting SketchUp files and importing the result into Blender
[1: Import SketchUp | 2: Extras & Options]

