Red Ninja Cubie™ #2 – Materials, UVs & Baking
The next part in making the simple Red Ninja character is to add Materials, UV unwrap the mesh and apply a texture. How this is done largely depends on the desired final ‘look’ – although cartoon-ish in appearance, the texture assigned to the model could be appear ‘real’ in the sense that, for example, the suit looks like real textured cloth rather than perhaps just a flat colour.
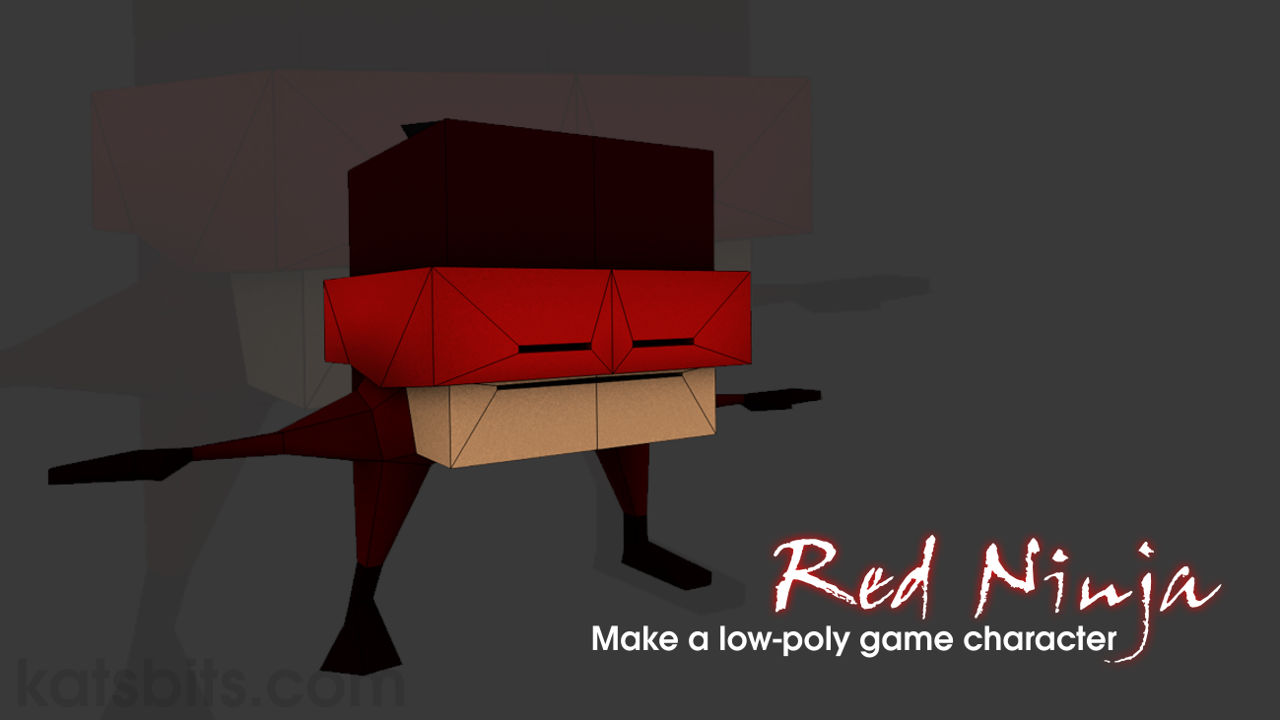
Download: Red Ninja™ source file (c. 900 KB | *.blend, *.tga).
Because of this, and the tools available in Blender, it’s possible to use the model, and materials assigned, as a means to inform the appearance of the final image used. To this end several Materials will be applied and used to generate an image that will be ‘mapped’ to the model, essentially replacing the coloured materials, making the character usable outside Blender.
Design note: the order in which the next few steps are done cane be reversed in that Materials can be assigned before UV Unwrapping, or vice versa because neither has any direct effect on the other. In other words, both aspects of the process can be carried out independently.
What are Materials, UV Maps and Textures
For the character to be usable it needs a least one Material, an associated Texture with linked Image, and a UV map. Together they form a basic material and coordinate system through which the bare, grey, surface of a mesh can be mapped and coloured to give the appearance of representing cloth, leather, wood and so on. This is essentially what materials and UV maps do (cf. illus. 1).
Design note: the word "material" here can be used to refer to the broader concept in the non-possessive sense, i.e. the application of a particular set of properties being collectively referred to as a "material", or a collection of such being "materials". And the possessive sense as applicable to a set of values attributed to a specific data-set in Blender, a "Material".
In terms of who they actually work, each Material is comprised of three separate stages or slots; a base "Material", an associated "Texture", and a linked "Image". For Materials to make sense relative to the mesh however, it needs to be mapped, a process that essentially ‘charts’ three-dimensional structure in two-dimensions, producing a flat UV map that in turn acts as a positional reference for the Image associated with the Material (cf. illus. 2). In other words, Materials provide what (what the mesh is to be covered with), UV Map instructs where (where or how the image is placed).
Design note: for models used in games, "Material" properties tend to be limited to colour and a few other basic settings not because of some failure on Blenders behalf, rather as a result of third-party environments having their own material systems not compatible with Blenders.

[illustration: 1] Materials assigned to the mesh adding simple colour to the character which can also be used to generate a bitmap image that can be reassigned to the model ready for game use

[illustration: 2] Final UV map assigned to the mesh shown using Blenders "UV Editing" layout – UV editor on the left, main 3D View on the right
Edit Default Materials
The default Cube Object used to make the Red Ninja has a Material pre-assigned so all that’s initially needed is a change of colour from the current light-ish grey to, in this instance, ‘red’ to distinguish it from subsequent Materials (cf. illus. 3).
Design note: the pre assigned Material is there as part of the properties initially provided by Blender in the default Scene.
Whilst the mesh is selected ("RMB") left-click the "Materials" Properties button to the right-side of Blender (button with a shaded sphere displayed), this exposes "Material", the active material and its associated properties. Scroll down past the "Material List" and "Preview" apertures to the "Diffuse" subsection. Here left-click the coloured lozenge (currently an off-white/light-grey colour) to access the "Color Selector" options pop-up and either left-click the ‘red’ area of the colour-wheel, or to be more accurate alter the "R", "G" and "B" values below typing "0.250" (R), "0.000974" (G), and "0.000" (B) in their respective input fields. Move the mouse cursor away from the colour selection pop-up to close and confirm, returning back to the materials properties with the entire mesh now also displayed in the 3D view dark-red (cf. illus. 4).
Design note: the default material assigned to the Cube is called "Material" – this can be changed later once other materials are available and it’s known which part of the mesh this current material is specific to. The colour picker pop-up is designed to stay open for as long as the mouse cursor is positioned over it, moving it away automatically closes the property and confirms the action. Occasionally however, this does not work forcing a left-click anywhere on-screen to close. Pressing "Enter" also closes the pop-up but it depends where the cursor is located, over an option or property, "Enter" will activate that setting for editing, i.e., the mouse cursor highlights a colour value, pressing Enter once activates it for editing, pressing Enter again confirms and stops further editing (until the option is activated again).

[illustration: 3] The default cube has a basic Material assigned that’s applied to all surfaces, indicated as a light-grey colour that can be edited and used rather than being discarded [8c_cubie.blend]

[illustration: 4] Materials have a basic "Diffuse" colour property that can be changed using "R" (red), "G" (green) and "B" (blue) numerical values for precision, or simply left-clicking inside the colour-wheel and/or light/dark slider to select/set a colour or tone, here as dark red is assigned [8d_cubie.blend]
Make and Assign Additional Materials
To distinguish different areas of the mesh, and for use later when generating the final mage for assigned to the character, several additional materials of varying tones of red are needed. Although this can be done continuing in Object mode, the process is often easier to manage in Edit Mode where Material instances can be assigned to surfaces as the are made, aiding subsequent surface selection and assignment.
Design note: it’s possible to create Materials in both Object and Edit mode, the difference, as mentioned above, is one largely of the ability to assign data to individual surfaces; in Object mode this is not possible – the first Material created is the one initially assigned to everything, which is why changing the original materials Diffuse colour changed the entire mesh.
With the Object selected, "Tab" into Edit Mode, press "A" to make sure the mesh is clear of any previous selections (to avoid incorrect material assignment), then "Shift+RMB" multi-select the arm and leg section of the mesh, from toes and finger-tips, up to and including the shoulder area (cf. illus. 5). In "Material" Properties, to the immediate right-side of the Material List aperture (currently showing "Material"), left-click the "+" button. A new entry appears called "Material.001". Directly below the aperture are three buttons, left-click "Assign". This assigned the new material to the selected mesh surfaces, which will update and change colour to off-white/light-grey by way of confirmation. Left-click "+ New" to generate a set of associated properties then in the "Diffuse" sub-section left-click the colour sample to access the "Colour Picker" as before and left-click the colour wheel in the ‘red’ section, or type "0.351" (R), "0.002" (G) and "0.000" (B) input fields. The assigned surfaces will update and change colour. Press "Enter" to confirm and return back to the materials properties (cf. illus. 6). In the input field directly below the Assign button left-click and type "body" and press "Enter" to confirm. The Material List will update to show the change (cf. illus. 7).
Design note: working with Materials is often recursive, i.e. the same basic A » B » C steps are used to create and assign each instance to a selection, usually in the same order – select » create » assign.
Press "A" to clear the selection, or left-click the "Deselect" button under the Material List aperture In the 3D View, "Shift+RMB" multi-select the top-half, lower back-side and corner, and inner under-side of the torso. Click the "+" button to the right of the Material List again, then left-click the "Assign" button below. This assigns the new "Material.001" to the selected surfaces, which will again change to the default off-white/light-grey colouration. Left-click the "Diffuse" colour sample and again left-click the colour wheel in the ‘red’ section, or type "0.138" (R), "0.000" (G) and "0.003" (B). Press "Enter" to confirm and return. The new mesh section will update a darker red. In the input field directly under the Assign button, left-click and type "torso". Press "Enter" to confirm. Left-click "Deselect" to clear the selection.
Design note: the previous "Material.001" was renamed "body", so "Material.001" as a unique identifier doesn’t exist, allowing Blender to reuse the ID for a ‘new’ instance – duplicate Materials and their respective properties, as with all duplication in Blender, are appended numerical increments where needed, to create uniquely identifiable instances of duplicated data.
Then once more for this initial pass at assigning materials, press "A" to ensure deselecting then "Shift+RMB" multi-select the faces associated with the bandanna – the face that protrude from the torso and the top and under-side edge. In "Material" properties left-click the "+" to create another "Material.001" instance, then click the "Assign" button. The mesh selection will change to conform assignment. In the ID input field left-click and type "bandanna". Press "Enter" to confirm. Finally click the "Diffuse" colour sample and again left-click the colour-wheel or type "0.800" (R), "0.034" (G) and "0.021" (B) (cf. illus. 8).

[illustration: 5] Left-click the "+"[1] button to add a new Material entry[2] that can be assigned to the mesh clicking the "Assign" button – the selection in the 3D View will change colour relative to any other materials previously assigned. Note also the material does not have any extended properties, those are generated clicking "+ New"[3] [8e_cubie.blend]

[illustration: 6] Material instances don’t have properties by default, so they have to be generated (see above)[3]. Once done they can be made more unique by editing their ‘name‘ or "ID"[2] and their respective DIffuse colouration (once assigned the mesh automatically updates) [ 8f_cubie.blend]

[illustration: 7] New Material assigned an appropriate name[1] and change of colour (Diffuse), which updates in both the 3D View and Material List[2] [8g_cubie.blend]

[illustration: 8] Additional materials created to block out the core regions of the mesh, ‘torso’, ‘body’, ‘bandanna’ and the original ‘Material’, which can be further refined as needed – blocking-out helps established the main areas of the mesh in relation later establishing the objects UV map [8h_cubie.blend]
More Materials: Refinement
At this point the Materials created and assigned previous essentially block out the main regions of the character. These can now be refined. Rather then continuing with the same process however, of making selections and creating and assigning specific Materials, a quicker approach would be to simply add the remaining Materials as a group action before then making appropriate selections to which they can be assigned.
Design note: There are two basic approaches to take when working with and assigning Materials; create the materials needed then assign to selections, or make and assign each, one at a time as they are made. In other words, either A) create nine additional Materials and then assign to specific surfaces selections, or B) make a selection, create an individual Material then assign to the highlighted surfaces. The outcome from either/or is the same but the time taken to execute may differ depending upon the mesh and/or selection complexity.
In Material properties click the "+" button the to right of the Material List six times; this adds "Material" through to "Material.005" (materials "1" through "6"). Left-click each new entry in turn and rename "eyes", "face", "boots", "arms", "hands" and "mouth". There should now be ten Materials displayed in the Material List. Set their respective Diffuse colours as follows ([material name] – red, green, blue);
- "eyes" – 0.000 (R), 0.000 (G), 0.000 (B).
- "face" – 1.000 (R), 0.730 (G), 0.503 (B).
- "boots" – 0.050 (R), 0.002 (G), 0.001 (B).
- "arms" – 0.250 (R), 0.000 (G), 0.000 (B).
- "hands" – 0.037 (R), 0.000 (G), 0.000 (B)
- "mouth" – 0.000 (R), 0.000 (G), 0.000 (B).
The spherical samples displayed in the Material List will update reflecting the colours set (variations on a theme of ‘red’). Now they are available they can be assigned to different areas of the mesh. In Edit Mode ("Tab" if not already active) make the following selections ("Shift+RMB" multi-select) and Material assignments (left-click select the Material, left-click "Assign", press "A" to clear after each action);
- select faces corresponding to the foot up to the knee edge loop (including the underside of the foot), assign "boots".
- select faces corresponding to the hand up to the wrist edge-loop, assign "hands".
- select the lower and upper arm faces (excluding the shoulder area), assign "arms".
- select the front-lower faces, side (butts up to the shoulder) and under-side, assign "face".
- select the back face of the mouth, assign "mouth" (the inner rim of the mouth has "face" assigned).
- select the back face of the eye, assign "eyes" (inner rim of the eye has "bandanna" assigned).
Design note: when making selections some elements may automatically highlight Material assignments already in place. As each surface can only have a single Material assigned, left-clicking another reference and applying, over-writes whatever is currently active – ‘current’ is replaced with ‘active’.
One last Material to update is the original default. Left-click "Material" in the Material List and left-click the "Select" button below. If material set-up has been done correctly this should highlight the topknot element of the mesh, the only remaining part left from the original Cube assignment. As this is the case rename this to "topknot" and change its Diffuse colour to "0.000", "0.000", "0.000" (black).
Design note: when selecting "Material", if other elements of the mesh highlight, select those individually and assign the correct Material reference to them until all that remains are the ‘topknot’ faces.

[illustration: 9] Mesh now with all the needed Materials assigned to different areas of the mesh, each a different colour on a general theme of ‘red’ that will also be used to generate an image [9_cubie.blend]
Marking Seams & UV Unwrapping
Once materials have been assigned to the mesh is can be UV unwrapped, a process by which the mesh can be reduced and represented by a two-dimensional plain. This entails marking specific edges of the model with a special "Seam" property which cuts or splits the mesh – placed strategically this typically facilitates shapes being flattened in similar vein to flattening a cardboard box by cutting it along the corners. In other words the mesh first needs to be marked with Seams, then "Unwrapped" to create an actual "Map" to which an image will eventually be associated or "Mapped".
Design note: "mapping" ("mapped") or "unwrapping" are often used interchangeably to mean, of refer to, the process of generating a UV ‘map’; the former tends to refer to the generic process of charting a ‘map’ (a particular type of map; UV map’s are not the only ‘map’ that can be generated or used), whereas the latter typically refers to the same process specifically applicable to determining ‘UV’ coordinates.
To ‘unwrap’ the mesh it’s generally best to think in terms of breaking the object into regions much like was done marking edges for Smoothing, which for UV unwrapping might mean creating the following regions; topknot, upper-torso, lower-torso, bandanna, face, eye, mouth, arm (includes hand), leg (including foot and shoulder). To define each region first make sure to be in "Edge" selection mode, "Ctrl+Tab » Edge", then "Shift+RMB" select the edges defining an area, the two edges where the topknot meets the upper-torso for example, then from the "Mesh" menu left-click "Edges" then "Mark Seam" ("Mesh » Edges » Mark Seam"). The selection will highlight orange confirming assignment. Press "A" to clear the selection (or "Select » (De)select").
Design note: if an edge carries another ‘property’, ‘Sharp’ for example, edges marked as Seams will not display due to their being of lower priority. To override this from the "View" menu in the 3D View Header, select "Properties" to open the properties panel, scroll down to "Mesh Display" and left-click "Sharp" to toggle display off.

[illustration: 10 & 11] If Sharp edges were previously marked, because they take precedence over other edge markings it’s often best to disable them from the 3D View Properties panel under "Mesh Display"; simply deselect "Sharp" (they automatically return should additional edges be marked Sharp) [10b_cubie.blend & 10c_cubie.blend]


Mark the remainder of the mesh with Seams as follows;
- ‘upper torso‘ – select edges where upper-torso and bandanna meet, include front and back edges of the very top of the torso.
- ‘lower torso‘ – select edges where the lower-torso meets bandanna, include front and back bottom edges of the torso.
- ‘body‘ – select edges around the area where the lower-torso and shoulder sections meet.
- ‘arms‘ – select edges where arm and shoulder meet.
- ‘eyes‘ – select edges around the indented eye-socket.
- ‘mouth‘ – select edges around the indented mouth section.
Once the main regions are established the final step before unwrapping is to mark a Seam along the arm and leg so they unwrap properly; in their current state the resulting UV’s will be distorted because the shapes can’t be properly flattened, this requires they be Seam marked so they split along their respective lengths (cf. illus. 12).
Design note: simple shapes are generally easy to mark and unwrap because everything is structured ‘formally’, i.e. comprised mostly from hard angles and simple shapes, the torso section for example. Compound shapes are more complex however, and often require multiple Seam markings to facilitate shapes properly relaxing and flattening for mapping; a tube for example, absent a split along it’s length, its essentially squashed flat rather than spread apart and laid out flat (imagine a cardboard tube cut along its length and spread apart).
To do this "Shift+RMB" select the lower underside edge of the arm from where it meets the shoulder section, down along the back of the hand, ending at the lower outer edge of the fingertips (cf. illus.13). The selection should also include the front and back edge of the fingertips. Similarly for the leg, start at the top where the body meets the underside of the torso and travel down the back inside edges, across the back, and around the outer edge of the foot to where the big-toe would be (cf. illus. 14).
Design note: as best as possible Seams should either be hidden from view, or placed in positions where they a unlikely to be seen, or where their presence can be disguised texturally – fabric seams or natural joints between structures.
With Seams now marked, to generate the UV map select everything (it may be necessary to press "A" twice, once to clear active selections, then again to reselect all) and from the "Mesh" menu in the 3D View Header, select "UV Unwrap… » Unwrap". To confirm switch the "Outliner" view top-right to "UV/Image Editor" by selecting that option from the "Editor Type" list; left-click the "Current Editor type for this area…" button far-left of the Outliner’s Header – if the map has been properly generated it will appear superimposed over the top of a grid that appears on swapping editors (cf. illus. 15).
Design note: the UV/Image Editor display UV’s based on mesh selection/s, either "RMB" or "Shift+RMB" to view specific UV’s (single or multiple), or press "A" to select everything for viewing (as in this instance) – UV’s display relative to an fixed position in the overall map. The default Cube Object should not have a UV Map already associated with it but this may vary depending upon the version used. If it does, unwrapping now will over-ride and redistribute the map relative to the way Seams have been assigned.

[illustration: 12] Shown for clarity the mesh is physically broken apart to show the general regions defined by "Seams"; these will be distinct areas in the overall UV map once generated [10d_cubie.blend]

[illustration: 13] Seams are marked to edges so for greater control it’s best to be in ‘Edge’ selection mode ("Ctrl+Tab") – they can be placed in other modes but are more difficult to manage due to the nature of the selected element, i.e. ‘face’ or ‘vertex’ [10e_cubie.blend]

[illustration: 14] All edges marked as Seams highlight orange, and now placed, mean the UV map can be generated

[illustration: 15] The initial UV map generated after Seams have been placed – some adjustments may be needed to ensure it unwraps flat and without distortion, this typically just means going back over the mesh checking/marking/removing Seams as necessary. To view the map simply swap the "Outliner" Editor top-right with the "UV/Image Editor" then expand the view by dragging the borders [11_cubie.blend]
Generating & Assigning an Image
With a UV map now in place an image can be assigned. This is done first by creating a placeholder to establish image basics; size, dimensions and position relative to UV’s, once set up the temporary data is made real, saved externally then reloaded back into Blender replacing the initial temporary image data. A majority of this process is done using the "UV/Image Editor".
Design note: where assets are to be used outside Blender, generated image data will need to be replaced with a bitmap to be useful.
To create the placeholder first select the entire mesh in the 3D View, "A". Then if the "UV/Image Editor" is not visible, switch the "Outliner" view, top-right, by left-clicking the "Current Editor type for this area…" button far-left of the Header, select "UV/Image Editor" from the list ("LMB"). A grid appears over which the UV map appears highlighted. In the "UV/Image Editor" Header left-click "Image" and select "New Image" from the menu options (or alternatively click the "+ New" button) (cf. illus. 21). The "New Image" properties pop-up will appear. Here left-click the "Name" input field and type "ninja", leave "Width" and "Height" as they are ("1024 px"), left-click "Blank" to the right of "Generated Type" and select "UV Grid" from the drop-down menu before clicking "OK" to confirm and generate (cf. illus. 22). This places a two-tone grey-scale image with coloured "+" symbols in the Editor, replacing the grid, over which the UV map is now superimposed (cf. illus. 23). To see the result in the 3D View switch "Display Mode" to "Texture" (or press "Alt+Z" to toggle "Texture" and "Solid" mode) – the mesh will update to display the new checker image instead of the previously defined Material colours.
Design note: Blender provides three ‘image’ options; "Blank", "UV Grid" and "Colour Grid", each can be used to varying effect depending on preference or requirement; "Blank" makes it easier to see the UV map, whereas "UV Grid" and "Color Grid" make it easier to assess texture distribution based on the size each ‘unit’ appears on the mesh.
[illustration: 16-18] A Materials texture properties includes three basic types of ‘image’ that aid different aspects of the UV mapping and texturing process; "Blank", a flat colour; "UV Grid", a grey-scale checker; "Color Grid", a colour tinted colour grid


At this point however, because the Scene still includes the default "Lamp" object, the mesh appears heavily shaded making it difficult to see the checkers distribution. To remedy this, in the 3D View "Properties" panel, "View » Properties" or "N", scroll down to the "Shading" subsection and activate "Shadeless" by left-clicking the associated checkbox. The mesh instantly appears uniformly flat lit, the image clearly displayed.
Design note: the light can also be removed or moved. To remove; right-click the Lamp ‘target’ to select then press "Del" ("Delete") or "X", left-click "Delete" in the pop-up that appears to confirm the action. To move; right-click the ‘target’ to select then clicking the "Object" in the 3D View Header, select "Move to Layer" ("Object » Move to Layer"). A pop-up appears, the "Layer Manager". Here left-click any ‘layer button’ without an orange sphere (the sphere indicates the Layer contains something) to move. Move the mouse away from the Manager to return. In both instances the Scene will display flat/uniformly lit.
[illustration: 19 & 20] When viewing the Scene with textures displayed meshes appear overly dark and shaded due to illumination from a "Lamp" light source. This can be removed (deleted) or moved to an empty "Layer" using the "Layer Manager" – right-click the light to select, press "M" then left-click a button (top-left is the layer all objects are on by default)


[illustration: 21] Using the "UV/Image Editor", an ‘image’ cane be created and assigned to the mesh as a temporary measure – -left-click "Image" in the views Header then "New Image"… [11_cubie.blend]

[illustration: 22] … the "New Image" properties pop-up appears allowing the basics of the image to be set; ‘name’, ‘image dimensions’, and the ‘type’ of image to be generated (blank, greyscale grid or coloured grid)…

[illustration: 23] … which then appears under the UV map in the UV/Image Editor and assigned to the mesh in the 3D View (currently not visible due to being in ‘Wireframe’ display mode) [11b_cubie.blend]
Assign Image to Texture
To ensure the Image behaves as it should, especially for export, it needs to be properly associated with the materials assigned to the mesh. This is done by creating an association between the image and each materials "Texture" slot.
Design note: as is stand the image generated above is a completely independent block of data ("datablock") not linked to any other ‘surface’ data except the UV Map. This typically needs to be fixed when models are to be used outside Blender, often as a consequence of engine requirements.
To do this, in "Material" Properties left-click select any one of the available entries in the Material List, "eyes" for example, then in "Texture" Properties left-click the top entry displayed in the "Texture List" aperture (red and white checker). Next either; left-click the red/white checker icon below the Texture List to access the "Browse Texture to be linked" menu, if "Tex" is shown, left-click select it. A set of properties appears.
Design note: the Material assigned to the original Cube object includes a "Texture" slot pre-populated and identified as "Tex". If this is not the case the "Texture" Properties panel will simply display the "Texture List" aperture with a "+ New" button directly below.
Or; if "Tex" is not shown when doing the above, left-click the "+ New" button instead to generate a new set of properties, which will appear populating the panel (cf. illus. 24). Once available check "Type:" is set to "Image or Movie" – if "None" is displayed left-click the drop-down menu and select "Image or Movie" from the list (cf. illus. 25). Next in the "Image" subsection left-click the "Browse Image to be linked" icon (displays a landscape) to access the "Image List", "ninja", the image previously generated will be available, left-click select the entry to confirm and complete the association between image and Texture. The properties will update with the "Preview" aperture showing the checkered image. Finally for now, in the ‘name’ input field directly below the Texture List aperture left-click and type a new name, "ninja" for example. Once these basic properties are created go back into "Material" Properties, select another instance from the Material List and return to "Texture" Properties, before then left-clicking the "Browse Texture to be linked" button directly below the List aperture and assigning the entry now called "ninja" from the list (left-click select). The panel will update. Repeat the process for all materials linking each one to the same texture and image data (cf. illus. 27 & 28).

[illustration: 24] Although the Materials assigned to the mesh have a Texture slot its empty[3], a blank entry in the Material List[1], so a new set of properties needs to be generated by clicking the "+ New" button or using the default material assigned to the default Material [11c_cubie.blend]

[illustration: 25] The default Material ("Material") assigned to the original cube has an associated texture slot called "Tex" that can be used that will need updating… [11d_cubie.blend]

[illustration: 26] … or a new instance, automatically named "Texture", can be generated clicking the "+ New" button (cf. illus. 24) that has a number of associated properties not attributed to "Tex" [11e_cubie.blend]

[illustration: 27] The Materials shown in the Material List prior to updating and being associated with the "Texture" slot carrying the checker image… [12_cubie.blend]

[illustration: 28] … which changes the appearance of the Material "Preview" sphere (default), and the Material List entries – each now shows the grey-scale checker image indicating successful application [12b_cubie.blend]
Editing UV Maps
With materials now complete, linking to the same image data, before moving on to the final aspect of process, texture baking, some time should be spent adjusting the UV map to make best use of the space available, simply moving, rotating or scaling UV elements, or "Islands", around the UV/Image Editor so they are better positioned relative to the assigned image.
Design note: by default Blender unwraps UV’s relative to the square texture grid visible in the UV/Image Editor. As a result elements are typically uniformly aligned side-by-side until a similar, square, shape is formed (based on a ‘bounding box’ – the outer-limits defining the area a selection occupies), itself then scaled up or down to fit within the grid. This does not however, mean the UV’s are always optimally placed.
To do this, first select the entire mesh in the 3D View ("A" to clear previous selections, "A" again to select everything). The objects UV’s will highlight in the UV/Image Editor. Mouse over the UV view then either; A) press "Ctrl+Up" to toggle full-screen; B) mouse over the border between the 3D View and UV Editor until a double-headed black arrow appears then left-click drag the border to resize the two views, repeat for the border between the UV Editor and Properties panel; or C) change the screen layout to "UV Editing" using the "Choose Screen Layout" option in the main Header.
Design note: there is no particular advantage to using one ‘layout’ over another except that resizing the views and switching screen layout, keeps the object and 3D View visible alongside the UV/Image Editor and accompanying UV’s – as mentioned previously, by default UV’s can only be edited if the appropriate section of the mesh is selected – this setting can be changed by activating the "Keep UV and edit mode selection in sync" option once the UV is assigned an image (left-click the button in the UV Editor Header showing a small cube, two dots and the mouse cursor).
[illustration: 29-31] Blender provides three basic ways to view and edit UV maps in the UV/Image Editor – top: changing the entire layout to "UV Editing" which splits the interface in two, UV/Image Editor on the left, 3D View on the right; middle: toggling the UV/Image Editor to full screen using "Ctrl+Up Arrow" (revert using "Ctrl+Dwn Arrow" or the same key combination); bottom: swapping out one of the default views and expanding the borders between views [12b – 12d_cubie.blend]


Looking at the UV map it’s possible to better optimise the layout so each section fits conformably within the allotted space with a degree of room to spare. For this UV’s can be selected and manipulated as individual elements, or as group or multi-selections similar to the way mesh selections are made (cf. illus. 32).
Design note: this ‘padding’ or ‘margin’ is often necessary to make allowance for the types of dynamic change often required of models used in games, for example a character being designed to have lower quality versions load when the model is at a distance from the viewer – the reduced complexity of the mesh is often accompanied with equally optimised and size reduced image(s).
With the UV/Image Editor now fully visible zoom the workspace, "MMB+scroll up", to enlarge the UV area and, as the UV’s don’t need to be edited individually, in the Header set the "UV Selection Mode" to "Island" (left-click the button displaying what appears to be a two-paneled window frame) and right-click one of the UV segments, which will highlight in its entirely rather than just an individual vertex, edge or face. This is a UV "Island", a distinctly selectable section of the overall UV map. Select each section in turn and move them onto the workspace (the grey area surrounding the grid) – either "RMB+drag" to select and move in a single action, left-click to drop/confirm, or, because the UV Editor has no manipulator widget, right-click select then press "G" to "Translate/Move/Grab" before then left-clicking to set in place.
Design note: as an alternative, using the ‘numpad’ keys "1", "2", "4" and "8" will zoom the UV’s scale 1:1 (actual/full size), 1:2 (half size), 1:4 (quarter size) and 1:8 (eighth size). Or select those options from the "View" menu option in the UV Editors Header. Alternative access to "UV Select Mode" options can be had pressing "Ctrl+Tab" whilst the mouse cursor hovers over the UV Editor. It’s important to note the UV/Image Editor does not use a manipulator widget although the same ‘transform’ operations can be performed, i.e. "Translate" ("G"), "Rotate" ("R") and "Scale" ("S"), albeit in two-dimensions only (left/right, up/down).
Once done, (re)select the arm and leg UV sections, RMB, in turn and position them them to occupy the bottom of the grid, leg on the right, arm on the left, left-click confirm each action. Continue placing the lower-torso above and to the right side, the upper-torso towards the upper-left, the bandanna towards the upper-right, with the top-knot placed in the gap between the upper and lower torso, the eye in the upper-right corner, and mouth in the gap between lower-torso and bandanna. The resulting adjusted layout changes the spacing around each element allowing for more room (cf. illus. 33). Further minor adjustments can then be made using "S" to "Scale" and "R" to "Rotate" selections, capitalising on any remaining available space.
Design note: right-click select each Island, move, and then left-click to set it in place – using RMB again once an element is active will reset the selection back to its original position before manipulation – reset occurs regardless as to an element being ‘drag-selected’ and moved in a single action versus standard right-click select then move.
")
[illustration: 32] The first pass at UV unwrapping the mesh often produces a lot of unused space which can be edited and optimised (shown mapped to a Blank image for clarity) [12f_cubie.blend]
")
[illustration: 33] Changing the UV layout by manipulating individual UV "Islands" – "G" translates, "R" rotates and "S" scales in similar fashion to manipulating objects in the 3D View. UV islands should be sized relative to each other although some increase/decreases can be used subject to noticeable differences (the texture looks pixilated, or their respective ‘sharpness’ differs too much) [12g_cubie.blend]
Bake Ambient Occlusion
Earlier in the build process more materials were applied to the mesh than perhaps might seem necessary, especially as they all reference the same single (generated) Image. Generally speaking setting the mesh up this way aids the editing process as it makes certain (de)selection processes relatively easy to do – as described above, once several materials are assigned to different areas, each can be selected as a group rather than individual faces/elements. In addition to this, when the "Diffuse" property is set, materials can also be used to generate colour-tinted bitmap images using Blenders internal "Bake" system that can then be reassigned to the mesh; assigning bitmap-based images is typically more flexible for game-related content than might otherwise be possible using materials alone. From an ‘art’ point of view, "Bake" allows for various maps to be rendered individually, or combined, that might otherwise be relatively time-consuming to create, and/or not be as accurate as the objects structure might dictate.
Design note: Blenders "Bake" feature is one of a number of ancillary rendering ‘sub-systems’ able to generate an image (bitmap) using Scene or Object – lighting, object structure and so on.
For the Ninja character two images, or maps, will be baked; a standard black and white (greyscale) "Ambient Occlusion" map, and a second with colour, that is the same Ambient Occlusion influenced by the Diffuse colour property associated with each material.
Design note: producing two maps grants a degree of flexibility editing the final image that is to be (re)assigned to the mesh, for example the Ambient Occlusion map can be ‘blended’ with the Full Render to emphasise through contrast, i.e. making areas of the image darker or lighter depending on the desired look and blender filter used.
With the original half of the mesh selected in Object Mode left-click the camera icon to access "Render" Properties. Scroll down to the bottom of the panel where "Bake" properties reside (cf. illus. 34). Left-click the black arrow to the left of the heading to expand the available options. Left-click the "Bake Mode" option selector (currently displaying "Full Render" – default) and left-click "Ambient Occlusion" (second from, or near the bottom of the list). The panel options will update (cf. illus. 35). Left-click the "Normalize" check-box to active, leave the remaining settings as they are, then left-click the large "Bake" button to start the process – if the UV/Image Editor is visible progress will be shown as Blender calculates the map based on the objects structure and renders a greyscale image to the Editor. Once done the 3D Scene will update with the map displayed over the mesh (cf. illus. 37).
Design note: Ambient Occlusion maps are greyscale in terms of the ‘colours’ or ‘tints’ used, black to white with various grey’s in between, they are however standard 24 bit RGB bitmaps.
Once done, left-click the "Image*" menu option in the UV/Image Editors Header and select "Save a Copy". Blender will switch to the "File Browser" view where the location for the image to be saved is set. Browse to a location and type an appropriate name for the file. Additionally, bottom-left are the "Save As Image" properties. Here left-click the "File format to save the rendered image as:" pop-up menu (currently displaying "PNG" by default) and select "TIF", "BMP" or "Targa RAW". Finally, ensure the "Copy" check-box is active (left-click if not) then left-click the "Save As Image" button top-right. Blender will momentarily pause as the data is saved to disk before then returning to the previous screen (cf. illus. 38 & 39).
Design note: to browse a location using the Browser; the "System" section upper-left selects and sets the drive materials are saved to where more than one hard-drive is available – left-click once. On the right, the main pain displays the results of the initial drive selection, folders and files. To drill-down (select to view) folders left-click once to expose their contents (left-click the ‘up arrow’ at the top of the file list to go back up the directory). When an appropriate location is found, give the new image a name, select a format lower-left then left-click the "Save As Image" button top-right. When saving as a copy the "Relative Path" option is removed, this writes data to disk using a ‘relative’ or ‘local’ directory/file path to the image.
To bake an image that takes into account the ‘Diffuse’ colours of each material, in "Bake" properties again simply deselect "Normalise" – left-click the checkbox to clear – and left-click the "Bake" button again (cf. illus. 40). This time the resulting Ambient Occlusion map will be colour tinted to match the assigned materials. As before click "Image*" in the Editor Header then "Save a Copy". The File Browser will again open. Set a name, select a file type (similarly ‘loss less’ as before; *.tga, *.bmp, *.tif) and then click the "Save As Image" button top-right. Blender will pause then return to the previous screen once done.
Design note: baked images should be saved using a ‘loss less’ format, or at least one that does not remove critical data from the image when compressed, as *.jpg and *.gif tend to do. For this reason it’s preferable to save rendered or baked images as *.bmp (Bitmap), *.tif (TIFF), *.tga (Targa RAW), or in limited circumstances *.png.


[illustration: 34-36] Texture baking is a useful tool to add depth to models by rendering different types image map. The default "Bake" mode however, "Full Render", needs to be switched to "Ambient Occlusion", which ‘bakes’ an grey-scale or colour-tinted image based on the objects structure; simply set "Normalize"[2] then click "Bake"[3] [13a1, 13a2 & 13c_cubie.blend]
")
[illustration: 37] When "Normalize" is set, Blender produces an ostensibly ‘white’ biased grey-scale image for "Ambient Occlusion" [13d_cubie.blend (note: mesh appears pink in source file, Bake results are temporary so rendered image cannot be saved to the *.blend)]


[illustration: 38 & 39] Both white and colour-tinted versions of the Ambient Occlusion maps can be saved for external editing, i.e. opening in an photo-editing application for further modification – click "Image*" then "Save a Copy" to open the File Browser where the rendered image(s) can be named and saved, preferably using a ‘loss-less’ image format, e.g. "Targa Raw"

[illustration: 40] When "Normalize" is disabled (checkbox unchecked) the baked Ambient map will be tinted based on the "Diffuse" colours associated with each Material assigned to the mesh [13e_cubie.blend – (note: mesh appears pink in source file, Bake results are temporary so rendered image cannot be saved to the *.blend)]
Reloading Saved Image
Once the images have been saved externally and modified in a image/photo editor to produce a finalised image, the result can be (re)loaded back into Blender and assigned to the each Material. To do this, in "Material" Properties left-click an entry in the Material List aperture to highlight a selection then left-click the "Texture" Properties tab. Scroll down to the "Image" sub-section and under "Source:" left-click the "Where the Image comes from:" drop-down menu (to the right of "Source:"). Select "Single Image" from the list of options (cf. illus. 41). The sub-section properties will update. In the input field that’s now available left-click the "Open File Browser" button (displays a folder icon to the immediate right of the text input field). In the Browser that opens, locate the finalised image to be assigned, left-click to highlight, then left-click the "Accept" button top-right (cf. illus. 42). Blender will return to the previous screen loading the bitmap into the Texture Properties source (point of origin), automatically assigning it to the overall Material.
Design note: because Blenders materials consist of three ‘stages’ or ‘slots’, each can be edited and manipulated independently of its neighbours. This often results in images loaded into Blender not automatically updating everything as might be expected. This can be corrected as described above. The exception to this is loading in an image that carries the same name as a property that already exists in the file, which essentially refreshes active data rather than replacing it.
However, this might not assign it image to the mesh as the previously generated baked data may still be active and associated with the objects UV’s. To correct this, select the model (if not already selected) in the 3D View and "Tab" into Edit mode. Select everything, "A", to highlight the previously defined UV map in the UV/Image Editor (cf. illus. 43). Here (UV/Image Editor) left-click the "Browse Image to be linked" button in the Header (displays an ‘image’ icon) and select the image just (re)loaded in. The Editor and 3D View will immediate update to display the newly assigned bitmap image. Exit Edit mode, "Tab" to complete the process and finish the model (cf. illus. 44).

[illustration: 41] Loading the baked image back in to the Material replacing the temporarily ‘generated’ data – the image "Type" has to be changed and then the "Source" so Blender knows what it should be doing [13e_cubie.blend]

[illustration: 42] Using the "File Browser" the replacement image is found, selected and loaded [13d_cubie.blend]


[illustration: 43 & 44] The final iteration of the Red Ninja with colour tinted, ambient shaded bitmap image assigned [14_cubie.blend]
[illustration: 45] Turntable video showing the completed model fully textured, in ‘Wireframe’ and in ‘Solid’ display modes

