Make A Product Bundle For IMVU
Unlike much of the Creation process when assembling products for IMVU, making a Product Bundle differs in that it’s mainly done using a page on imvu.com rather than the Client and Create Mode. As a result, it can be difficult to work out or even find the appropriate information on putting a "ModIcon Bundle", as they are correctly called, together when the process is unfamiliar. The following then, aims to run through the basic process of creating a product bundle in IMVU.
Download: Katsbits IMVU Blender Source Files.
Introduction To IMVU Product Bundles
There are two basic steps to the creation of a ModIcon Bundle; 1) create a set of products as normal, a room and some furniture items for example; and 2) generate the actual bundle into which a set of products will be placed (forr example the aforementioned furniture and room). The order in which the two elements are created is not critical so one can be made before the other, or vice versa. Bundles can contain any number of items, bearing in mind that the more items contained, the larger the file and longer download time required by the client to pull in the relavent products. Product Bundles also need to contain at least one or more item/s.
Make An IMVU Product Bundle
To create the actual ‘Bundle’, which acts as a container for other products. First go to Product 15956 (or click this link to be taken there). At the bottom of the page (but just above the USer Comments section) is a link – "Make New Bundle". Click it. A new page will open.

Product 15956 is used to generate an ’empty’ ModIcon (product) Bundle
On this new page, add the appropriate details pertaining to the Bundle being generated; required information include "Product name:", "Product rating:", "Profit" and "Catalog icon image:", then click "Submit" at the bottom of the page (note the cost associated with creation) to generate the new Bundle.
Design note: initially a relatively high "Profit" value may need to be entered, this can be altered at a later stage if necessary.

Some basic product information is required in order for the bundle to be generated when "Submit" is clicked
Upon clicking "Submit" as instructed above, a new wen page will appear. This is the bundles "Product Page" – what IMVU shoppers see when looking through the catalogue. Scroll down to the bottom of this page and click "Edit Bundle" (note that’s "Edit BUNDLE", not "Edit SETTINGS"). Another page appears. This next page is where the actual content of a bundle are put together. Each item has a unique "PID" ("Product ID Number") which identifies individual product – when products are submitted to IMVU’s catalogue an indentifying number is generated and associated with each item – these "PID’s" are unique and are what’s needed for bundles. In the text area towards the bottom of this new page, type (or copy/paste) the Product ID’s of each item to be included in the bundle – there should ideally be two or more items listed. Once done, click "Submit" to complete the process and be taken back to the bundles Product Page as before.

On the "Make a bundle" page, each PID to be included is typed into the text area page-bottom
To complete the process, clicking "Edit Settings" will allow the bundles Product Page and it’s "Description:" to be edited with plain text or html.

Editing the bundles "Settings" allows for the Product Page to be changed with the addition of some custom images and content, either plain text or html (shown above)
Legacy Instructions
As IMVU no longer uses the separaate "Previewer Tool" for product assembly and publishing the following is inlcuded for archival legacy purposes only and should NOT be used when making an IMVU product bundle – see above for details on the current correct procedure.
Deriving From IMVU’s Parent Bundle
Making a bundle is a two part process;
- Derive from IMVU’s parent bundle (basically saving and uploading an ’empty container’)
- Adding/Editing the contents of the bundle (adding products to the container).
For reference you can find IMVU’s dummy bundle here. All you need to do is derive from that product as you would with any other derivation; the initial bundle set up is no different to creating a new derived product or item.

IMVU’s derivable dummy bundle product
So either,
- Click on the "Derive from product" link at the bottom of the page (shown in the image above) to have that item open the previewer automatically.
Or,
- Open the previewer and click "File > Create a derived product" and then type "15951" in the text field that pops up.
Doing either of these will open the product into the previewer. At this point, nothing more needs to be done to the product here in terms of ‘editing’ except to "Save" and "Submit" the file.
- Saving the default bundle product
Save the derived product to the project folder on your computer (give it a name you’ll be able to easily reference at a later date if you make more bundles), IMVU recommends everything saved into "Products > Examples".- Submitting empty bundle product to the catalogue
Click the red "Submit Product To IMVU Catalogue" button at the top of the previewer which opens up a product submission page;
- Fill in the details – provided some basic product information and a thumbnail for the item.
IMPORTANT NOTE : When entering price details makes sure to type a value that is well in excess of the estimate real total of the all separate products you want to include in the bundle. If this is not done a warning will display and the process will be halted until corrected (usually pressing the ‘Back’ button and reediting the value to a higher number is sufficient).- Uncheck "Make product visible" and "Derivable" for now (so that each box has no tick in them).
- Click "Submit".
- Make a note of the product id given to that item.
That’s part one taken care of.
Adding/Editing Contents Of The Bundle
You now need to add some products into the bundle, the link to doing which is here. When you go to that page you’ll see something similar to the images shown below; there are two text fields where you can enter data, "Parent" and "Sub-ids".

The "Make a Bundle" editing page
- "Parent"
By default the text field displays "xxxxxx" (or similar), this needs to be edited and changed so just select, delete and type in the product id of the bundle saved in part one above. Enter that number in that field, for example "1098762".- "Sub-ids"
The bottom field is where you enter the actual items you want included in the bundle, this is done by product id number only. So in that box [b]just type the product id numbers[/b] separated by a ‘,’ (comma) for each item you want to include (12345, 67894, 23561 and so on). Click "Submit" once done. You have now added those items to the bundle.That’s part two done which should then result is a completed bundle similar to that shown below.

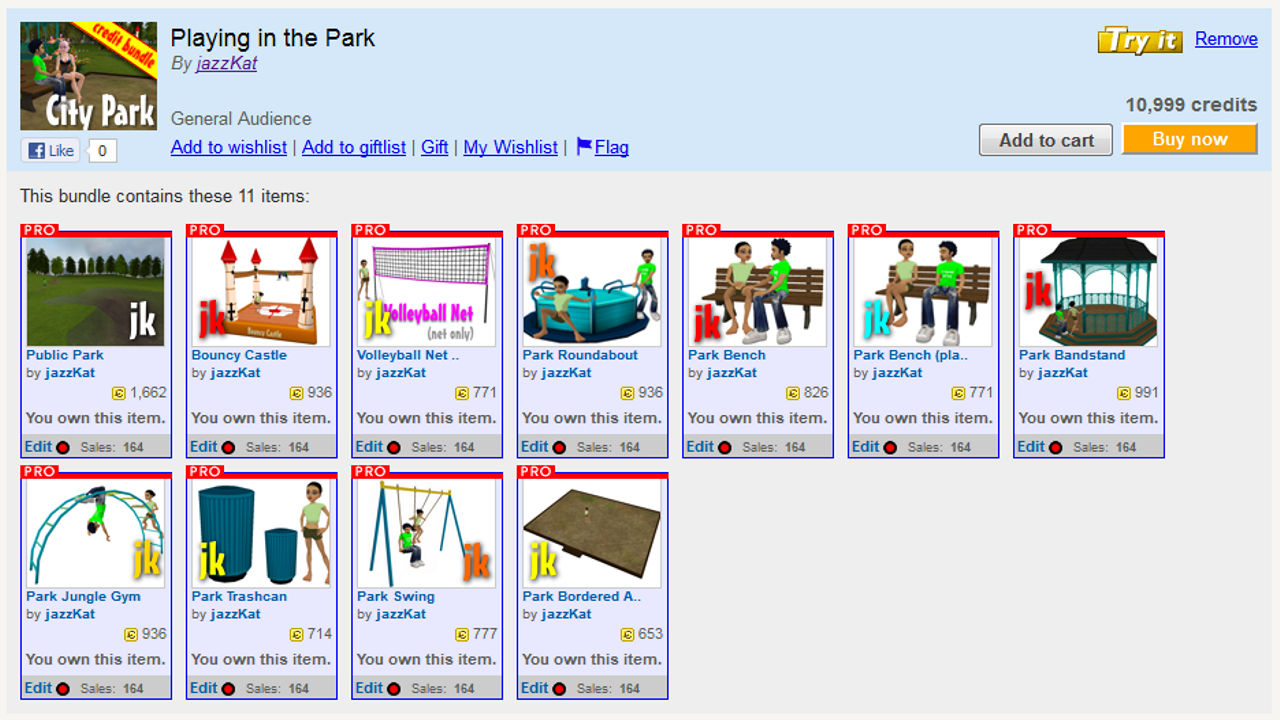
The final resulting bundle composed of several separate products.
Additional Product Bundle Editing
Once done you’ll have the option to go back to the Make a Bundle page or go to the products catalogue listing; any additional editing of the products details can be done at this point; any editing of the product items needs to be done back on the "make a Bundle" page. Once editing is done the bundle product can be made live by selecting "Make Product Visible"; be sure to reedit the price to a more appropriate value at this point.


