Import SketchUp Building Models into Blender 2.49 – Extras, Options & Issues
Basic clean up of the imported model in Blender. Before the imported mesh is going to be usable some scene and mesh prepping in Blender is usually required.
SketchUp Model Size & Scene Scale
As mentioned above on initial import from SketchUp the mesh will be extremely large on, this is due to SketchUp using a larger system of scale than Blenders – it’s equivalent to the scale used for idtech or Unreal content creation – so in order to see the mesh fully in the 3D view-port the view settings needs to be changed. In perspective mode it’s likely that the image below is what will be seen, a large part of the mesh will have disappeared; it is in fact ‘clipped’ from view, it’s there but not visible.
Open up the "View Properties" panel from the 3D view-ports ‘header’ (the menu bar along the bottom of the 3D view itself) – click the "View" then "View Properties" – "View » View Properties..." – a panel will appear on screen (shown bottom right below). The important parameters to look at in the "View Properties" panel are;
- Spacing: 1.00
- Divisions: 10
- Clip Start: 0.10
- Clip End: 500
The main parameter to change initially is "Clip End: 500". The reason the model appears the way it does on-screen is because the ‘depth’ of the camera used to view a scene when moving around is set to a very low value, 500 ‘units’ in this instance, relative to the imported model; that needs to be changed by increasing the ‘depth’ or "Clip End" value; although by default it’s 500.00 units, it will initially max. out at 10000.00 units.
To do this, either click in the "Clip End" field and type "10000.00", or, click, hold and drag to the right to increase the value until it hits the default maximum value of 10000.00 units.

Partial display of the mesh due to limited camera clip distance
If the mesh still appears ‘clipped’ and partially drawn, it means the "Clip End" value needs to be increased further. To do that "Spacing: 1.0" needs to be increased to use a higher value – Clip End is relative to the Spacing value. As with the adjustments above, either click and type in a value or click, hold and drag; "10" should be sufficient. If the model is excessively large, increase both the "Spacing" and "Clip End" values until the complete model is visible.

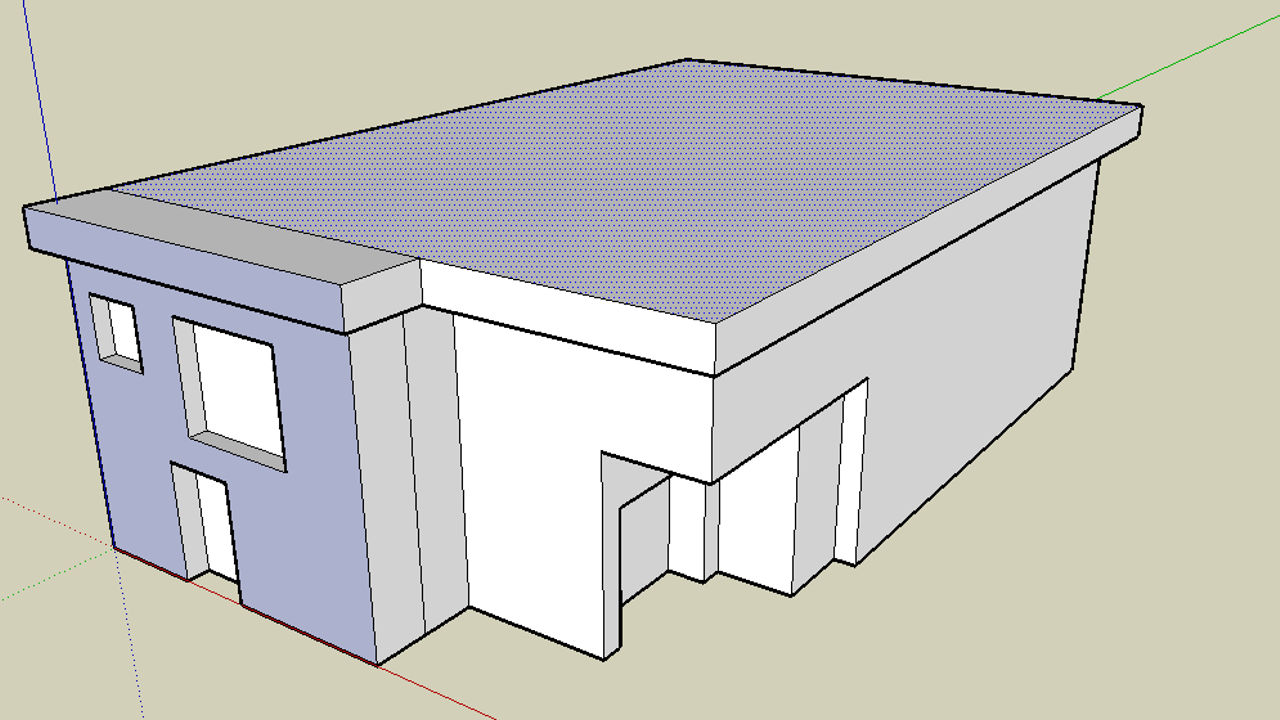
Model properly visible after "Spacing" and "Clip End" have been adjusted
Converting Triangles to Quads
SketchUp models are exported as ‘game optimised meshes‘. That means the number of polygons used to make objects is at an absolute minimum; only polygons that are actually needed are used. This presents a problem if further work is required on a mesh after it’s imported in to Blender, primarily because triangles are difficult to manage from a construction point of view. What this means is that the imported tessellated mesh needs converting in ‘quads’ (faces composed of 2 triangles instead of 1).
Before doing this though note that the imported Collada/dae data may contain more than one version of the object that’s needed; a ‘faced’ mesh (a mesh that contains, faces, edges and vertexes) as well as a version composed of only edges and vertexes; this latter mesh needs to be put to one side, as it’s of no use, by moving it to a different layer, or it needs to be deleted completely.
Select the object and press "M" to open the layers pop up, then select a layer to move the object to by clicking one of the small layer buttons. Click "OK" to move the selected object to the selected layer. This may need to be done for one or more objects until all that’s left is the filled version (the one with faces).
")
Edges and vertex only version of the mesh – this needs to be deleted or moved to one side (another layer)

The ‘optimised’ and tessellated mesh in Blender. SketchUp exports models ‘game ready’ with minimum polygons used
Blender has a much improved algorithm for converting triangles to polygons that will make a best guess as to which triangles will combine together to create a quad, so, there will be very little extra work needed here except the selection of all face contained in the mesh or a chosen (and more controlled) few for conversion.
Press "A" to select all faces (this may need to be pressed twice, once to clear any previous odd selections and then again to re-select everything), or "Shift+RMB" on a number of faces to select a specific area or group. Once done either choose the menu option from the 3D view-port header of "Mesh >> Faces >> Convert Triangles to Quads" or press "Alt+J". Blender will then merge triangles into quads. The mesh is now ready for further limited editing.

Converting triangles to quads

The resulting mesh converted to quads
Further Editing of the Mesh
If extended editing is required then the mesh is going to need more extensive ‘prepping’; because of the way polygons flow (or don’t, as is actually the case) around the mesh it makes any level of extensive editing difficult because cuts, extrudes and ‘loops’ can’t flow around the mesh optimally due to the fact that faces are formed relative to the minimal number of (corner) vertices present in the mesh; they either shape or form poorly or are terminated awkwardly, which then exasperates the problem of editing further. This is especially notable on buildings and/or objects with angular shapes.
Doing this now does mean that extra ‘cuts’ will be required so as to ‘square up’ the polygons (edges and vertices will be at approximate right angles to each other), but it saves a lot of time, effort and extra work to do it now rather than either trying to do it after additional editing has been carried out, or, as a result of trying to ‘fix’ issues that arise in the middle of a session editing a face and finding it won’t do what’s needed because of the way its shaped or aligned.
The creation of a ‘tidy’ mesh is going to be done by splitting edges; this places an extra vertex at the mid point of an edge (the edge is ‘split’ at the mid point) which can then be moved into alignment with other vertices. To do this select an edge (or the top and bottom vertex of an edge) and in the edit button window (the section at the bottom of Blender with all the buttons) find the "Mesh Tools" panel and then press the "Subdivide" button (or use the shortcut of "W" then "1"). The newly created vertex can then be selected and moved (if required) to form approximate right angles with other vertices on the mesh. Do this for every edge until the end result is a ‘squared’ mesh as shown below. Further editing can now be done without run the risk of creating a messy mesh and more work.
Design note: if, when moving vertexes to square up polygons, more accuracy is required, open the "Transform Properties" panel by pressing "N" or selecting "Mesh >> Transform Properties…" and use the "XYZ" co-ordinates seen to move selected objects with more precision. To align a newly created vertex with another, select the ‘old’ and note its "XYZ" co-ordinates, re-select the ‘new’ and then change any one or more of its "XYZ" parameters so that it aligns with the old vertex.

Faces converted to polygons are ‘messy’ for use when doing additional editing

Edge splitting

Faces ‘squared off’ to make additional editing easier. Once finished the mesh can be re-optimised and poly-reduced
Conclusion
Because SketchUp is a (currently) freely available 3D application its feature limited due to it’s target use, namely the creation of content for Google Earth; SketchUp was never meant to be used as a fully fledged 3D application like Blender 3D or 3DS Max because that was never its designed or intended purpose – SketchUp is an architectural building and visualisation tool and whilst that’s not a limiting factor per-say, it’s not possible to do a number of things in SketchUp that are often required when creating content for games.
So being able to import SketchUp content into Blender 3D (or any 3D application that supports the dae/Collada format) means that SketchUp users can now produce limited ‘game ready’ content, it also mean that in doing so it should be expected that additional learning is going to be required because of the use of additional tool-sets – how to mesh edit, UVW map, apply materials and textures as well as correctly prepping content for game export and so on; there is currently no getting around this.
In light of that, if there is a desire to produce a significant amount of custom content for whatever game or interactive media that allows UGC then SketchUp users may be better off learning to use Blender 3D from the get-go or other application that allows a wider export capability than SketchUp can provide.

