Resize/Scale Textures on Game Models in Blender
Texture scale, pixel density and material settings. It’s important to understand, when working on content intended for use in a game engine or interactive 3D environment, that many of the more ‘advanced’ settings and parameters that can be applied to a model within a 3D application as part of their internal rendering system, do not work.
Primarily, this is because these aforementioned settings and parameters tend to be extremely complex as well as differing wildly between applications. So, whilst a scene could in theory be rendered to image so that it looked the same regardless of the application used to do the rendering, the ‘internal’ parameters to do that won’t ‘translate’ directly between them so one wouldn’t necessarily be able to open the ‘raw’ file from one application in to another and have that imported file then work ‘as is’.
What this means is that models created for use within the context of game modification and content creation more often than not tend to need to be reduced to a ‘common denominator’ of sorts; an absolute basic ‘data set‘ that will import into other resources (3D applications as well as game/rendering engines) and have that 3D object appear the same irrespective. It’s for this reason that trying to scale textures applied to models via a 3D applications ‘material’ settings don’t work; they’re in effect ‘advanced’ settings that (generally) can’t be translated for game use. This then means finding a way to ‘scale’ textures applied to models that does work.
Material/Texture Scale Doesn’t Work on Game Models
"My textures don’t look right when I get my model into game. I’ve tried everything in Blender but it still doesn’t look right. What am I doing wrong?"
As mentioned in the introduction above, the problem associated with the quote in this section is usually the result of trying to use a model exported from Blender after altering the scale of a texture applied to a mesh using Blenders own ‘material scale‘ settings in the "Material Buttons" window ("F5"), and/or, ‘texture tile‘ settings in the "Texture Buttons" window ("F6"). These do not work in the context of exporting game modding and/or 3D media content development (outside of Blenders internal game engine).

Blender internal material settings won’t work on models meant for use in games 3rd party game engines
How to Scale/Resize Textures on Models
This applies to most 3D applications; changing the size of textures applied to game models is (usually) done by resizing and/or scaling the UVW map and not by (generally) changing any internal material settings associated with the 3D application used to create the content.
Design note: "usually" and "generally" in brackets above because there are exporters available for other 3D applications written specifically to use such material settings as is being discussed here.
Assuming a mesh has already had a UVW map created, back in UVW map/face edit mode (keyboard "F" for 2.45 or below, or "TAB" to enter ‘edit mode’ for 2.46 and above), simply re/select the faces associated with the section of the UVW map that needs to be resized – either select faces in the 3D view whilst in edit mode, or, select faces in the face/image edit view – and press "S" to initiate the "Scale" feature.
Design note: make sure that the mouse cursor is over the face/image edit window otherwise Blender will scale the contents of what’s selected relative to where the mouse is (scale faces in the 3D view if that’s where the mouse is when activating "S").
Simply drag the mouse to resize the UVW map relative to the texture, increasing the amount of space being used on the model and associated UVW faces. Doing this increases the texture and pixel density by using more space on the texture. Obviously if other objects are going to be using the same texture care must be taken to allow space for those other components; a balance has to be struck between how much space is available for use like this and the number of objects that need to be UVW mapped to the same texture. Optimisation and efficiency are more important than the resulting greater visual detail.

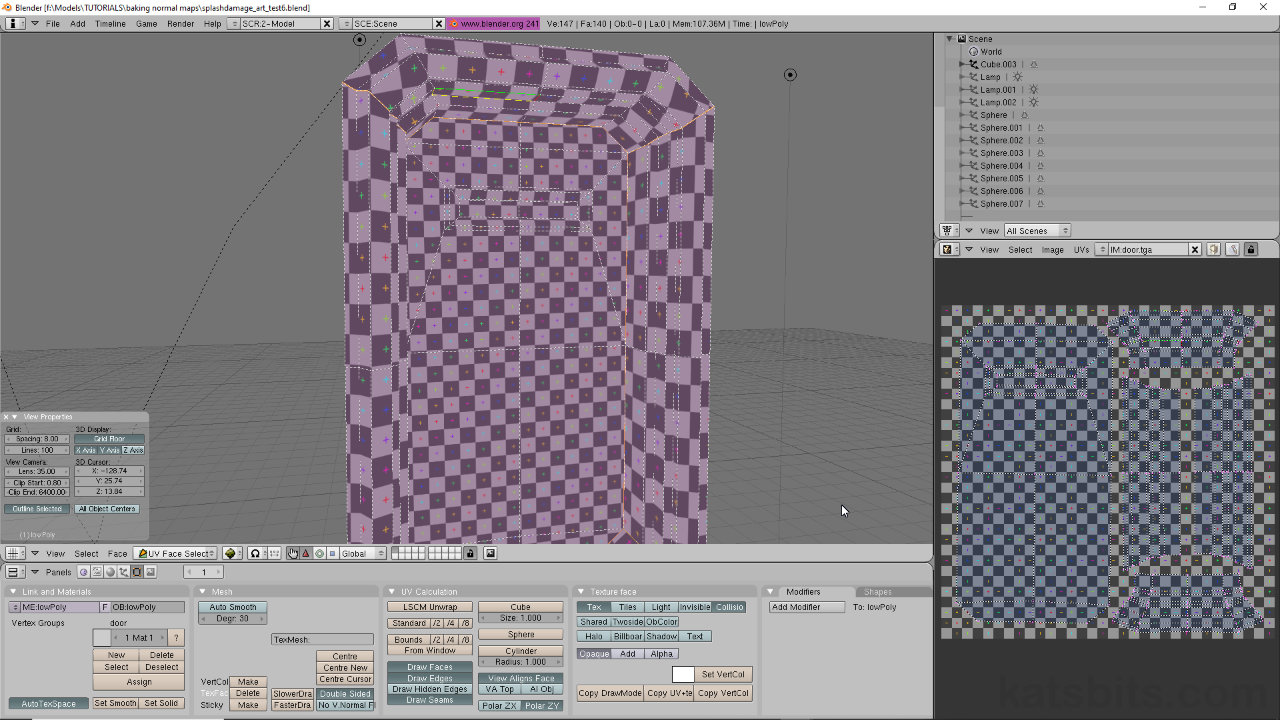
The original UVW map layout is too small so the texture space/pixel density wont be too good in-game, usually resulting in pixelation

Resizing or scaling the UVW map changes the size of the texture relative to the model and the UVW map so that it uses more texture space and has a greater pixel density resulting in better representation in-game
Conclusion
A alternative way to scale textures on game models is to do so using in-game material systems. Most modeled content used in games is UVW mapped on a one-to-one basis (the usual exception is terrain or excessively large objects, both of which don’t always use ‘unique’ texture), this means, as above, that only a certain amount of texture space is available for use; this obviously leads to various degrees of pixelation as it’s simply not possible to use textures large enough to reduce pixelation and have the game running in an optimised fashion (the larger the image assets the more resources are used to un/load them into memory and use).
This is where ‘material tiling‘ comes into play whereby the texture image associated with an in-game material is ’tiled’ using some form of "scale" or "repeat" parameter. So, for example, using in game material settings to texture a 256×256, height x width, unit wall, "scale 1" would apply a texture on a 1:1 ratio – a 256×256 image would be mapped on the model at actual size. "Scale 2" would decrease the relative size of the texture image so it tiles twice across a surface; a 2:1 ratio which increases the texture resolution because the model is now mapped with twice the pixel density across it’s surfaces – in effect the original texture image is reduced in relative size from 256×256 to 128×128 (without resolution loss) and repeated twice over the 256×256 unit height x width of the model.
Using tiled materials like this does mean paying particular attention to ‘hot spots’ on an image where it becomes apparent that an image has been tiled, usually light or dark patches left in place will becomes obvious when tiled so care has to be taken to remove those at source.
There are other ways to increase texture resolution but not all game engines and their respective material systems are set up to use them; ‘detail layers‘ for example, use a ‘generic’ texture with a high scale/repeat value which is then blended with other texture layers (via the material) to ‘mask’ any apparent pixelation in the ‘parent’ layers of a material.
Using large source images also help with pixelation issues because the larger the image, the more pixel data available for UVW mapping. However, this is dependant on texture size limitations placed on the game engine and/or associated assets; game tech with a ‘low common denominator’ (playable on the widest variety of system) may have limits of as little as 512×512, whereas more modern ‘specialised’ game technology may be able to use assets in excess of 2048×2048.
What this all means is that how you tackle the resolution/size of a texture UVW mapped to a model is determined not just by the model and detail level you want visually but also by underlying technical restraints the game engine being used has in place, the purpose, destination and context for which the content is to be used. A general rule of thumb, always try and keep the resolution of textures on models relatively consistent ant across asset types – don’t make something highly detailed just because you can (whether by tiling or using large images). For instance, textures UVW mapped to terrain will generally have a low resolution because so much area is being covered with few assets, buildings will have another, with character models, weapons and pickups generally having the highest texture resolution, primarily because that’s what the players focus is on.

