Snowman – Materials, Textures & Images (#3)
In the first two chapters of the tutorial the character was built up from a series of simple sphere objects using a number of Blenders core tools, finished up with the assignment of Smoothing to define the different areas of the structure – the ‘scarf’, ‘body’, ‘hat’ etc. At this point construction of the mesh is complete. The next step is to move on to making the mesh look like a ‘Snowman’ though the application of materials, with consideration being given to UVW mapping and later, texture baking an Ambient Occlusion map, whilst doing so.
Download: KatsBits – Snowman Character Source (c. 40 MB | *.blend, *.tga, *.psd, *.xcf). Zip file includes each stage of the process as indicated throughout.
Materials, Textures & UVW maps
With respect to low poly ‘game’ content a Material is generally composed from three core ‘stages’ or ‘slots’, each serving a particular function within the over all ‘unit’ that a material is in a ‘global’ sense. They are 1) a “Material” slot, 2) a “Texture” slot and 3) an “Image” slot. Typically all three are needed for the production of ‘valid’ material assignments although they can be assigned in part – an ‘Image’ can be assigned absent of either a ‘Texture’ or ‘Material’ slot for example. However, doing so can make the textural management of an object cumbersome so it’s a practice best avoided.
What they in practice is generally affect the surface appearance and behaviour of a mesh – in essence, and depending on the properties and settings used, a given ‘Material’ will make an object appear to be made from ‘wood’, ‘metal’, ‘fabric’ or other surface patterns. They can be assigned “je suis seul/e” (on their own), or as part of a collection of materials, and as such, based on a given objects apparent complexity, and/or, their use as a way to ‘manage’ selections in Edit mode (mesh element selection based on material assignments).
Design note: a “material” is both a specific component of a material (‘child’), and a generic term for a group of properties assigned to the surfaces of Objects as a material (‘parent’), that is, a ‘container’ of a series of properties, and/or a specific property in it’s own right. This means the word itself, “material”, is often used interchangeably to mean either/or/both, so the context of ‘use’ is important to note.
Assigning Materials is typically the first step towards ‘texturing’ a model, i.e. the application of an image over a mesh so it appears to be made from a particular type of substance – ‘brick’, ‘grass, ‘cloth’ and so on.
Design note: materials are usually a requirement, however, some game engines can use models without, so this would typically need to be investigated beforehand to ensure best-case compatibility.

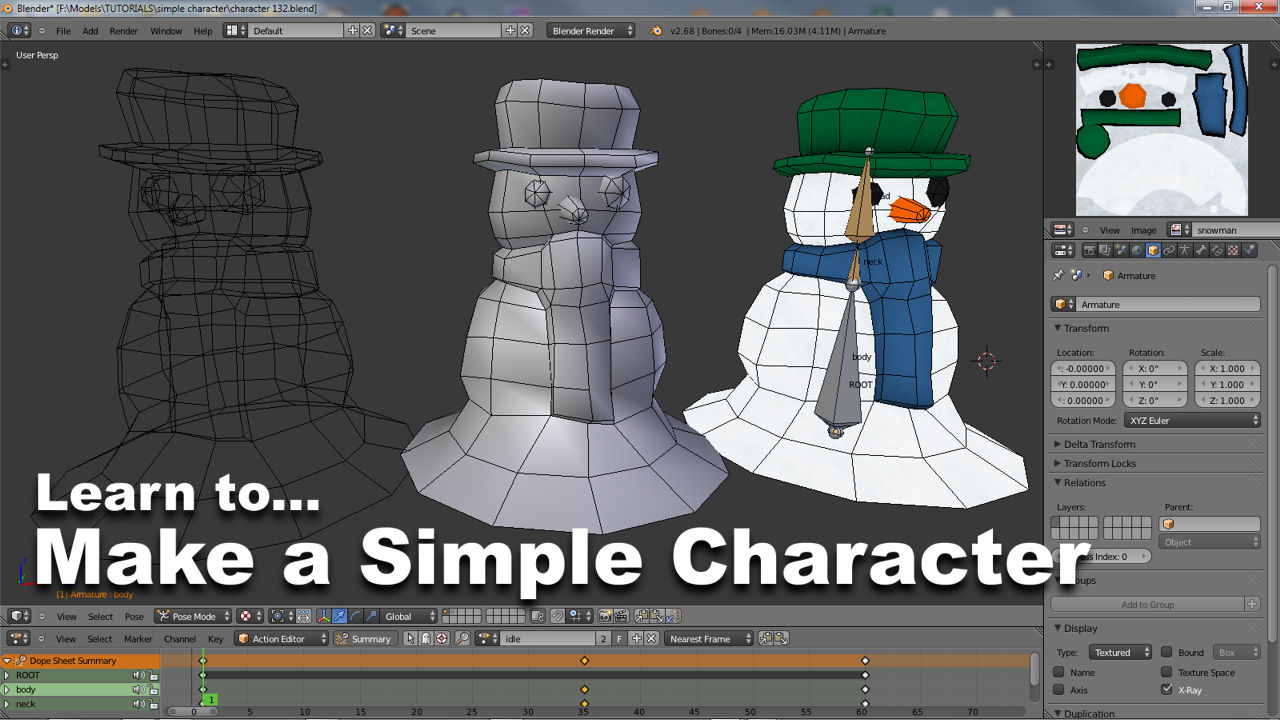
The model after completing the ‘meshing’ component of making a simple character model. The next step in the process is to assign materials and UVW maps
Creating a new Material
Although much of the following can be done in any order it’s preferable to follow a sequence, simply to ensure all the necessary steps are taken – for game related work, models tend to need materials, UVW maps and texture assignments, else models don’t export correctly and/or typically appear broken in the medium of choice. First then, the mesh needs a “Material” assigned to it.
Design note: simple characters, like the one being made in this tutorial, don’t need especially complex material assignments. Having said that, assigning and using multiple materials can help ‘manage’ the mesh in terms of making particular sections selectable at the click of a (material) button.
To assign the material, select the Object and click the “Material” button in the “Properties” section to the right of the screen. In the panel that opens click “+ New” if a material is not already listed. On doing this a new ‘slot’ is created[1], called “Material“, with an associated set of parameters and options appearing directly below – whilst these new properties can be left ‘as is’ for now, the Materials name (“Material”) can be changed to something more suitable by LMB clicking in the “Unique datablock ID name“[2] field and typing a new reference (in this instance “snowman“). Press “Enter” or LMB click elsewhere on screen to confirm/set the change in place.
Design note: a Material may already be available depending on whether the mesh was modeled up from the default cube or an object added to the scene – the default cube object always has a material assigned by default which can be used as outlined in this section of the tutorial. In addition, by default materials are appended with a numerical reference if more than one exists; “.001”, “.002”, “.003” etc. becomes “Material.001”, “Material.002” and so on, these can be changed where necessary by changing the “Unique datablock ID name” as described above.

If a Material is not listed, click the “+ New” button to add a new entry (be sure to select the mesh beforehand) [blend 57]

Changing the name of the material[1] from “Material” to something more appropriate by editing the “Unique datablock ID name“[2]. The default ‘colour‘ of the Material[3] is a pale-grey so the Object will change to reflect this; other objects not assigned the same data will remain a slightly darker-grey [blend58]
Adding a Texture slot
The “Texture” slot contains a set of parameters to do with the ‘type’ and way in which an image or other surface property is ‘mapped’ or placed over an Object. The ‘texture’ itself is generally either an actual (external) asset or a ‘generated’ (‘virtual’) datablock of some description, mapped using “UV” or “Generated” coordinates which can be augmented using “Scale” or “Offset” values – whether any of these approaches to texturing can be used depends on the destination technology; for most game content “Texture” properties contain information pertaining to the way a bitmap image is ‘mapped’ or ‘wrapped’ around the mesh (hence the term “unwrapping”). By default new Materials may not automatically contain an associated texture slot so in instances where one needs to created, click the “Textures” properties button and then “+ New” to add a new entry/reference. A set of options will appear below. Directly under the “Texture List” window, change “Type:” from “Clouds“[2] to “Image or Movie“[3] by clicking the drop-down list. This sets the material to use an “Image” assignment.
Design note: the Texture slots ‘name’ can be changed by amending the “Unique datablock ID name”[1] to something more suitable, in this instance “snowman”. Doing this (as with the ‘Material’ slot) is ‘referential’, it helps in distinguishing different textures and ‘ID’ references from each other.

Click “+New” to add a new “Texture” slot and associated properties…

… change the textures “Type:” to “Image or Movie“[1] from the default “Clouds“[2]; this tell Blender the ‘data’ to be mapped over the Object will be an image of some description, which is needed for game related content [blend59]
Generating a new Image
Following on from the previous step, with the “Type:” changed to “Image or Movie” one (an ‘Image’) needs to be loaded into and/or associated with the Texture slot. There are two ways this can be done; 1) is to use a pre-existing bitmap image, typically a place-holder at this point; and 2) is to generate an image datablock that can be assigned and later saved as an image (made real).
Design note: The advantage of the latter over the former is really down to convenience, it’s easier to set up Materials and generate images as and when they are needed without necessarily doing to much additional work, particularly helpful on larger projects where numerous assets need to be created before knowing exactly how many are needed and what for.
To create a generated image, whilst still in “Textures” properties, scroll down to the “Image” sub-section and click the “+ New” button; this opens the “New Image” pop-up. Give the new image a “Name” – “Snowman” in this instance – to distinguish it from others should there be any; change both the “Width” and “Height” to “1024” and then make sure “UV Test Grid” is active. Click “OK” to create a new image from the properties entered.
Design note: this latter option, activating the test grid, is important but not absolutely essential, because the grid itself helps in determining how well a texture has been UVW mapped around a mesh by the amount of distortion present when viewed on the mesh in the 3DView (more on this in the follow chapters).
It’s important to understand here that what this does is create a data ‘set’ – a collection of properties and parameters properly referred to as a “datablock“, that can be used within a project; the element being referenced does not yet exist in any real sense, it’s not yet a ‘real’ image essentially making it a ‘virtual’ texture.

Generating an ‘image’ using Blender means setting up the same basic Textures properties[1] as normally would be done (renamed where appropriate[2]), i.e., setting “Type:” to “Image or Movie“[3], but then in the “Image” subsection[4] click the “+ New” button[5] to create an associated ‘generated‘ texture ‘image‘…

… and in the panel that appears, “Name” the slot[1] (“snowman” is shown), change the “Width” and “Height“[2] (“1024 is shown) and enable “UV Test Grid“[3]. Click OK to generate the new ‘Image’ data[4]
Assigning Images to Textures
With the virtual image datablock generated it next needs to be assigned to the “Image” component of the Material – in effect, all that’s been done so far is to create a new ‘image’; Blender does not yet know or have an association between this new image ‘data‘ and the Materials Image ‘slot‘, so one needs to be created.
Design note: they’re not the same thing physically or contextually, the ‘Image slot‘ is a container for the ‘image data‘, in this instance a generated bitmap.
Whilst still in “Textures” properties, first make sure an ’empty’ slot is selected in the “Texture List” panel[3], then in the “Image” sub-section below click the “Browse Image to be linked“[1] icon to the left of the “+ New” button and from the list select the ‘image’ created in the previous step, i.e. “snowman”[2]. A new set of properties will appear, which indirectly confirm the link between the image data and slot.
Design note: as per previous explanations, at present this association is still a ‘virtual’ one, it’s ‘data’. This means the ‘name’ used/displayed in the “Unique datablock ID name” field is a virtual reference to the datablock, if the data being connected to was an actual image, the name would generally use the file name. Using data connections like this means Materials and Textures can reference the same ‘source’ data using different names.

Once the generated image is created, assign it to the previously created Texture slot[3] (renamed “snowman”) by using the “Browse Image to be Linked“[1] button and selecting the datablock from the list[2] (“snowman” in this instance)
The final setting to change is the textures “Mapping“. This is used to instruct Blender to ‘map’ (wrap) the texture around the mesh in a particular way, for game related content this usually means using the Objects UVW’s (which will be done in a later stage). To do this, in the “Mapping” sub-section click the drop-down menu to the right of “Coordinates:” and select “UV” from the list of options available. Leave all the remaining settings as they are.
Design note: game models don’t need to use any settings other than making sure an image is associated with the texture slot and overall material. In other words, “Offset:”, “Size:” and the remaining properties are not needed or used for most content and generally have no effect on the outcome of the final character.

Scroll down to the “Mapping” subsection and change the “Coordinates:“[1] options from “Generated” to “UV“[2]
Assign the Material to other Objects
Once the previous steps are done the basic material is set up and ready to be assigned to any remaining objects; simply select the eye and nose objects in turn[4] and for each, assign the new entry by clicking the “Browse Material to be linked“[2] icon in “Material” properties[1] and selecting the entry from the list[3] (“snowman” in this instance), which will change colour slightly to indicate successful application.

With material set up, select the other objects in the scene[4], the eyes and nose, and assign the same material to each by selecting the reference[3] from the “Browse Material to be Linked” button[2] in Material properties[1]

All the objects assigned the same Material [blend 60]
[1: concept | 2: model | 3: material | 4: UV maps | 5: bake | 6: rig | 7: animate]

