Baking Ambient Occlusion Maps for Simple Objects
Ambient Occlusion is a form of indirect top-down global lighting. In practice it gives the impression that an object, objects or scene are lit by a hemispherical soft, diffuse (indistinct) light source that approximates the way real light reflects, bounces and affects objects and surfaces based on their proximity and orientation to each other and the ambient light source – the closer an object or surface is to its neighbours, the more light it blocks, and visa-versa. This results in surface ‘shading‘ rather than the surface ‘shadows‘ typical of standard ‘localised’ lighting (like a spot light for example). Baking is the process by which this is lighting mechanism is rendered into a usable form, an image or “map“, which is then used as a texture enhancement, providing a better sense of visual fidelity and/or depth that may not ordinarily be available.
In this first part of this tutorial, explained below are the basic steps necessary to produce generic Ambient Occlusion maps in Blender. In the second part more advanced topics are discussed and what the artists needs to keep in mind for best results. A basic understanding of Blender is assumed, it’s not within the scope of this tutorial to delve too deeply into Blender usage except within the context of this topic.
The Basics of Baking Ambient Occlusion
Baking Ambient Occlusion maps in Blender is relatively straightforward. At its simplest all that needs to be done is for a mesh object to be selected, the “Bake” button in “Render” properties clicked, and the resulting image saved.
However, as with anything to do with using Blender for content development, to render good quality ambient occlusion maps takes a little bit of effort and forethought to make sure the model or models being processed are set up correctly given the limitations of the render baking system (as discussed in the following ‘advanced’ section of this tutorial). That generally means observing the following core ‘rules’. They are;
- Materials: Objects need at least one material with a “Texture” and “Image” slot assigned[2].
- UVW map: Make sure the mesh is correctly UVW mapped[1&3].
- Texture bounds: UVW’s should fall within the boundary of available texture space[1].
- Triangulation: Tessellate the mesh manually beforehand.

Mesh prep. The model has to be properly prepared before the baking process can be done; UVW map and texture assignment
Bake Properties & Ambient Occlusion
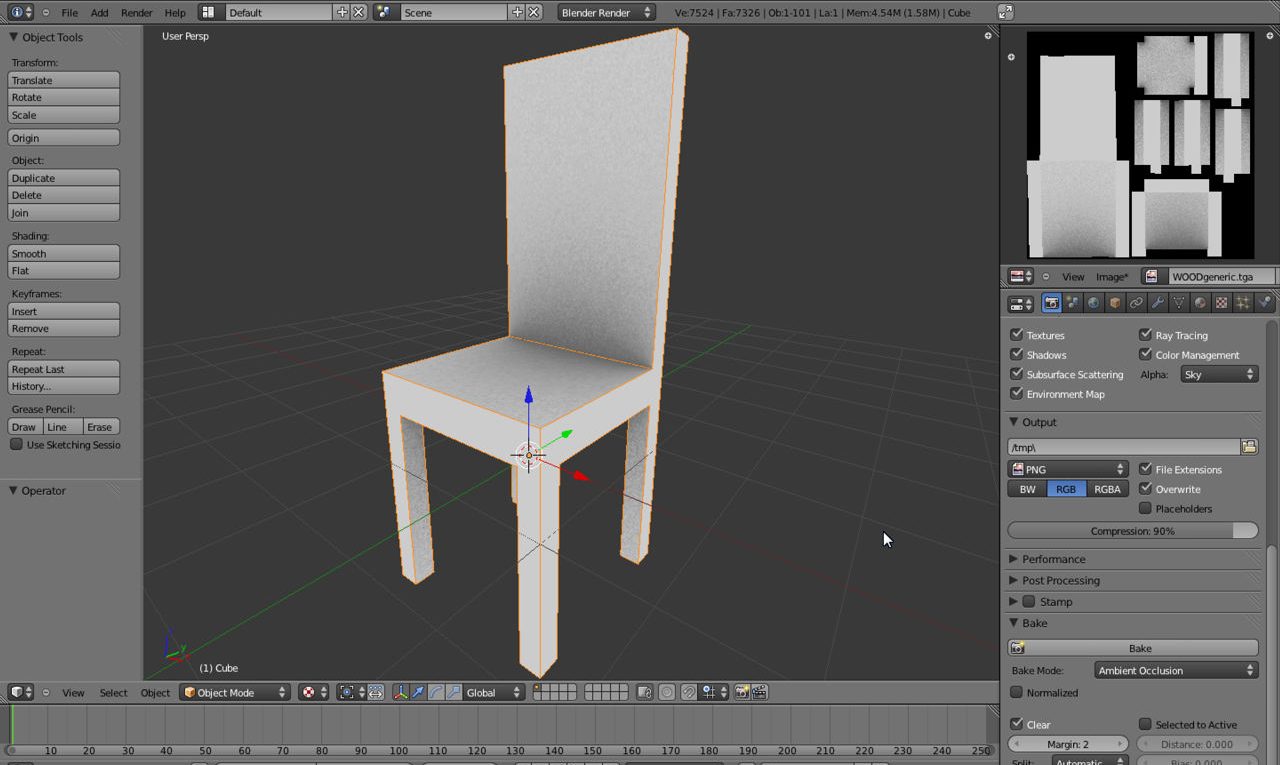
Texture baking is a sub-section of Blenders “Render” buttons which can be found within the applications main “Properties” panel (usually open on the right-hand side by default – shown below). To activate the tool, from the “Properties” header click the button marked with a small camera icon[1] and scroll all the way down to the bottom of the section, “Bake” is the very last sub-group (by default). Expand the options by clicking the triangle to the left of the heading[2]. In the now expanded sub-section find “Bake Mode: Full Render“[3] (“Full Render” is set by default) and from the drop-down list select “Ambient Occlusion“[4] – this will change the “Bake” property options to settings and parameters more appropriate to Ambient Occlusion.

Ambient Occlusion is a ‘bake’ process which is available through the Render buttons in Blenders main Properties tool section
Ambient Occlusion Settings & Options
With the appropriate settings and options open, three are of particular interest; “Clear“, “Margin:” and “Normalized“. “Clear” allows the bake process to overwrite any texture data previously rendered so removing the likelihood of old data renaming in place causing issues. “Margin” adds an extended border around UV islands that acts as ‘padding’, generally reducing issues associated with angled (non-axial) UVW edges and ‘jaggies’ resulting from low resolution and/or the lack of anti-aliasing. “Normalized” forces Blender to produce greyscale (black <-> white) renders, ignoring any individual Material (“Diffuse”) colour associations – leaving “Normalised” OFF results in tinted AO maps based on Material colour.

The three main settings useful for ambient occlusion – Margin, Clear & Normalized
Baking Ambient Occlusion Maps
With “Normalized“, “Clear” and “Margin” set to appropriate values, select the object to be baked and click the “Bake” button at the top of the section. Blender will then render into the appropriate memory buffer for each mapped texture, available ambient occlusion data, using the relevant UVW’s mapped to the object as a ‘guide’ whilst doing so. Progress can be monitored from the UV/Image Editor view (“Shift+F11“) or the progression bar that appears in the main header (shown below). After the bake is done the resulting texture map should appear assigned to the model, automatically replacing the what was there originally (by temporarily overwriting it). It then needs to be saved.

The Texture Bake progress can be monitored either via the UV/Image Editor view, which will incrementally show the texture as it’s being baked, or the progression bar that appears in the upper header area

Once the Ambient Occlusion map has been Baked it appears in the 3D View applied to model because the process overwrites whatever image/s were initially assigned to the mesh
Saving Baked Ambient Occlusion Maps
Looking to the UV/Image Editor, the “Image” menu item will now appear with a “*” to the right, “Image*“, indicating the texture map currently visible in the editor has been changed and is yet to be saved. To do this simply click “Image*” and select “Save As” (or “Save As Image” depending on the Blender version being used) to open the file “Browse” view. Select an appropriate format from the drop down list[1] – note that in this context, saving the results of a render process, it’s best to use an uncompressed format such as BMP, TGA or TIF as compression artefacts such as the ‘cubed’ appearance of JPEG’s for example, can cause various ‘quality’ issues during any subsequent texture work. Edit the file name[2], and then click the “Save As” (or “Save As Image“) button top right[3]. Blender will save the image to the chosen location and format and the menu item will revert back to “Image” without the unsaved image indicator mention above, “Image*“. The ambient occlusion bake is now a texture applied to the mesh that can be left in place or changed once a proper ‘diffuse’ image has been made and re-assigned.
Design note: earlier versions of Blender title functions as “Save As“, later versions “Save As Image“, so be aware of this when working – there are no functional differences between the two, only the heading.

Saving the resulting AO map as an image (the image above shows the menu function as “Save As“, later versions of Blender display it as “Save As Image” there’s not actual difference other than the name)

When saving baked images it’s preferable to use an uncompressed texture image format such as TGA, BMP or TIF to avoid unwanted compression artefacts
Conclusion
The use of ambient occlusion maps typically mean their being purposed for a ‘unique’ asset; that is, the final texture may only be applicable to the object from which the map was baked, so unless the bake is of an object that forms the basis of a ‘class’ or group of similar/same models, the image map will be of no use elsewhere. Additionally as a type of visual enhancement, AO maps are rarely used on their own (unless some form of ‘clay’ render is required), it’s generally typical for their use to be as a layer within the broader context of a diffuse textures elements. Bare this ‘unique’ or ‘single use’ caveat in mind when baking AO maps.

