You've got a couple of issues to content with and the fix is a little fiddly if you're not familiar with using Blender yet;
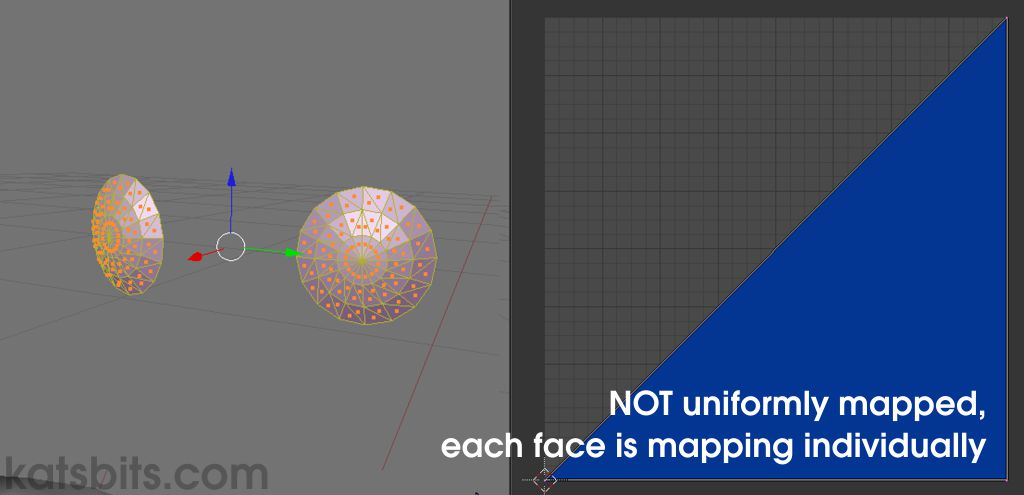
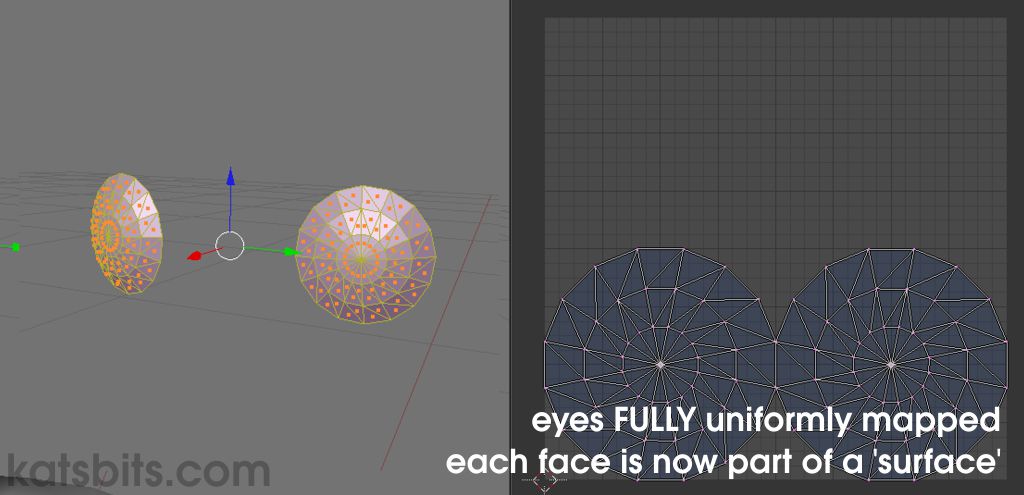
(1) The eyes look the way they do because they don't appear to be UVW mapped or properly textured, you need both for game use. Have a read through
this section of the above tutorial on UVW mapping.
(2) the positioning issue is likely related to vertex parenting - I've not yet written a tutorial on this (I'm doing one at the moment but it won't be available for a while). In Edit mode, you need to check the assignments of vertex_groups to the mesh, the eyes need to use the same ones as the head and only the head otherwise they may be unduly influenced by additional groups (which will pull the sub-meshes out of shape).
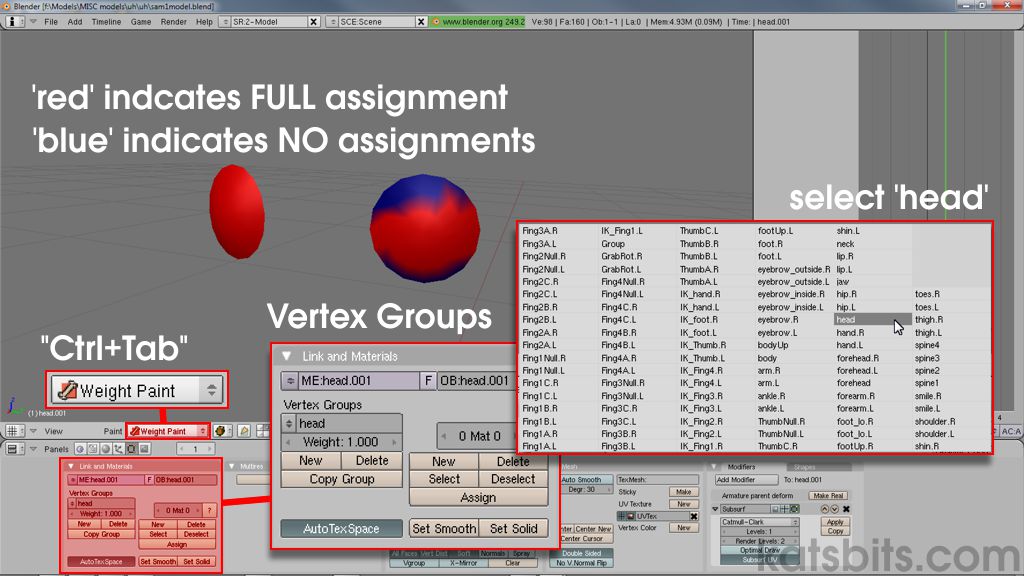
Select the mesh in "Object" mode and switch to "Weight Paint" mode (an option available in the 3DView header - the mesh will turn 'blue'), you'll be able to see the colour influences of each group on the mesh. Select the 'head' group and see which elements change colour. The eyes should turn red.
(3) the 'spike' exiting the chin is a vertex that hasn't been 'weighted' and/or isn't yet assigned to a vertex group. When that happens Blender automatically parents the elements to the 'root' bone of the mesh on export, resulting in what you see. So again in "Weight Paint" mode, be sure all the eye sub-mesh vertices are assigned a group (refer to the 'blue' areas in the image above).
The round thing in 2.49 is "Border Select" - have a read through this section of the "
Learning Blender" tutorial to learn more about using it.
